
Related Manuals for X-Micro XWL-11GPAG

Summary of Contents for X-Micro XWL-11GPAG
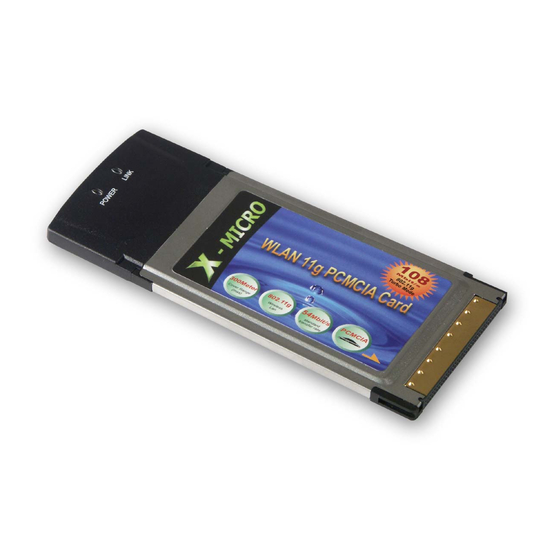
- Page 1 WLAN 11g PCMCIA Card Quick Installation Guide...
- Page 2 This product is in compliance with the essential requirements and other relevant provisions of the R&TTE directive 1999/5/EC. Product Name: X-Micro WLAN 11g PCMCIA Card Model Name : XWL-11GPAG...
- Page 3 COUNTRY Spain 2400-2483.5 MHz France 2400-2454 MHz France 2454-2483.5 MHz Italy 2400-2483.5 MHz 2400-2483.5 MHz Netherlands 2400-2483.5 MHz Germany 2400-2483.5 MHz Austria 2400-2483.5 MHz Belgium 2400-2483.5 MHz Switzerland 2400-2483.5 MHz Luxemburg 2400-2483.5 MHz Ireland 2400-2483.5 MHz Portugal 2400-2483.5 MHz Norway 2400-2483.5 MHz Denmark 2400-2483.5 MHz...
-
Page 4: Fcc Information
REGULATORY INFORMATION X-Micro WLAN 11g PCMCIA Card must be installed and used in strict accordance with the instructions. This device complies with the following radio frequency and safety standards. USA - Federal Communications Commission (FCC) This device complies with Part 15 of FCC Rules. - Page 5 X-Micro WLAN 11g PCMCIA Card Installation and Setup Before insert PCMCIA Adapter into the PC Card slot of your computer , please install the Driver&Utility Program first. Make sure that the 11g LAN PCMCIA Card is into the PC Card slot.
- Page 6 Click on the “Install” button on the selection menu. InstallShield Wizard starts. Click “Next” to continue.
- Page 7 Click “Next” to install the program files in the default der . Select a Program Folder , and click “Next” to start copying the files.
- Page 8 Click “Finish” to complete the installation. Select “Yes, I want to restart my computer now.” and click “Finish” to restart the computer .
- Page 9 NOW. After the computer restarted, insert the Wireless LAN PCMCIA Adapter into the empty PC Card slot. Your PC should detect the new hardware automatically. Continue with Installation setup. Installation and Setup Select “Yes, I want to restart my computer now.” and click “Finish”...
- Page 10 Click “Continue Anyway” to continue Click “Finish” to complete new hardware installation.
- Page 11 After successful installation, a utility program icon will appear on your desktop screen. To launch the utility, simply double-click the icon.
- Page 12 WLAN 11g PCMCIA Card Kurzanleitung zur Installation...
- Page 13 X-Micro WLAN 11g PCMCIA-Karte Kurzanleitung zur Installation Installation und Setup Bitte installieren Sie das Treiber- und Utility-Programm, bevor Sie den PCMCIA-Adapter in den PC-Karten-Steckplatz in Ihrem Computer einstecken. Stellen Sie sicher , dass sich die 11g LAN PCMCIA-Karte NICHT im Steckplatz für die PC-Karte befindet.
- Page 14 Klicken Sie auf “Install” im Auswahlmenü. Der InstallShield Wizard startet. Klicken Sie auf “Next”, um fortzufahren.
- Page 15 Klicken Sie auf “Next”, um die Programmdateien in das Standardverzeichnis zu installieren. Wählen Sie ein Programmverzeichnis (Program Folder) und klicken Sie auf “Next”, um mit dem Kopieren der Dateien zu beginnen.
- Page 16 Klicken Sie auf “Finish”, um die Installation abzuschließen. Wählen Sie “Yes, I want to restart my computer now.” und klicken Sie auf “Finish”, um den Computer neu zu starten.
- Page 17 VERFAHREN SIE WIE FOLGT: Stecken Sie nach dem Neustart des Computers den Wireless-LAN-PCMCIA-Adapter in den unbenutzten PC-Karten-Steckplatz. Ihr PC sollte die neue Hardware nun automatisch erkennen. Fahren Sie mit Installation und Setup fort. Installation and Setup Wählen Sie die erste Option und klicken Sie auf “Next”, um fortzuf ahren.
- Page 18 Klicken Sie auf “Continue Anyway”, um fortzufahren. Klicken Sie auf “Finish”, um die Installation der neuen Hardware abzuschließen.
- Page 19 Nach erfolgreicher Installation erscheint ein Symbol für das Utility-Programm auf Ihrem Desktop. Doppelklicken Sie zum Starten der Utility einfach auf das Symbol.
Need help?
Do you have a question about the XWL-11GPAG and is the answer not in the manual?
Questions and answers