
Summary of Contents for brena TWW02W
- Page 1 2 Way Audio Wireless NVR Monitor Surveillance System User Manual Model: TWW02W brena.uk Visit our website for a more detailed explanation of our products where you can watch our videos and be setup within minutes...
-
Page 2: Table Of Contents
Content Warrantee Terms & Conditions...................................Page 1 Camera & NVR Specifications.................................Page 2-3 Power Adapter Safety Instructions................................Page 4 NVR & Camera Installation..................................Page 5 Camera Bracket Adjustments...................................Page 6 Menu Bar & Channel Toolbar.................................Page 7 NVR Password Setup....................................Page 8-9 General Setup.......................................Page 9-10 Record Setup....................................Page 10-11-12 Motion Detection Setup................................Page 12-13-14 Network Setup....................................Page 15-16 Email Alerts Setup.................................Page 16-17-18-19... -
Page 3: Warrantee Terms & Conditions
Brena. The end user is responsible for all freight charges incurred to send the product to Brena's repair center. The end user is responsible for all shipping costs incurred when shipping from and to any country other than the country of origin. -
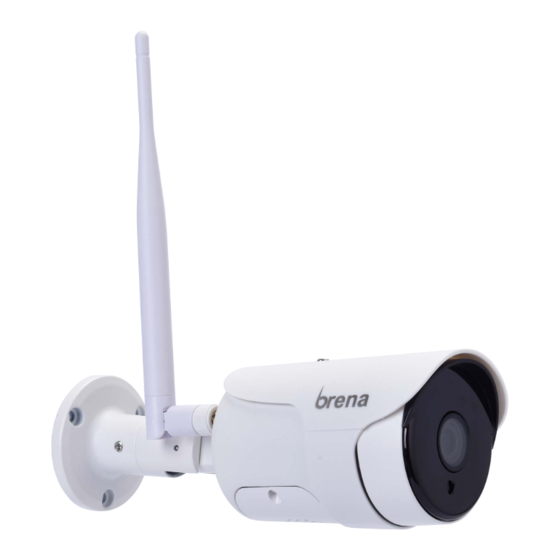
Page 4: Camera & Nvr Specifications
Camera Specifications Model: CAM- BR0103W... - Page 5 NVR Specifications 5mp recording and playback, enjoy high-definition picture quality ⚫ H.265+ high compression ratio, reducing storage space and transmission bandwidth ⚫ Built-in wireless network card, get rid of the shackles of network cables ⚫ Built-in security dedicated WIFI module, stable signal and strong anti-interference ability ⚫...
-
Page 6: Power Adapter Safety Instructions
POWER ADAPTER SAFETY INFORMATION Safety Instructions: Operating Instructions: Specifications: • Please note the charger can become warm during • Plug charger into wall socket • Model: SA0241-1202000BB operation SA0122-1201000BB • Connect to CCTV equipment • Input 100-240Vac, 50/60Hz • Do not open the charger •... -
Page 7: Nvr & Camera Installation
C m r I s lla Connect your NVR and Cameras to the correct power adapters provided and wait for your NVR to automatically detect your cameras on the monitor... -
Page 8: Camera Bracket Adjustments
First screw will enable adjustment of Second screw will enable you to adjust Third screw allows bracket turning and bracket and allow rotation of camera camera up,down, left and right removal for easier installation... -
Page 9: Menu Bar & Channel Toolbar
Menu Bar Click on the right button of your mouse to enter the Menu Bar Split Screen: Change status of live view. you can choose to view multiple cameras or any single camera. Video Manage: Manage Ip Cameras and NVR channels. System Setup: All System Settings. - Page 10 Leave password section blank(Do not type anything into the 1. After the NVR is powered on, Right click the mouse to enter box) and press System Setup h nvr ssword brena.uk brena.uk 3. Select the System Admin 4. Then select the User...
-
Page 11: Nvr Password Setup
NVR Password Setup (Continued) 6. Enter a password of your choice, repeating it 2 times and then click on 5. Click on the Set Password button Set Password brena.uk brena.uk General Setup 2. Select the r l Setup tab. 1. Go to the System Setup brena.uk... -
Page 12: Record Setup
Format box and Date, Time Zone and Time Format then pressing the Format button brena.uk brena.uk Record Setup Error Setup tab allows the dvr to be setup to send you 1. Select the Record Setup notifications when an error occurs via buzzer and/or email brena.uk... - Page 13 You can divide one day into 3 separate periods having certain hours constantly recording while another hour is only motion recording and other times only alarm recording brena.uk 4. Hold the left button of the mouse and move the mouse to 3.For motion recording check the Motion select the times you want for motion recording brena.uk...
-
Page 14: Motion Detection Setup
Channel Setup tab select the Video Detection detected, click on Apply and OK to save brena.uk brena.uk Channel::Select the channel you want to modify and enable Detection::Choose the detection method you would like to use and configure. Motion – Have the camera detect movement and configure settings for that Alarm Input –... - Page 15 Select whether a specific channel appears full screen on your monitor when motion sensor has been triggered. brena.uk 3.Choose when you would like the detection mode to be enabled. By default, it is set to be armed at all times. If you would like it to be...
- Page 16 5. Select the area of the camera feed you want to be monitored for motion. By default the full area is selected. 4. Click on the Area Edit button brena.uk brena.uk 7. Click on the left mouse button and hold to draw specific 6. To select specific areas, right click and Clear All.
-
Page 17: Network Setup
Apply Wait for connection to be established and Healthy brena.uk 4. Check the Enable Wireless Lan box and wait for the available 3. For Wifi connection to your router/modem (without networks to be listed on the right... -
Page 18: Email Alerts Setup
5. Select your wifi network from the list and input the password patiently" to your network then click on Apply brena.uk brena.uk Email Alerts Setup 1. For instant email alerts you first need to allow this function in your gmail account. Go to your gmail account. Click on 7. - Page 19 2. Scroll down until you see the Security tab. Then select 3. Select the Network Setup tab then the Email tab on the left Security. Turn the "Less secure app access" brena.uk 4. Check the Enable More Parameter boxes SMTP Provider: gmail Sender:...
- Page 20 Email Alerts Setup (C 5. Enter your details and click on Apply 6. Click the Test button on the right brena.uk brena.uk 8. Once E-Mail Test is Successful, click on 7. Wait for the Email Testing to complete brena.uk brena.uk...
-
Page 21: Mobile Phone Setup For Remote Viewing Via App
E-Mail Notice from the options and click You are now ready to receive email alerts 9. Click on Apply from your NVR brena.uk brena.uk 1. Go to the Channel Setup tab and select Video Detection on the left. Enable APP Alarm... - Page 22 M bil Ph F r R m V w g V 2. Download and install the app IP Pro 4. Register with your mobile or email 3. Click on the Register button Eseecloud We are demonstrating the IP Pro...
- Page 23 Mobile Phone Setup For Remote Viewing Via App (Continued) 5. Drag the tennis ball through the red 7. Click on the top right icon 6. Input the verification code sent to dot and through the racket add your device your email/mobile and generate a password of your choice and confirm -21-...
- Page 24 9. Add your device and give it a name 10. Double click on your device screen Network Setup tab, then scan your of your choice to identify easily to enter live view systems QR code with your mobile phone brena.uk -22-...
- Page 25 Mobile Phone Setup For Remote Viewing Via App (Continued) 11. Live view is now available, double 12.Click on the Sound button to listen live click on a channel to enlarge Click on the Microphone to talk live -23-...
-
Page 26: Video Playback
Record Mode 1. Select Video Playback from the Menu Bar brena.uk Video Backup to USB 3. Manually enter the beginning and end hour you are 1.Connect a USB Drive into a usb port on the side of the NVR wanting to playback for and hit the Search button. - Page 27 Video Backup to USB (C 2. Select Video Backup from the Menu bar brena.uk brena.uk 3. Select the Channel, Date Time you want to backup 4. Select the Time you want to backup by checking the and click on the...
-
Page 28: Video Manage
Video Backup to USB (C 6. Record Backup Successful, you may now remove your 5. Wait for the backup to complete USB Drive brena.uk brena.uk Video Manage 2.The Video Manage screen allows you to add, remove, 1.Select Video Manage from the Menu Bar and modify the cameras connected to your system. -
Page 29: Setup Of Additional Cameras To Your Nvr With Wireless Add
Wireless Add provided in the box , then connect the other end of ethernet cable to the NVR brena.uk 4.Once the camera has been added you will see Channel 3. Wait for the NVR to search and automatically add the camera (5,6,7,8) added successfully brena.uk... -
Page 30: Hard Disk Installation
Hard Disk Installation O r systems come complete with a pre installed hard drive (you do not have to do this part) This is for future reference if you ever decide to upgrade or increase your storage/memory 2. Disconnect the Power & Data cable to your 1. -
Page 31: F&Q & Troubleshooting
FAQ & Troubleshooting 1.No interface displayed on the monitor after the device has started up. Solutions: Method 1: Check if the Power Adapter light is on and working Method 2: Make sure the power button has been switched on from the front of NVR 2. - Page 32 FAQ & Troubleshooting (C 4. No image displayed on some cameras Possible Reasons: Make sure all cameras are connected to power. If one or several cameras have no image displayed on the monitor, but others are working fine, you should make sure the camera or power adapter is not damaged or faulty Also check in the video manage section of your nvr to determine how many cameras are active on the system Solutions: 1.
-
Page 33: Contact
Web: brena.uk Email: support@brena.uk brena.uk@gmail.com Address: Vision 25, Electric Avenue, Innova Park, LONDON, Hertfordshire, EN3 7GD, United Kingdom -31-... - Page 34 Address: Vision 25, Electric Avenue, Innova Park, LONDON, Hertfordshire, EN3 7GD, United Kingdom...
Need help?
Do you have a question about the TWW02W and is the answer not in the manual?
Questions and answers