Table of Contents
Advertisement
Available languages
Available languages
Quick Links
Advertisement
Table of Contents

Summary of Contents for Forgeon KYBER
- Page 1 KYBER INSTRUCTIONS MANUAL MANUAL DE INSTRUCCIONES...
-
Page 2: Technical Specifications
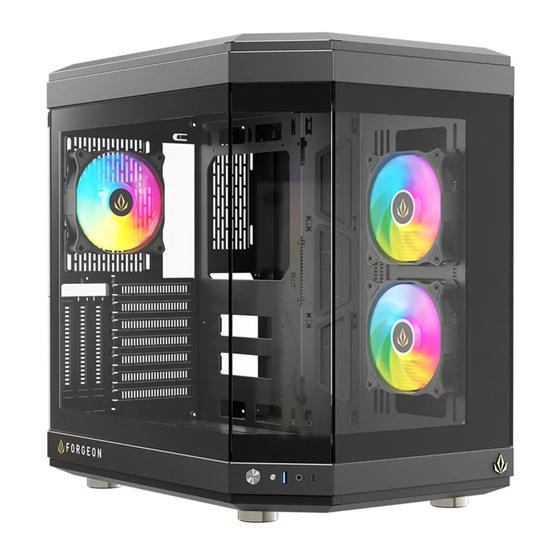
TECHNICAL SPECIFICATIONS MODEL Kyber DIMENSIONS (L x W x H) 428*310*460mm WEIGHT 11.23KG MATERIAL Steel 0,8mm SPCC, tempered glass Left Side Panel Tempered glass Right Side Panel Metal MB tray: 2 x 120mm Top: 3 x 120mm Cooler Fan Support... - Page 3 KYBER DIAGRAM Dust filters IO panel Tempered glass Power supply panel Rear panel...
- Page 4 FRONT PANEL I/O AND MOTHERBOARD CONNECTORS ACCESORY BAG Motherboard screws Hard disk sideway screws HDD Screws Copper pillar Cable tie Reset Type-C Power USB 3.0 HD Audio...
-
Page 5: Basic Installation
BASIC INSTALLATION Panel disassembly Remove and install glass side panels SSD install Install the power supply. HDD install Install the motherboard. The graphics card installation Install fan and radiator (optional). - Page 6 Remove and install glass side panels The way of Side glass panel opens is by Clip (without screws). Remove the iron side plate: remove the two screws at the rear.
-
Page 7: Install The Power Supply
Install the Install the power supply. motherboard. The power supply can be fixed by aligning the screw According to the motherboard type (ATX/M-ATX/ITX), inthe figure to the hole position. the copper pillars may need to be re-arranged manually Note: different types of power supply, hole location may according to the fixing locations specific to your slightly different, take the actual object as the standard. - Page 8 The graphics card installation Panel disassembly 400mm(without fan) VGA Length: Installation: Fit the panel to the front panel and fix it Can be installed 400mm without fan, with screws from the inside of the chassis 370mm with fan Removal: Unscrew the screws from the inside of the chassis and remove the panel...
-
Page 9: Hdd Install
SSD install HDD install Push the SSD into the slot, align Phe scrtw Push the HDD into the slot, align the screw holes, and lock the 4 scnws holes, and lock the 4 screws... - Page 10 Install fan and radiator (optional). MB Tray REAR BOTTOM Fans → 2x 120mm Fans → 3x 120mm Fans → 1x 120mm Fans → 3x 120mm Radiator up to 240mm Radiator up to 360mm Radiator up to 360mm...
-
Page 11: Especificaciones Técnicas
ESPECIFICACIONES TÉCNICAS MODELO Kyber DIMENSIONES (L x A x A) 428*310*460mm PESO 11,23KG MATERIAL Acero 0,8mm SPCC, vidrio templado Panel lateral izquierdo Cristal templado Panel lateral derecho Metal Bandeja MB: 2 x 120 mm Parte superior: 3 x 120 mm... - Page 12 DIAGRAMA KYBER Filtros de polvo Panel IO Cristal templado Panel de alimentación Panel trasero...
- Page 13 CONECTORES I/O DEL PANEL BOLSA DE FRONTAL Y DE LA PLACA BASE ACCESORIOS Tornillos de la placa base Tornillos laterales del disco duro Tornillos HDD Pilar de cobre Sujetacables Restablecer Tipo-C Alimentación USB 3.0 Audio HD...
-
Page 14: Instalación Básica
INSTALACIÓN BÁSICA Desmontaje del panel Retirar e instalar los paneles laterales de cristal Instalación de SSD Instale la fuente de alimentación. Instalación del disco duro Instale la placa base. Instalación de la tarjeta gráfica Instale el ventilador y el radiador (opcional). - Page 15 Retirar e instalar los paneles laterales de cristal La forma de apertura de la chapa lateral es por clip (sin tornillos). Retire la placa lateral de hierro: retire los dos tornillos de la parte trasera.
- Page 16 Instale la fuente de Instale la placa alimentación. base. La fuente de alimentación puede fijarse alineando el Según el tipo de placa base (ATX/M-ATX/ITX), tornillo de la figura con la posición del orificio. puede que sea necesario reordenar manualmente los Nota: según el tipo de fuente de alimentación, la pilares de cobre de acuerdo con las ubicaciones de posición de los orificios puede variar ligeramente.
- Page 17 Desmontaje del Instalación de la tarjeta gráfica panel 400 mm (sin ventilador) Longitud VGA: Instalación: Encaja el panel en el panel frontal y fíjalo Se pueden instalar 400mm sin ventilador, con tornillos desde el interior del chasis 370mm con ventilador Desmontaje: Desatornille los tornillos del interior del chasis y retire el panel...
-
Page 18: Instalación Del Disco Duro
Instalación Instalación del de SSD disco duro Empuje el SSD en la ranura, alinee los Introduzca el disco duro en la ranura, alinee agujeros Phe scrtw, y bloquee el 4 scnws los orificios de los tornillos y bloquee los 4 tornillos. - Page 19 Instale el ventilador y el radiador (opcional). Bandeja MB TRASERO FONDO Ventiladores → 2x 120mm Ventiladores → 3x 120mm Ventiladores → 1x 120mm Ventiladores → 3x 120mm Radiador hasta 240mm Radiador hasta 360mm Radiador hasta 360mm...
- Page 20 KYBER...
Need help?
Do you have a question about the KYBER and is the answer not in the manual?
Questions and answers