Table of Contents
Advertisement
Advertisement
Table of Contents

Summary of Contents for Favero ASSIOMA PRO MX
- Page 1 ASSIOMA PRO MX USER MANUAL...
-
Page 2: Table Of Contents
Pairing to your training device Crank-arm length Manual and automatic calibration First use Battery charge From single to dual-sided Pedals removal Reinstalling the pedals (swap them between bikes) Sensors’ LEDs behaviour Servicing Spare parts Stack height Technical features Favero Electronics Warranty Copyright... -
Page 3: Overview
1. Overview To use the product it’s necessary to install the Favero Assioma app, which is available for free on the App Store and Google Play Store. When using the product for the first time, you can find on the app an interactive quick start guide with all the steps necessary for the installation. -
Page 4: Product Description
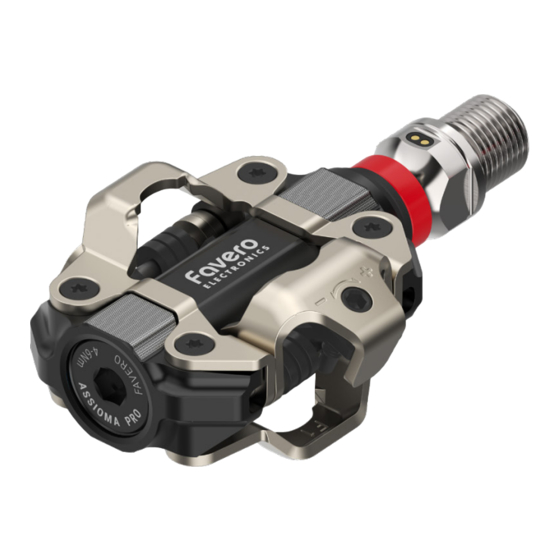
4. Product description Assioma PRO MX is a clip-less pedal with a sensor measuring the force applied to the pedal during the pedal stroke. Assioma PRO MX is designed to be used in the following disciplines: Mountain Bike (MTB) • ... -
Page 5: How To Distinguish The Left Pedal From The Right One
5. How to distinguish the left pedal from the right one Round groove on the left axle No round groove on the right axle Fig. 3 Left pedal and spindle The left pedal is stamped “L” on one internal side of the •... -
Page 6: Bike Category
ASTM F2043 Riding on rough terrain with drops of less than 61 cm. Assioma PRO MX has been designed for paths up to category 3 (standard ASTM F2043). It meets the safety standard DIN EN ISO 4210. 8. Installation ASSIOMA PRO MX uses needle roller bearings, which offer a much higher load carrying capacity compared to the standard ball bearings. - Page 7 Proceed as described: 1. Screw the spindle into the crank-arm MANUALLY until complete insertion. See Fig. 5 Left pedal (L) counter-clockwise Right pedal (R) clockwise Fig. 5 Carry out this operation MANUALLY, without any tools.
- Page 8 2. Make sure to shift the chain to the largest, outermost chainring and the smallest cassette sprocket. See Fig. 6 Fig. 6 3. Check the distances to avoid any kind of interference When stationary, rotate the crank-arm manually until • performing a complete rotation The spindle cap must be at a distance bigger than • ...
- Page 9 If the distance is inferior to 4mm, use one or two washers (A1, A2). Use only the washers provided by Favero Electronics. See Fig. 8. Fig. 8 3. Tightening on the crank-arm Finish tightening with a torque wrench by applying a force of 30-40Nm.
-
Page 10: Installation Of The Cleats
9. Installation of the cleats Use only the cleats provided (SPD® Front compatibile) or the original Shimano® SM- SH51 cleats. Align the cleats properly according to your needs and tighten the mounting bolts with a torque of 4-6Nm. Mounting bolts Cleat adapter Cleat Fig. -
Page 11: Release Force Adjustment
10. Release force adjustment Adjust the tension of the spring with a 3mm hex key. Don’t use ball-end hex keys. It is possible to check the regulation level by the position of the adjusting bolt or counting the number of clicks. Before start pedaling, try to unclip the shoes several times to ensure that the release force of the pedal springs is suited to your needs. -
Page 12: Turn On
5 minutes of inactivity to safeguard the battery duration. When using Assioma PRO MX for the first time, you must turn it on by plugging it into a charger plugged into a socket. -
Page 13: Activation
Open the Favero Assioma app and follow the procedure to search for your pedals, connect them to your device and activate them. If Assioma PRO MX doesn’t appear on the search window, make sure it’s not already connected via Bluetooth to another device (e.g. bike computer). - Page 14 Both via ANT+ and Bluetooth, you only have to pair the left sensor to your training device. Don’t worry: If you use Assioma PRO MX-2 (with sensor on both sides), the left pedal will automatically transmit also the data collected by the right pedal it is coupled with.
-
Page 15: Crank-Arm Length
14. Crank-arm length The crank-arm length has an influence on power calculation. Assioma PRO MX must, therefore, know its value: an incorrect vaule may result in incorrect power data. Please, refer to the manual of your bike computer’s manufacturer to understand how to correctly set the crank-arm length value. - Page 16 Bluetooth to Fig. 15 another device. The calibration procedure varies depending on whether it is performed on the Favero Assioma app or on your bike computer. 1. On the Favero Assioma app 1. Select “Settings” 2. Select “Manual calibration”...
-
Page 17: First Use
In any case, it’s necessary to turn them on or temporary disable them on the bike computer. 16. First use At first installation, Assioma PRO MX will not send any power data to the bike computer until it has completed an internal self-calibration. - Page 18 Assioma PRO MX needs. To charge Assioma PRO MX, insert the magnetic connectors into a battery charger plugged into a socket and clip the magnetic ends on to the pedal as shown in the figure.
-
Page 19: From Single To Dual-Sided
18. From single to dual-sided Assioma PRO MX-1 measures the power output of the left leg only and doubles it to offer total power data reading. Please note that you can always purchase the right power meter pedal at any time to change from a single to a double-sided power meter, Assioma PRO MX-2. -
Page 20: Reinstalling The Pedals (Swap Them Between Bikes)
To speed it up, we suggest you pedal seated, at a uniform pace and on a leveled road. 21. Sensors’ LEDs behaviour Fast and continuous blinking for Assioma PRO MX is being turned on 3 seconds Short blinking every 3 seconds Assioma PRO MX is turned on... - Page 21 4-6Nm and 5-7Nm respectively. See Ch.23 . 2. Cleaning Clean Assioma PRO MX with a damp cloth. Do not use aggressive chemicals such as: gasoline, gas oil and petrol by-products in general, alcohol, industrial or all- purpose degreasers, etc.
-
Page 22: Spare Parts
1x axial washer 1x greasing kit tool Oil seal Rings Set: Art. 773-00-38 2x metal red rings Rings and Bushing 1x bushing only for Assioma PRO MX-1. SENSOR: Repair kit: Art. 773-00-20 Art. 773-00-50 1x Left pedal PRO 2x end cap sensor 1x screw cap (red) Art. -
Page 23: Stack Height
9/16”-20 25. Technical features ASSIOMA PRO MX-2 (art. 773-10-02), power sensors Product code: on both sides ASSIOMA PRO MX-1 (art. 773-10-01), power sensor on the left side only Transmitted data: ANT+, Bluetooth (bike PC) & Favero Assioma app • Power (watt) • ... - Page 24 Stack height: 11,2 mm Pedal axle material: AISI 630 stainless steel Bearings: 2x needle rollers (Dynamic load > 400kg each needle roller) 1x axial washer in technopolymer Axle threads: 9/16”-20 tpi Operating temperature: -10 / +55 °C Suggested battery charge +10 / +45 °C temperature: Protection degree:...
-
Page 25: Favero Electronics
26. Favero Electronics Assioma PRO MX is entirely designed, produced and assembled by Favero Electronics in Italy, according to rigorous quality and safety standards and using highly qualified personnel. For more information, visit the page: https://cycling.favero.com/it/company Favero Electronics Srl Via R. Lombardi 64 - 31030 Arcade TV | Italy P.Iva: IT 04703130262 | REA: TV371603 | BattG: DE21721389 Share Capital: €... - Page 26 A SS IOMA Download the Favero Assioma app...
Need help?
Do you have a question about the ASSIOMA PRO MX and is the answer not in the manual?
Questions and answers
Assioma PRO MX-2 not charging (both pedals). Stuck at about 30% charge and getting low battery warning from Garmin when connected. I am not getting blinking red light when connected to both power bank and socket. I have updated to the latest firmware 6.10. Any solutions?