
Related Manuals for SI Ysia Zigbee Remote 1 channel

Summary of Contents for SI Ysia Zigbee Remote 1 channel
- Page 1 Ysia Zigbee Remote (1 & 5 channels) Installation Instructions 400204 | v. 1.0 | 3 March 2023...
- Page 2 Please use this QR Code to access more documents and Video Tutorials related to the product. Tech Specs Scan the QR code to scan Ysia specsheet CE Information SOMFY ACTIVITES SA, 74300 CLUSES FRANCE hereby declares that the radio equipment covered by these instructions is in compliance with the requirements of Radio Directive 2014/53/ EU and the other essential requirements of the applicable European Directives.
- Page 3 CONTENTS Parts in the Box ................In Detail ..................Start Up..................Selection of Groups ..............Installation ..................Replacing the Batteries ............. Technical Support: 512.832.6939 Hours of Support: 7:30am - 5pm CST screensupport@screeninnovations.com shadesupport@screeninnovations.com...
- Page 4 PARTS IN THE BOX Ysia Zigbee Remote (1 & 5 channels) Installation Instructions (1) Ysia Zigbee remote (1) User Instructions (1) Wall Mount (1 or 5 channel) (2) Screws & Anchors (2) Batteries Ysia - Parts in the Box...
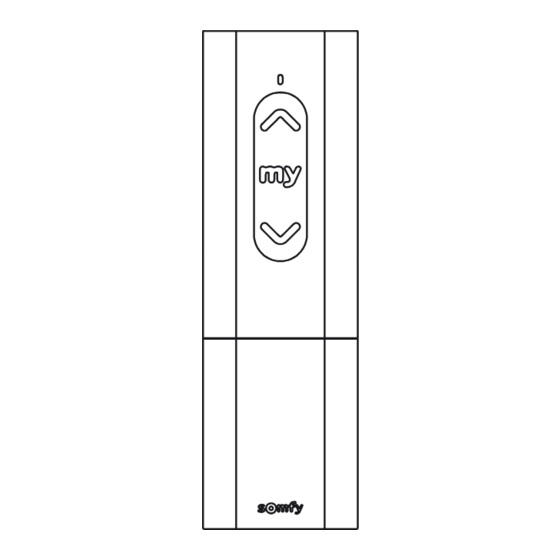
- Page 5 IN DETAIL a) Transmission indicator LED b) Up button (Short activation enables the application to be raised, switched on or opened. Long activation enables some additional functionality. See complete instructions for more details). c) Stop/my button (enables the application to stop by pressing the button once or switched to the favorite position by pressing the button twice).
- Page 6 START UP Download the TaHoma application if it is not yet installed on the smartphone. Note: Somfy motor can be set and used with this product without TaHoma Box (HUB Optional only). SELECTION OF GROUPS Before using Ysia 5 Zigbee, check that the correct group has been selected. Ysia - Start Up and Selection of Groups...
- Page 7 INSTALLATION Adding/Deleting Ysia Zigbee Follow the instructions on the TaHoma application to add or remove a Ysia Zigbee. Wall mounting (Refer the drawing below) Open the wall mount (i) and fix it to a flat surface using a screwdriver and an M3-type screw Note: Do not use an electric screwdriver.
- Page 8 REPLACING THE BATTERIES Insert the batteries types 2 x AAA LR03, 2 x 1.5 V, as indicated by the polarity (+ and - signs) markings in the battery compartment. The power supply terminals must not be short-circuited. Note: Explosion risk if the battery is replaced by an incorrect type. Screen Innovations 9715-B Burnet Rd, Suite 400 Austin, TX 78758 512.832.6939...
Need help?
Do you have a question about the Ysia Zigbee Remote 1 channel and is the answer not in the manual?
Questions and answers