Table of Contents
Advertisement
Quick Links
Advertisement
Table of Contents

Subscribe to Our Youtube Channel
Summary of Contents for Gator GRV7HDW
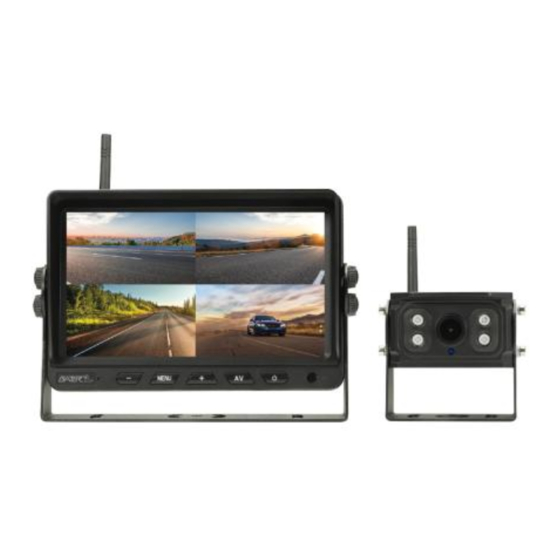
- Page 1 GRV7HDW USER MANUAL For more information on the Gator range go to our website gatordriverassist.com INCLUSIONS: 7" Wireless Monitor, Mounting Bracket With Adhesive Pad, Monitor Sunvisor, 1080P HD Wireless Camera, 1.7M 10-32V Monitor Power Adaptor, 1.5M Monitor Power Cable & 2.5M Camera Power Cable.
-
Page 2: Table Of Contents
Contents Installation diagram .............2 Introduction.............3 Product information..............4 Menu operation (Main Menu)..........5 Menu operation (Cameras)..........5 Menu operation (Pairing) .............6 Menu operation (Record)............7 Menu operation (Playback)..........8 Menu operation (View mode) ..........9 Menu operation (Setting) ..........10 Monitor specifications............11 Camera specifications ............11 Optional extras...... -
Page 3: Installation Diagram
Installation diagram Monitor Camera Option1 Option2 Socket Hardwired wired Power wires Power wires 10-32V DC car (10-32V Accessory) (Reversing light 10-32V) accessory socket... -
Page 4: Introduction
Introduction Before using this unit, please read this instruction manual carefully. Take special care to follow the warnings indicated on the unit itself as well as the safety suggestions listed. Keep this instruction for future reference. WARNING: The wireless monitor reversing system is designed to be used with, not instead of other viewing aids in your vehicle. -
Page 5: Product Information
Product information 10 11 1. Monitor wireless antenna 2. Screen 3. Adjustable monitor angle mount 4. Camera wireless antenna 5. - Selection button 6. Menu button: Click to enter/exit the menu settings 7. + Selection button 8. AV button 9. Power button: Press for 1 second to turn on or off. 10. -
Page 6: Menu Operation (Main Menu)
Menu operation When the monitor is on, press the “MENU” button to enter into the menu settings. Press the “+ / -“ buttons to cycle through setting options. Press the “AV“ button to confirm setting. Main menu Cameras / Pairing / Record / Playback / View Mode / Setting NOTE: To change settings within the menu will only be accessible when in single channel mode. -
Page 7: Menu Operation Pairing
Menu operation Pairing NOTE: This monitor can pair up to 4 cameras at once. The monitor must be told how many cameras are to be used in “Settings: , :CAM select: and select CAM1, CAM2, CAM3 or CAM4. Select in order from 1 to 4. For connection press the “+ / -“... -
Page 8: Menu Operation (Record)
Menu operation Record NOTE: This monitor can record footage from each of the paired cameras when used with an SD card up to 128GB Class 10 (not included). The monitor saves video files at a resolution of 1280x704P to accommodate the simultaneous 4 way camera recording onto the SD Card. -
Page 9: Menu Operation (Playback)
Menu operation Playback Playback Select the Playback icon on screen. Press the “AV” button to enter. Press the “+ / -“ buttons to cycle through recorded video files. Press the “AV” button to open the file and playback. Each recorded file is coloured differently depending on what camera the footage was recorded, highlighted at the top of the screen (CAM1, CAM2,CAM3,CAM4 and Merge). -
Page 10: Menu Operation View Mode
Menu operation View mode NOTE: This monitor can display different camera views depending on how many cameras are being used. Select the View mode icon on screen. Press the “AV” button to enter, then press the “+ / -“ buttons to cycle through view options as pictured below. -
Page 11: Menu Operation Setting
Menu operation Setting Select the Setting icon on screen. Press the “AV” button to enter, then press the “+ / -“ buttons to cycle through setting options. Scan Time Changes the amount of time the cameras are displayed on screen when in switching view mode. -
Page 12: Monitor Specifications
Monitor specifications Display Device..........Colorful IPS LCD Size..................7 Inch Interface...............Digital Resolution............1024 x 600 (RGB) Luminance (Nits)............500 cd/m2 Contrast Ratio..............500:1 Power Consumption..............6W Video frame................30FPS Power Supply..............10-32VDC View Angle (LR/UD)....L 90, R 90, U 90, D 90 (Degree’s) Wireless Frequency........2400 ~ 2483.5MHz (2.4G hz frequency hopping technology Chipset Solution) Operating Temperature........-20˚C to +70˚C Weight..................440g... -
Page 13: Optional Extras
Optional extras (Sold separately) Additional wireless camera (GRVC7W) Technical assistance If you need assistance setting up or using your Gator product now or in the future, call Gator Support. Australia TEL: 03 – 8587 8898 FAX: 03 – 8587 8866 Mon-Fri 9am –...
Need help?
Do you have a question about the GRV7HDW and is the answer not in the manual?
Questions and answers