Advertisement
Available languages
Available languages
Quick Links
Advertisement

Summary of Contents for Qian QOP-T10UB-DI
- Page 1 THERMAL LABEL PRINTER IMPRESORA TÉRMICA DE ETIQUETAS MODEL QOP-T10UB-DI Please read carefully before using your equipment and save it for future reference. Por favor lea cuidadosamente antes de usar su equipo y guárdelo para uso de futuras consultas. USER MANUAL / MANUAL DE USUARIO...
-
Page 2: Warranty And Product Information
(in so far as it is invalid or unenforceable) shall be given no effect and deemed to be excluded without invalidating any of the remaining terms. Qian reserves the right to amend any term at any time without notice. -
Page 3: Print Label
Print Label Zlabel Android editing software IOS editing software Install Password:1234 Version: April 2023 Please install the driver from the CD-ROM. -
Page 4: Safety Tips
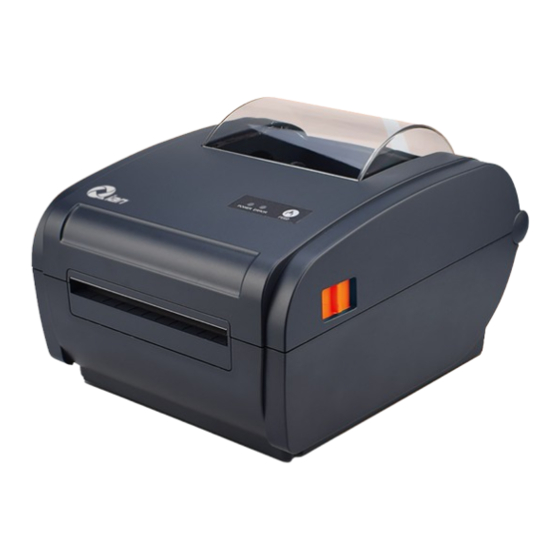
SAFETY TIPS This section presents important information intended to ensure safety and effective use of the printer. Please read carefully. Notes on safety Be sure to use the specified power source provided by our company. Connection to an improper power source may cause fire, explosion or damage to the printer. - Page 5 APPEARANCE Size: 226*180*147mm Weight: 1200g Feed button Status light Power light Paper exit...
- Page 6 THE INSTALLATION OF THE PAPER ROLL The printer uses a thermal label paper and adapt for easy paper loading. So, the paper is very convenient to install. It also supports various paper specifications for printing. Thermal paper installation method is as follows: (1) Open the printer’s top cover.
- Page 7 Thermal receipt paper installation method Finger pinching prevention design Press the cover bracket to the card slot to close the cover Lift the bracket button to adjust the position Press the bracket button to lock the position...
- Page 8 INSTRUCTION OF LED AND BUTTONS Power(blue light) Printer status Printer off Printer is on and have paper Flash Printer is on and no paper When printer power on, press Paper out /Label positioning the FEED button detection Hold down the FEED button in Print self-test page the shutdown state, and then power on the printer, when you...
-
Page 9: Printer Driver Installation
PRINTER DRIVER INSTALLATION Note: A printing software is required to be used with this driver. Please install the driver from the CD-ROM. 1. Please choose “Yes” to allow the installation. 2. Please read the related terms carefully, and install it as agreement as below, then click “Next”. - Page 10 3. If the printer is USB interface, click the “USB Port” to automatically identify the USB port, click “Install Driver”.
- Page 11 4. If label printer driver installation is successful, it will automatically pop up printer properties interface as shown below: Click “Print Test Page”, if the printer prints a normal page, it indicates that the installation was successful. Note: If the printer prompts “Printing Error”, return to step 3, select Selection USB0001, or USB002, or USB003...
- Page 12 The choice of label paper is based on the size of the label paper you use. as shown in below:...
- Page 13 If it is not in the list, it needs to be created, as shown in below:...
- Page 14 The method of setting receipt paper type: 1. Open the Printer Preferences, find the Page Setup, and select the paper type as Continuous Paper. The operation is as follows: If choose the “Continuous”, don’t need to change the gap height.
- Page 16 THE BLUETOOTH CONFIGURATION Please make sure the printer support Bluetooth connection. Step 1: Make sure your device (like PC/Laptop) has Bluetooth function, and the Bluetooth is activated, shown as below: Step 2: Power on the Bluetooth printer. Step 3: Click “Add a Bluetooth Device”, then choose “My device is set up according and ready to be found”, showed as below:...
- Page 17 Step 4: Choose Bluetooth device, and then pls wait till to the blue- tooth printer is found (if the “Bluetooth Printer” is founded, it will be listed on the screen), shown as below:...
- Page 18 Step 5: Enter the PIN(1234) for Bluetooth Printer, then connect: Step 6: If the bluetooth printer is shown “Paired”, that means it’s connected successfully, shown as below:...
- Page 19 Step 7: The Bluetooth printer will be automatically assigned a COM port, pls click “More Bluetooth options” and check the Blue- tooth Settings and find out the COM port what the Bluetooth Prin- ter is assigned.
- Page 20 Step 8: Open the Printer Driver “Properties”, select the specific COM port which bluetooth printer is used. Remember that the COM port should be setting the corresponding baud rate same as Bluetooth serial port.(Factory Default Baud Rate : 115200, N, 8, 1.).
- Page 21 LABEL EDITING SOFTWARE FOR WINDOWS SYSTEM Please install the software from the CD-ROM, then find the Label Editing Software (For Windows) and install it. LABEL EDITING SOFTWARE FOR ANDROID&IOS SYSTEMS Please make sure the printer support Bluetooth connection. 1. If the connected device is Android system, please go to Google Play store to download the app “Print Label”...
- Page 22 2. If the connected device is IOS system, please go to App Store to download the app“Zlabel”or scan the below QR code: Zlabel IOS editing software HOW TO CLEAN THE PRINTER HEAD Printer Cleaning: When the printer has the following conditions, you should clean the printer head: 1.The printer does not print clearly and the thermal paper is ok.
- Page 23 printer head, do not use tweezers to scratch the surface of the printer head and other sensitive parts. 3. Do not use gasoline, acetone and other organic solvents for printer head cleaning. LABEL CALIBRATION AND EXCEPTION HANDLING METHODS Label Calibration Processing : If your printer skip the paper when changed to different paper size, or the printer keep printing and never stop, the printer should be done the calibration, the method are as follows:...
- Page 24 If the following phenomena occur after calibration: 1) With paper, but the printer reports error: When this happens, take away the paper, power on the printer and wait for the red light to flash, then press and hold the “FEED” but- ton, released the button after the red light flashes and the buzzer beeps, wait 2 seconds, then restart the printer and have a test.
- Page 25 (en la medida en que sea inválido o inaplicable) no tendrá efecto y se considerará excluido sin invalidar ninguno de los términos restantes. Qian se reserva el derecho de modificar cualquier término en cualquier momento sin previo aviso.
-
Page 26: Print Label
Print Label Zlabel Software de edición Software de edición para Android para IOS Contraseña para instalar:1234 Version: Abril 2023 Instale el controlador desde el CD-ROM. -
Page 27: Consejos De Seguridad
CONSEJOS DE SEGURIDAD Esta sección presenta información importante destinada a garantizar la seguridad y el uso eficaz de la impresora. Léala atentamente. Notas sobre seguridad Asegúrese de utilizar la fuente de alimentación especificada proporcionada por nuestra empresa. La conexión a una fuente de alimentación inadecuada puede provocar un incendio explosión o daños en la impresora. - Page 28 APARIENCIA Tamaño: 226x180x147 mm Peso: 1200g Botón de alimentación Luz de estado Luz de alimentación Salida de papel...
- Page 29 LA INSTALACIÓN DEL ROLLO DE PAPEL La impresora utiliza un papel de etiquetas térmico y se adapta para facilitar la carga de papel. Por lo tanto, el papel es muy cómodo de instalar. También admite varias especificaciones de papel para imprimir. El método de instalación del papel térmico es el siguiente (1) Abra la cubierta superior de la impresora.
- Page 30 Método de instalación del papel térmico para recibos Diseño para evitar pellizcarse los dedos Presione el soporte de la tapa hacia la ranura de la tarjeta para cerrar la tapa Levante el botón del soporte para ajustar la posición Pulse el botón del soporte para bloquear la posición...
- Page 31 INSTRUCCIONES DE LED Y BOTONES Alimentación (luz azul) Estado de la impresora Apagado Impresora apagada Encendido La impresora está encendida y tiene papel Flash La impresora está encendida y no hay papel Cuando la impresora esté Detección de salida de encendida, pulse el botón FEED papel/posicionamiento de etiquetas...
-
Page 32: Instalación Del Controlador De Impresora
INSTALACIÓN DEL CONTROLADOR DE IMPRESORA Nota: Se requiere un software de impresión para ser utilizado con este controlador. Instale el controlador desde el CD-ROM. 1. Seleccione “Sí” para permitir la instalación. 2. Por favor, lea atentamente los términos relacionados, e instálelo según el acuerdo que se indica a continuación, luego haga clic en “Siguiente”. - Page 33 3. Si la impresora es de interfaz USB, haga clic en “Puerto USB” para identificar automáticamente el puerto USB, haga clic en “Instalar controlador”.
- Page 34 4. Si la instalación del controlador de la impresora de etiquetas se realiza correctamente, aparecerá automáticamente la interfaz de propiedades de la impresora que se muestra a continuación: Haga clic en “Imprimir página de prueba”; si la impresora imprime una página normal, indica que la instalación se ha realizado correctamente.
- Page 35 La elección del papel de etiquetas se basa en el tamaño del papel de etiquetas que utilice, como se muestra a continuación:...
- Page 36 Si no está en la lista, hay que crearla, como se muestra a continuación:...
- Page 37 Método de configuración del tipo de papel de recibo: 1. Abra las Preferencias de la impresora, busque la Configuración de página y seleccione el tipo de papel como Papel continuo. La operación es la siguiente: Si elige la opción “Continuo”, no es necesario cambiar la altura del hueco..
-
Page 39: Configuración Bluetooth
CONFIGURACIÓN BLUETOOTH Asegúrate de que la impresora admite la conexión Bluetooth. Paso 1: Asegúrese de que su dispositivo (como PC/portátil) tiene la función Bluetooth, y el Bluetooth está activado, como se muestra a continuación: Paso 2: Encender la impresora Bluetooth. Paso 3: Haga clic en “Añadir un dispositivo Bluetooth”... - Page 40 Paso 4: Seleccione el dispositivo Bluetooth y espere a que se encuentre la impresora Bluetooth (si se encuentra la “Impresora Bluetooth”, aparecerá en la pantalla).:...
- Page 41 Paso 5: Introduzca el PIN (1234) para que la impresora Bluetooth se conecte: Paso 6: Si la impresora bluetooth aparece “Paired”, significa que se ha conectado correctamente, como se muestra a continuación:...
- Page 42 Paso 7: La impresora Bluetooth se asignará automáticamente un puerto COM, por favor, haga clic en “Más opciones de Bluetooth” y compruebe la configuración de Bluetooth y averiguar el puerto COM lo que la impresora Bluetooth se asigna.
- Page 43 Paso 8: Abra las “Propiedades” del controlador de la impresora y seleccione el puerto COM específico en el que se utiliza la impresora Bluetooth. Recuerde que el puerto COM debe tener la misma velocidad en baudios que el puerto serie Bluetooth (velocidad en baudios predeterminada de fábrica: 115200, N, 8,...
- Page 44 SOFTWARE DE EDICIÓN DE ETIQUETAS PARA EL SISTEMA WINDOWS Instale el software desde el CD-ROM, busque el software de edición de etiquetas (para Windows) e instálelo. SOFTWARE DE EDICIÓN DE ETIQUETAS PARA SISTEMAS ANDROID Y IOS Asegúrese de que la impresora admite la conexión Bluetooth.
- Page 45 2. Si el dispositivo conectado es el sistema IOS, por favor vaya a la App Store para descargar la aplicación “Zlabel” o escanear el código QR a continuación: Zlabel Software de edición IOS CÓMO LIMPIAR EL CABEZAL DE IMPRESIÓN Limpieza de impresoras: Cuando la impresora presenta las siguientes condiciones, debe limpiar el cabezal de impresión: 1.
- Page 46 Notas: 1. Por favor, asegúrese de que la alimentación está desconectada cuando realice el mantenimiento. 2. Mantenga las manos u otras herramientas metálicas alejadas de la superficie del cabezal de impresión, no utilice pinzas para rayar la superficie del cabezal de impresión y otras partes sensibles.
- Page 47 Si tras el calibrado se producen los siguientes fenómenos: 1) Con papel, pero la impresora indica error: Cuando esto ocurra, retire el papel, encienda la impresora y espere a que la luz roja parpadee, a continuación, pulse y mantenga pulsado el botón “FEED”, suelte el botón después de que la luz roja parpadee y el zumbador emita un pitido, espere 2 segundos, a continuación, reinicie la impresora y haga una prueba.
Need help?
Do you have a question about the QOP-T10UB-DI and is the answer not in the manual?
Questions and answers