Table of Contents
Advertisement
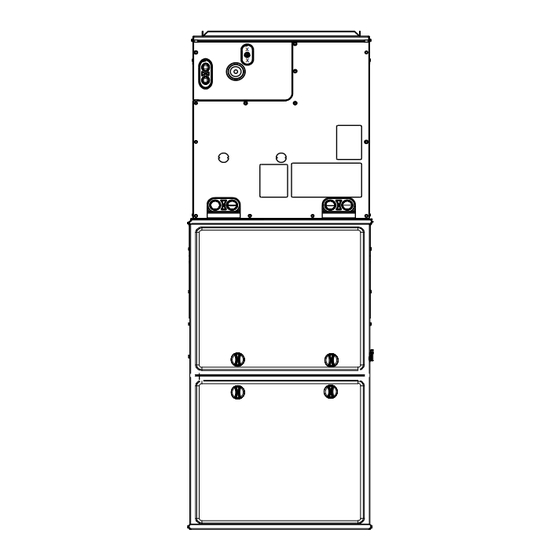
EVM4X, WMVM
Multipoise Cased Cooling and Heating Evaporator Coil
To be Used with Outdoor HP Piston Heating Metering Device Only*
*Refer to AHRI Directory for Approved Rated Combinations.
NOTE: Read the entire instruction manual before starting the
installation.
Safety Considerations . . . . . . . . . . . . . . . . . . . . . . . . . . . . . . . . . . . . . 1
Introduction. . . . . . . . . . . . . . . . . . . . . . . . . . . . . . . . . . . . . . . . . . . . . 2
Installation . . . . . . . . . . . . . . . . . . . . . . . . . . . . . . . . . . . . . . . . . . . . . 2
Airflow . . . . . . . . . . . . . . . . . . . . . . . . . . . . . . . . . . . . . . . . . . . . . . 2
TXV . . . . . . . . . . . . . . . . . . . . . . . . . . . . . . . . . . . . . . . . . . . . . . . . 2
Cabinet Sweating . . . . . . . . . . . . . . . . . . . . . . . . . . . . . . . . . . . . . . 2
Inspect Equipment . . . . . . . . . . . . . . . . . . . . . . . . . . . . . . . . . . . . . 2
Select Installation Procedure . . . . . . . . . . . . . . . . . . . . . . . . . . . . . 2
Upflow Coil Installation. . . . . . . . . . . . . . . . . . . . . . . . . . . . . . . . . 3
Downflow Coil Installation . . . . . . . . . . . . . . . . . . . . . . . . . . . . . . 5
Horizontal Coil Installation . . . . . . . . . . . . . . . . . . . . . . . . . . . . . . 5
Refrigerant Line Connections . . . . . . . . . . . . . . . . . . . . . . . . . . . . 6
Connect Refrigerant, Liquid, and Suction Lines . . . . . . . . . . . . . . 7
Waste Line Connection . . . . . . . . . . . . . . . . . . . . . . . . . . . . . . . . . 8
Humidifier Application . . . . . . . . . . . . . . . . . . . . . . . . . . . . . . . . . 9
Care and Maintenance . . . . . . . . . . . . . . . . . . . . . . . . . . . . . . . . . . . . 9
Safety Considerations
Improper installation, adjustment, alteration, service, maintenance, or
use can cause explosion, fire, electrical shock, or other conditions which
may cause death, personal injury or property damage. Consult a
qualified installer, service agency, or your distributor or branch for
information or assistance. The qualified installer or agency must use
factory-authorized kits or accessories when modifying this product.
Refer to the individual instructions packaged with the kits or accessories
when installing.
Follow all safety codes. Wear safety glasses, protective clothing, and
work gloves. Use quenching cloth for brazing operations. Have fire
extinguisher available. Read these instructions thoroughly and follow all
warning or cautions included in literature and attached to the unit.
Consult local building codes and the current editions of the National
Electrical Code (NEC) NFPA 70.
In Canada, refer to the current editions of the Canadian Electrical Code
CSA C22.1.
Recognize safety information. When you see this symbol
and in instructions or manuals, be alert to the potential for personal
injury. Understand the signal words DANGER, WARNING, CAUTION,
and NOTE. These words are used with the safety-alert symbol.
DANGER identifies the most serious hazards which will result in severe
personal injury or death. WARNING signifies hazards which could
result in personal injury or death. CAUTION is used to identify unsafe
practices which may result in minor personal injury or product and
property damage. NOTE is used to highlight suggestions which will
result in enhanced installation, reliability, or operation.
Installation Instructions
on the unit
WARNING
!
PROPERTY DAMAGE HAZARD - FURNACE/COIL
MATCHING
Failure to follow this warning could result in property damage, personal
injury, or death.
This coil must be matched to heating equipment that meets all
CSA/ANSI Z21.47 or cooling equipment that meets UL 1995 or UL
60335-2-40. Refer to the furnace/blower installation instructions for
any potential considerations when installing coils with composite drain
pans.
CAUTION
!
PARTIAL UNIT REQUIREMENTS
Failure to follow this warning could result in equipment damage.
This family of evaporator coils are PARTIAL UNIT HEAT PUMP OR
AIR CONDITIONER, complying with PARTIAL UNIT requirements
of UL/CSA 60335-2-40 or UL 1995 Standard, and must only be
connected to other units that have been confirmed as complying to
corresponding PARTIAL UNIT requirements of this UL/CSA
60335-2-40 or UL 1995 Standard.
WARNING
!
PERSONAL INJURY / PROPERTY DAMAGE HAZARD
Failure to follow this warning could result in property damage, personal
injury, or death.
For continued performance, reliability, and safety, the only approved
accessories and replacement parts are those specified by the equipment
manufacturer. The use of non-manufacturer approved parts and
accessories could invalidate the equipment limited warranty and result
in fire risk, equipment malfunction, and failure. Please review
manufacturer's instructions and replacement part catalogs available
from your equipment supplier.
WARNING
!
ELECTRICAL SHOCK HAZARD
Failure to follow this warning could result in personal injury or death.
Before installing, modifying or servicing system, always turn off main
power to system. There may be more than one disconnect switch. Lock
out and tag switch with a suitable warning label.
Advertisement
Table of Contents

Summary of Contents for APR EVM4X
-
Page 1: Table Of Contents
EVM4X, WMVM Multipoise Cased Cooling and Heating Evaporator Coil To be Used with Outdoor HP Piston Heating Metering Device Only* *Refer to AHRI Directory for Approved Rated Combinations. Installation Instructions NOTE: Read the entire instruction manual before starting the WARNING installation. -
Page 2: Introduction
EVM4X, WMVM: Installation Instructions Airflow WARNING Airflow amount and distribution are vital to adequate system performance. Problems that can be experienced with incorrect airflow PERSONAL INJURY HAZARD include: Failure to follow this caution may result in personal injury. • low system performance This coil contains Nitrogen precharge of 7 –... -
Page 3: Upflow Coil Installation
EVM4X, WMVM: Installation Instructions To install cased coils in downflow applications, follow the instructions CAUTION below, (Downflow Coil Installation on p5). To install cased coils in horizontal applications, follow the instructions PROPERTY DAMAGE HAZARD below, (Horizontal Coil Installation on p5). - Page 4 EVM4X, WMVM: Installation Instructions Airflow Ductwork Flush Mount 4” Equal Overhang with block-off plates Ductwork Airflow A221125A Fig. 6 – 90° Rotation (shown in downflow) A221123A Fig. 4 – Smaller Furnace, Equal Overhang, Flush Mount 4" Transition Required (not recommended)
-
Page 5: Downflow Coil Installation
EVM4X, WMVM: Installation Instructions Downflow Coil Installation The unit can be installed on a work platform, secured to roof truss in attic, suspended from hangers on floor joists in crawl space, or installed NOTE: In downflow installation with a 4-way multipoise furnace, break on blocks. -
Page 6: Refrigerant Line Connections
EVM4X, WMVM: Installation Instructions Horizontal Right Installation Horizontal Left Installation 1. Use field fabricated attachment plates to secure coil to furnace 1. Unbend the 4 tabs at the right side of the casing (Fig. 12). (Fig. 2. Connect furnace snugly against coil casing. -
Page 7: Connect Refrigerant, Liquid, And Suction Lines
EVM4X, WMVM: Installation Instructions Refrigerant Metering Device Do not use damaged, dirty, or contaminated tubing because it may plug refrigerant flow-control device. ALWAYS evacuate the coil and These Coils have a factory installed hard shut-off TXV designed only for field-supplied tubing before opening outdoor unit service valves. -
Page 8: Waste Line Connection
EVM4X, WMVM: Installation Instructions CAUTION PROPERTY DAMAGE HAZARD Failure to follow this warning could result in property damage. Provide trap with air gap in drain line when connecting to waste (sewer) line. IMPORTANT! THE PRIMARY DRAIN PORT MAY BE ON THE INSIDE OR OUTSIDE DEPENDING ON THE DATE OF MANUFACTURE. -
Page 9: Humidifier Application
EVM4X, WMVM: Installation Instructions Humidifier Application When installing a humidifier in a system which contains a V-coil, consideration must be given to location of coil slabs (Fig. 16). 1. The humidifier should be mounted to the supply plenum or return duct whenever possible.
Need help?
Do you have a question about the EVM4X and is the answer not in the manual?
Questions and answers