
Related Manuals for Crown STUDIO AMPLIFIER


Summary of Contents for Crown STUDIO AMPLIFIER
- Page 1 T H E P R O F E S S I O N A L A U D I O D I V I S I O N O F C R O W N I N T E R N A T I O N A L , I N C . Exported to select countries as Amcron.
- Page 2 THREE YEAR FULL WARRANTY WORLDWIDE NORTH AMERICA...
- Page 3 The information furnished in this manual does not include all of the details of design, production, or variations of the equipment. Nor does it cover every possible situation which may arise during installation, operation or maintenance. If your unit bears the name “Amcron,” please substitute it for the name “Crown” in this manual. If you need special assistance beyond the scope of this manual, please contact our Technical Support Group.
-
Page 4: Table Of Contents
CONTENTS 1.1 Features ... 7 3.1 Mounting ... 10 3.2 Cooling ... 10 3.3 Wiring ... 11 3.3.1 Stereo (Two-Channel) Operation ... 12 3.3.2 Bridge-Mono Operation ... 12 3.3.3 Parallel-Mono Operation ... 13 3.3.4 Input Connection ... 14 3.3.5 Output Connection ... 16 3.3.6 Additional Load Protection ... - Page 5 I I I I I II II II II II Professional Studio Amplifiers ILLUSTRATIONS Studio Reference I Amplifier ... 6 Front Facilities ... 8 Rear Facilities ... 9 Mounting Dimensions ... 10 Removing an End Cap ... 10 Top View of a Rack-Mounted Unit ... 10 Proper Air Flow with a Rack-Mounted Blower ...
-
Page 6: Studio Reference I Amplifier
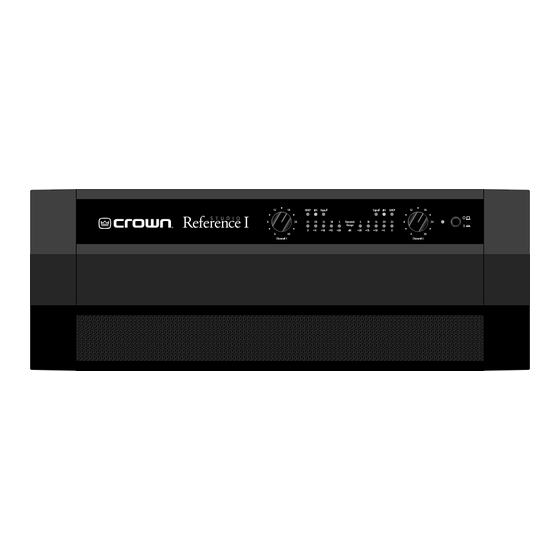
Fig. 1.1 Studio Reference I Amplifier Unpacking Instructions Please unpack and inspect your new amplifier for any damage that may have occurred during transit. If damage is found, notify the transportation com- pany immediately. Only you, the consignee, may ini- tiate a claim for shipping damage. -
Page 7: Features
I I I I I II II II II II Professional Studio Amplifiers 1 Welcome The stunning realism you will experience when listen- ing to a Crown Studio Reference redefine your expectations. The evolution of this studio standard ushers in a new era of powerful, ultraquiet amplifiers capable of faithfully reproducing the most demanding signals that state-of-the-art 20-bit digital recording systems can offer. -
Page 8: Front Facilities
2 Facilities A. Level Controls Each channel’s output level can be adjusted accurately using the 31-position detented level controls on the front panel (see Section 4.4). B. ODEP Indicators During normal operation of the amplifier, the ODEP (Output Device Emulation Protection) indicators glow brightly to show the presence of reserve thermody- namic energy. -
Page 9: Rear Facilities
I I I I I II II II II II Professional Studio Amplifiers I. Reset Switch This back panel switch can be used to trip and reset the AC mains circuit breaker (see Section 4.3.4). J. Power Cord For 120 VAC, 60 Hz North American units, the Studio Reference I includes a 10 AWG power cord and NEMA TT30P plug, and the Studio Reference II includes a 12 AWG cord and NEMA 5-15P plug. -
Page 10: Removing An End Cap
3 Installation 3.1 Mounting Studio Reference amplifiers are designed for standard 19 inch (48.3 cm) rack mounting or stacking without a cabinet. In a rack, it is best to mount units directly on top of each other. This provides the most efficient air flow and support. -
Page 11: Proper Air Flow With A Rack-Mounted Blower
I I I I I II II II II II Professional Studio Amplifiers Fig. 3.4 Proper Air Flow with a Rack-Mounted Blower mounting, piles of power cords, clogged dust filters and closed rack doors. Mount your amplifier to allow suffi- cient air flow into the front intake, out the side exhaust vents, and out the back of the rack. -
Page 12: Bridge-Mono Wiring
making connections, selecting sources and controlling output levels. The load you save may be your own! Crown is not responsible for damaged loads that result from carelessness or deliberate overpowering. This practice reduces the chance of loud blasts that can cause loudspeaker damage. Studio Reference amplifiers provide three operating modes: Stereo, Bridge-Mono and Parallel-Mono. -
Page 13: Parallel-Mono Wiring
I I I I I II II II II II Professional Studio Amplifiers greatly degraded. Also, turn down the channel 2 level control (fully counterclockwise). Note: The channel 2 input and level control are not de- feated in Bridge-Mono mode. Any signal feeding chan- nel 2 will work against the channel 1 signal, and usually results in distortion and inefficient operation. -
Page 14: Input Connection
3.3.4 Input Connection The balanced inputs have a nominal impedance of 10 K ohms (5 K ohms unbalanced) and will accept the line-level output of most devices. Phone jacks are pro- vided on the back panel, while the factory-installed P.I.P.-FX provides female XLR input connectors (see Figure 2.2). -
Page 15: Subsonic Filter Capacitors
I I I I I II II II II II Professional Studio Amplifiers SOLVING INPUT PROBLEMS Sometimes large (subaudible) are present in the input signal. These can damage loudspeakers by overloading or overheating them. To attenuate such frequencies, place a capacitor in series with the input signal line. -
Page 16: Output Connection
power cables and power transformers. We also recom- mend using shielded or twisted pair wire. With loose wires, use tie-wraps to bundle together each pair of in- put wires. This helps reduce magnetically-induced current by minimizing the cross-sectional area be- tween conductors that could bisect the magnetic field. -
Page 17: Inductive Load (Transformer) Network
I I I I I II II II II II Professional Studio Amplifiers 1. For loads connected in parallel, use the equation that follows to calculate each channel’s total load resistance. Substitute the rated impedance of the connected loud- speakers for the Zs in the equation. When finished, mark your answer on the nomograph’s “Load Resistance”... -
Page 18: Additional Load Protection
available from most electrical supply stores. 3.3.6 Additional Load Protection Studio Reference amplifiers can deliver very high power levels, so it’s a good idea to add protection for your loudspeakers if it is not built-in. Loudspeakers are subject to thermal damage from sustained overpower- ing and mechanical damage from large transient volt- ages. -
Page 19: Operation
I I I I I II II II II II Professional Studio Amplifiers 4 Operation 4.1 Precautions Although your amplifier is protected from internal and external faults, you should still take the following pre- cautions for optimum performance and safety: 1. -
Page 20: Protection Systems
The green nously with the amplifier’s output signal. The signal de- tector is connected to the signal path after the input gain stages and level controls, so a flashing indicator tells you that there is audio in and out of the amplifier. Note: The signal presence indicators may not report signal presence if the output signal level is too low. -
Page 21: Odep
I I I I I II II II II II Professional Studio Amplifiers and transformer thermal protection. These systems will prevent amplifier damage in virtually any situation. 4.3.1 ODEP Crown invented ODEP to solve two long-standing problems in amplifier design: to prevent amplifier shut- down during demanding operation and to increase the efficiency of output circuitry. -
Page 22: Circuit Breaker
former than in the output devices. This can overheat the transformer and activate its protection system. Studio Reference amplifiers are designed to keep work- ing under conditions where other amplifiers would fail. But even when the limits of a Studio Reference amplifier are exceeded, it still protects itself—and your invest- ment—from damage. -
Page 23: Filter Cleaning
I I I I I II II II II II Professional Studio Amplifiers is located inside the amplifier’s P.I.P. compartment. It is factory-set to a fixed voltage gain of 26 dB. For standard 1 kHz power into 8 ohms, this is equivalent to an input sensitivity of 4.0 volts for the Studio Reference I and 2.7 volts for the Studio Reference II. -
Page 24: Technical Information
5 Technical Information 5.1 Overview Studio Reference amplifiers incorporate several new technological advancements including real-time com- puter simulation of output transistor stress, low-stress output stages, an advanced heat sink embodiment and the Programmable Input Processor ( P.I.P. ) expan- sion system. Custom circuitry is incorporated to limit temperature and current to safe levels making it highly reliable and tolerant of faults. -
Page 25: Circuit Block Diagram
I I I I I II II II II II Professional Studio Amplifiers Fig. 5.1 Circuit Block Diagram... -
Page 26: Bridge-Mono Operation
output signal and the input signal from the gain pot, and drives the voltage-translator stage. From the error amp, the voltage translator stage chan- nels the signal to the Last Voltage Amplifiers (LVAs) depending on the signal polarity. The +LVA (Q104 and Q105) and the –LVA (Q110 and Q111) drive the fully complementary output stage with their push-pull effect through the bias servo Q318. -
Page 27: Specifications
I I I I I II II II II II Professional Studio Amplifiers 6 Specifications The following applies to units in Stereo mode with 8 ohm loads and an input sensitivity of 26 dB gain unless otherwise specified. refers to maximum average power in watts at 1 kHz with 0.02% THD and noise. -
Page 28: Output Signal
A three-position switch inside the P.I.P. com- partment used to select the input sensitivity for both chan- nels: 0.775 or 1.4 volts for standard 1 kHz power, or a 26 dB voltage gain. A two-position switch behind the front panel used to turn the front panel meters on or off. A two-position switch behind the front panel used to set the display mode for the front panel meters. -
Page 29: Studio Reference I Minimum Power Matrix
I I I I I II II II II II Professional Studio Amplifiers In an effort to provide you with as much information as possible about the high power-producing capabilities of your amplifier, we have created the following power matrices. Crown’s minimum power specifications represent the absolute smallest amount of output power you can expect from your amplifier when it is driven to full output under the given conditions. -
Page 30: Studio Reference Ii Minimum Power Matrix
Minimum Guaranteed Power (Watts) Maximum Average Stereo/Mono 0.1% THD+N 0.1% THD+N (See note 1) (See note 2) Mode 1 kHz 20Hz-20kHz Stereo (both channels driven) Bridge-Mono (balanced output) Parallel-Mono Stereo (both channels driven) Bridge-Mono (balanced output) Parallel-Mono Stereo (both channels driven) Bridge-Mono (balanced output) -
Page 31: Studio Reference I Maximum Power Matrix
I I I I I II II II II II Professional Studio Amplifiers Crown’s maximum power specifications represent the largest amount of output power you can expect from your ampli- fier when it is driven to full output under the given conditions. These specifications can be used to prevent loudspeaker and hearing damage. -
Page 32: Studio Reference Ii Maximum Power Matrix
Single Cycle Tone Burst Stereo/Mono 0.05% Distortion + Noise (See note 1) Mode 50 Hz 1 kHz Stereo (both channels driven) Bridge-Mono (balanced output) Parallel-Mono Stereo (both channels driven) Bridge-Mono (balanced output) Parallel-Mono Stereo (both channels driven) Bridge-Mono (balanced output) Parallel-Mono Fig. -
Page 33: Typical Frequency Response
I I I I I II II II II II Professional Studio Amplifiers Fig. 6.5 Typical Frequency Response Fig. 6.6 Typical Damping Factor Fig. 6.7 Typical Output Impedance... -
Page 34: Typical Common Mode Rejection
I I I I I II II II II II Professional Studio Amplifiers Fig. 6.8 Typical Phase Response Fig. 6.9 Typical Common Mode Rejection... -
Page 35: Typical Crosstalk
I I I I I II II II II II Professional Studio Amplifiers Fig. 6.10 Typical Crosstalk... -
Page 36: Studio Reference I Power Draw, Current Draw And Thermal Dissipation At Various Duty Cycles
7 AC Power Draw and Thermal Dissipation This section provides detailed information about the amount of power and current drawn from the AC mains by Studio Reference amplifiers and the amount of heat produced under various conditions. The calculations presented here are intended to provide a very realistic and reliable depiction of the amplifiers. -
Page 37: Studio Reference Ii Power Draw, Current Draw And Thermal Dissipation At Various Duty Cycles
I I I I I II II II II II Professional Studio Amplifiers L O A D 8 Ohm Stereo / 16 Ohm Bridge-Mono / 4 Ohm Parallel-Mono 4 Ohm Stereo / 8 Ohm Bridge-Mono / 2 Ohm Parallel-Mono AC Mains AC Mains Current Draw (Amps) Thermal Dissipation... -
Page 38: Modules
8 Accessories 8.1 P.I.P. Modules One advantage of Studio Reference amplifiers is the ability to customize them using P.I.P. (Programmable In- put Processor) modules. Each amplifier is equipped with an edge card connector inside the back panel P.I.P. compartment. The modules install easily: Fig. - Page 39 I I I I I II II II II II Professional Studio Amplifiers pressors, it only compresses the signal to prevent over- load. It can deliver up to 13 dB of additional headroom without being noticeable. C H - 2 I N P U T THIS P.I.P.
-
Page 40: Worldwide Service
9 Service This unit has very sophisticated circuitry which should only be serviced by a fully trained technician. This is one reason why each unit bears the following label: 9.1 Worldwide Service Service may be obtained from an authorized service center. - Page 41 I I I I I II II II II II Professional Studio Amplifiers Crown Factory Service Information Shipping Address: Crown International, Inc., Factory Service, 57620 C.R. 105, Elkhart, Indiana 46517 Phone: 1-800-342-6939 or 1-219-294-8200 Fax: 1-219-294-8301 (Be sure to describe the conditions that existed when the problem occurred and what attempts were made to correct it.) I I I I I I I I I I I I I I I...
Need help?
Do you have a question about the STUDIO AMPLIFIER and is the answer not in the manual?
Questions and answers