Table of Contents
Advertisement
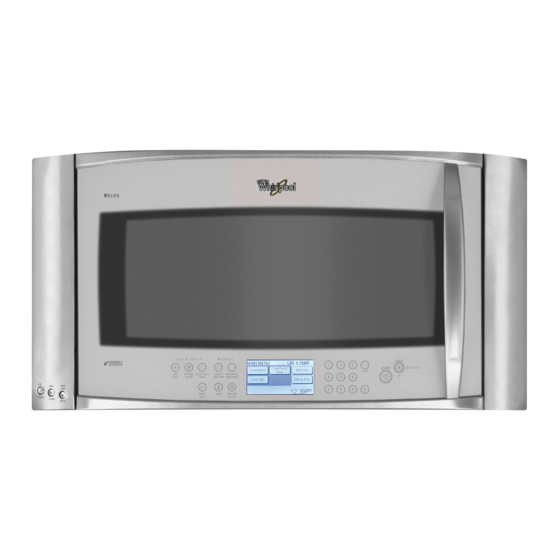
®
SPEEDCOOK
MICROWAVE HOOD
COMBINATION WITH
CONVECTION
Use & Care Guide
For questions about features, operation/performance,
parts, accessories or service, call: 1-800-253-1301.
or visit our website at...
www.whirlpool.com
Table of Contents .......................................2
Model GH7208XR
8206204
Advertisement
Table of Contents

Related Manuals for Whirlpool Gold GH7208XRY


Summary of Contents for Whirlpool Gold GH7208XRY
- Page 1 ® SPEEDCOOK MICROWAVE HOOD COMBINATION WITH CONVECTION Use & Care Guide For questions about features, operation/performance, parts, accessories or service, call: 1-800-253-1301. or visit our website at... www.whirlpool.com Table of Contents ...2 Model GH7208XR 8206204...
-
Page 2: Table Of Contents
MICROWAVE HOOD COMBINATION SAFETY ...3 Electrical Requirements ...5 PARTS AND FEATURES...5 Microwave Oven Cavity Coating ...6 Microwave System – ACCUWAVE ® Technology...6 Grill Element ...6 Convection Element and Fan...6 Turntable ...7 ACCESSORIES ...7 Sizzle Pan and Handle ...7 Grill Rack ...7 Convection Rack...8... -
Page 3: Microwave Hood Combination Safety
– Use extreme care when inserting a spoon or other utensil into the container. Oversized foods or oversized metal utensils should not be inserted in the microwave oven as they may create a fire or risk of electric shock. Do not clean with metal scouring pads. Pieces can burn off the... -
Page 4: Precautions To Avoid Possible Exposure To Excessive Microwave Energy
Do not cover or block any openings on the microwave oven. Do not store this microwave oven outdoors. Do not use the microwave oven near water - for example, near a kitchen sink, in a wet basement, or near a swimming pool, or similar locations. -
Page 5: Electrical Requirements
E. Halogen cooktop lights (2) Electrical Requirements For all cord connected appliances: The microwave oven must be grounded. In the event of an electrical short circuit, grounding reduces the risk of electric shock by providing an escape wire for the electric current. -
Page 6: Microwave Oven Cavity Coating
The convection system is embedded in the wall of the microwave oven cavity, behind the protective screen. See “Parts and Features.” The microwave oven cavity and door will become hot. The use of oven mitts is recommended. -
Page 7: Turntable
The rollers on the support should fit inside the turntable bottom ridge. The following accessories have been provided with your new microwave oven. Any of the parts may be ordered for replacement. Sizzle Pan and Handle... -
Page 8: Convection Rack
Convection Rack The short convection rack is designed to be used with the convection element and fan for true convection cooking. See “Convection Bake” and “Convection Roast” sections. Place the convection rack on the turntable, and position dish with food on the rack. -
Page 9: Microwave Oven Control
The microwave oven’s controls are accessed through its control panel and interactive touch display. NOTE: Due to the sensitivity of the control panel, we have provided special instructions for cleaning the panel as well as the touch screen display. See “General Cleaning” section for cleaning instructions. -
Page 10: Main Menu
The Main Menu is displayed on the default screen. Time / Temp / Cook Method Power Food Type Kids Menu From the Main Menu, all automatic cooking programs can be activated; all manual cooking can be programmed; settings can be adjusted; and instructions, preparation and tips can be accessed. -
Page 11: Settings & Info
While the poultry breasts are being pan browned, the cooking animation and countdown are active in the display. About halfway through the cycle, the microwave oven will stop, and the display will direct you to turn over the poultry breasts. -
Page 12: Clock
This is a standard 12-hour clock (12:00 AM-11:59 PM), or a 24-hour clock (0:00-23:59). When power is first supplied to the microwave oven, or after a power failure, the “Welcome” screen will appear, asking whether you would like to set the clock. If you choose to set the clock at that time, the display will take you directly to the Clock screen. -
Page 13: Tones
If non-sensor cooking is interrupted, touching the START control pad will resume the preset cycle. If the microwave oven has not been in use and the door has not been opened in the past 5 minutes, the cooking function will not start. -
Page 14: Trucapture Vent Fan, Cooktop Light And Night Light
TRUCAPTURE ® Vent Fan, Cooktop Light and Night Light The microwave oven’s hood controls, on the lower, left side of the microwave oven (see “Parts and Features”) operate the vent fan and cooktop lights. ® TRUCAPTURE Vent Fan The vent fan has 4 speeds: boost, high, medium and low. -
Page 15: Microwave Oven Use
Do not lean on or allow children to swing on the microwave oven door. Do not operate microwave oven when it is empty. -
Page 16: Aluminum Foil And Metal
Always use oven mitts or pot holders when removing dishes from the microwave oven. Aluminum foil and some metal can be used in the microwave oven. If not used properly, arcing (a blue flash of light) can occur and cause damage to the microwave oven. -
Page 17: Manual Cooking
The cook time may be set in hours and minutes. The temperature may be set from 100°F (38°C) to 450°F (232°C) in 5-degree increments. NOTE: The microwave cooking power may be set to 0%, 10%, 20% or 30%. The default power is 0%. To Use: 1. -
Page 18: Raising (Proofing) Bread
Doing so can result in food poisoning or sickness. Hot cooked food can be kept warm in the microwave oven. The Warm Hold function uses 10% cook power. Warm Hold can be used by itself, or it can be programmed to follow a cooking cycle. -
Page 19: Cooking In Stages (Or Steps)
Check for doneness after the cycle has ended. If the food is not completely done, let it stand in the microwave oven for a few minutes to finish cooking. During any automatic or manual combination cycle, no more than 30% microwave power is used. -
Page 20: Preheating
The microwave oven will estimate the preheat time, and will maintain the preheat temperature for up to 2 hours, or until the microwave oven is re- programmed or turned off. Preheating may be skipped after it has started by touching “Skip Preheat”... -
Page 21: Reheat
To Use: Touch “Cook Method” on Main Menu, touch “Bake,” and then follow screen prompts to make your selections, prepare your food and/or microwave oven for baking, and start the cycle. After Baking The food, convection rack, microwave oven cavity and door will be very hot. -
Page 22: Melt
Grill cycle. The use of oven mitts is recommended. The grill rack and Sizzle Pan will become very hot. Use oven mitts to grasp and remove the pan from the microwave oven. Do not place hot Sizzle Pan directly on heat-sensitive surfaces. -
Page 23: Boil & Simmer
Do not use metal utensils, as they can scratch the pan. Do not use the Sizzle Pan in any other microwave oven or in a standard thermal oven. Do not place the Sizzle Pan on the grill rack or the convection rack. -
Page 24: Steam Cook
(295 mL) water in the base, place food in the insert, place the insert in the base and cover. Do not remove the lid while the vessel is inside the microwave oven, as the rush of steam will disrupt the sensor readings. -
Page 25: Food Type Chart
Use this chart as a reference for menu items available in the “Food Type” menu FROZEN FOOD Frozen Entrée Regular (8-20 oz [227-567 g]) - Cook Large (40 oz [1.1 kg]) - Cook Family Size (60 oz [1.7 kg]) - Cook Pizza Kids Pizza 5"... - Page 26 VEGETABLE Canned Vegetable Cook Fresh Vegetable Asparagus - Cook or Steam Cook Baked/Sweet Potato - Cook Red Potato - Steam Cook Broccoli - Cook or Steam Cook Carrots - Cook or Steam Cook BEVERAGE & SOUP Beverage Reheat Frozen Juice Soften GRAINS: PASTA/RICE Canned Pasta...
-
Page 27: Cook Method Chart
DESSERT Angel Food Cake Convection Bake Brownies Convection Bake or Sizzle Pan Caramel Melt Caramel Dip Soften MISCELLANEOUS Butter/Margarine Melt or Soften Cheese Melt Cream Cheese Soften Use this chart as a reference for menu items and amounts available in the “Cook Method” menu. REHEAT Beverage 1 or 2 cups (250-500 mL) - Page 28 COOK Frozen Food Frozen Entrée - Regular: senses 8-20 oz (227-567 g) - Large: 40 oz (1.1 kg) - Family: 60 oz (1.7 kg) Pizza Roll: 1-4 servings Frozen Vegetable: senses 2-6 cups (500 mL-1.5 L) Burrito: 1 or 2 burritos Cheese Sticks: 1-4 servings Frozen Fish - Fillet, Breaded: 1-4 servings...
- Page 29 MELT Butter/Margarine 0.5, 1.0, 1.5 or 2 sticks or 1-8 tbs (15-120 mL) Caramel 7 or 14 oz (199 or 397 g) Cheese 8 or 16 oz (227 or 454 g) SOFTEN Butter/Margarine 0.5, 1.0, 1.5 or 2 sticks or 1-8 tbs (15-120 mL) Caramel Dip 18 oz (510 g) Cream Cheese...
- Page 30 SIZZLE PAN Baked Goods Biscuit, Refrigerated - Regular: 5 or 10 biscuits - Large: 5 or 8 biscuits Brownies: 20 oz (567 g) package Cookies: 4, 6 or 8 cookies Muffins: 4, 6 or 8 muffins Roll, Refrigerated - Regular: 4 or 8 rolls - Large: 5 or 6 rolls Frozen Food Cheese Sticks: 1-4 servings...
-
Page 31: Microwave Oven Care
IMPORTANT: Before cleaning, make sure all controls are off and the microwave oven is cool. Always follow label instructions on cleaning products. Soap, water and a soft cloth or sponge are suggested unless otherwise noted. GREASE FILTERS Do not use ammonia or corrosive cleaning agents such as lye- based oven cleaners. -
Page 32: Replacing Filters
The grease filters should be removed and cleaned at least once a month. The charcoal filters cannot be washed and should be replaced every 6 to 12 months. Do not operate the microwave oven without the filters in place. See “Replacement Parts”... -
Page 33: Replacing Microwave Oven Light
The microwave oven light is a 10W low-voltage halogen capsule bulb. It will automatically come on when the door is opened and when the microwave oven is operating. See “Assistance or Service” section to reorder. You will need a TORX screwdriver to remove the bulb cover. -
Page 34: Troubleshooting
Fan running slower than usual Has the microwave oven been stored in a cold area? The fan will run slower until the microwave oven warms up to normal room temperature. Fan running during cooktop usage This is normal. The microwave oven’s cooling fan, which is separate from the vent fan, automatically comes on during microwave oven operation to cool the microwave oven. -
Page 35: Assistance Or Service
ASSISTANCE OR SERVICE For further assistance If you need further assistance, you can write to Whirlpool Corporation with any questions or concerns at: Whirlpool Brand Home Appliances Customer eXperience Center... -
Page 36: Warranty
If you need service, first see the “Troubleshooting” section of the Use & Care Guide. After checking “Troubleshooting,” additional help can be found by checking the “Assistance or Service” section or by calling Whirlpool. In the U.S.A., call 1-800-253-1301. In Canada, call 1-800-807-6777.
Need help?
Do you have a question about the Gold GH7208XRY and is the answer not in the manual?
Questions and answers