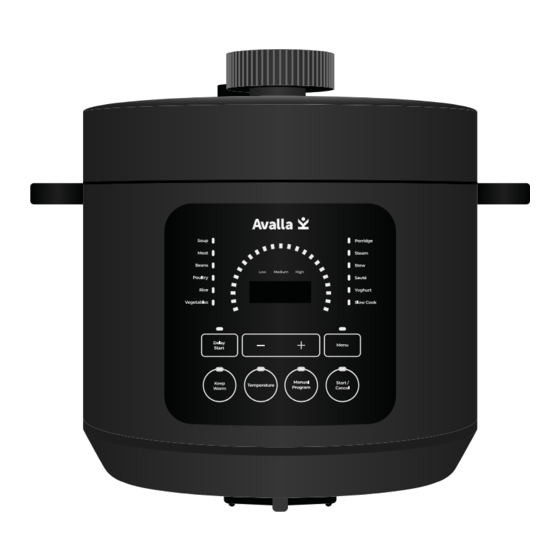
Summary of Contents for Avalla K-45
- Page 1 Pressure Cooker Multi-Cooker K-45 K-90 Read this manual carefully before use and keep it for future reference. Failure to do so may result in injury, property damage and may void the warranty. avalla.com...
-
Page 2: Table Of Contents
Contents Designed with safety in mind Parts guide: K-45 First time set up: K-45 Display guide: K-45 Using your K-45 Parts guide: K-90 First time set up: K-90 Display guide: K-90 Using your K-90 Cleaning and storage Health and safety •... -
Page 3: Designed With Safety In Mind
If the cooker lid will not unlock, this indicates that it is still under pressure, do not force it. Once the pressure has dropped the lid will unlock and you will be able to open it. (See 'Using your K-45' or 'Using your K-90') It is normal for steam to vent from the cooker during the cooking program. -
Page 4: Parts Guide
Parts guide: K-45 01. Cooker lid 07. Condensation cup 02. Control panel 08. Heat shield 03. Cooking pot 09. Silicone grab point 04. Pressure release valve 10. Silicone ring 05. Float valve 11. Anti-clog cap 06. Lid pin... -
Page 5: First Time Set Up
First time set up: K-45 Remove all packaging. Remove the 'Cooker lid' by turning it clockwise and take out the spatula and 'Condensation cup' from the 'Cooking pot'. Remove the 'Heat shield' from the underside of the 'Cooker lid' by pulling the 'Silicone grab point' firmly. Then remove the 'Silicone... -
Page 6: Display Guide
Display guide: K-45 12. Digital display 17. Function indicator 13. Soup mode 18. Rice mode 14. Function selection 19. Time adjust (Up) 15. Time adjust (Down) 20. Delay start 16. Keep warm / Cancel Default cooking times The table below shows the default cooking times for each cooking program. -
Page 7: Using Your
Using your K-45 Set - cooking programs Press either 'Function selection' to cycle through the cooking programs or you can select 'Soup' or 'Rice'. The default cooking time will be displayed, you can also adjust the time manually using the 'Time adjust' buttons. -
Page 8: Parts Guide
Parts guide: K-90 01. Cooker lid 07. Heat shield 02. Control panel 08. Silicone grab point 03. Cooking pot 09. Silicone ring 04. Quick vent button 10. Lid pin 05. Pressure release valve 11. Anti-clog cap 06. Float valve... -
Page 9: First Time Set Up
First time set up: K-90 Remove all packaging. Remove the 'Cooker lid' by turning it clockwise and take out spatula from the 'Cooking pot'. Remove the 'Heat shield' from the underside of the 'Cooker lid' by pulling the 'Silicone grab point' firmly. Then remove the 'Silicone ring' from the 'Heat shield'. Clean the 'Cooker lid', 'Cooking pot', 'Silicone ring' and 'Heat shield' in warm soapy water and then dry thoroughly. -
Page 10: Display Guide
Display guide: K-90 12. Program indicator 18. Light arc 13. Temperature indicator 19. Time adjust (Up / Down) 14. Digital display 20. Menu 15. Delay start 21. Start / Cancel 16. Keep warm 22. Manual program 17. Temperature Default cooking times The table below shows the default cooking times for each cooking program. -
Page 11: Using Your
Using your K-90 Set - cooking programs Press 'Menu' to cycle through the cooking programs. The default cooking time and temperature will be shown. You can adjust cooking time using the 'Time adjust' buttons and press 'Temperature' to cycle through the three temperature settings. Set - manual program cooking Press 'Manual program' to set your own time and temperature. -
Page 12: Cleaning And Storage
- cooker. Caution - Never put the cooker base or lid in the dishwasher or immerse it in water or any other liquid. Only use genuine Avalla silicone rings designed for this specific model. Health and safety Symbols from the unit and packaging... - Page 13 The following must always be observed for safety • Extreme care must be taken when this unit is under pressure. It cooks under pressure. Make sure the unit is properly sealed prior to operation. Do not attempt to open the cooker lid until all pressure has been released from the •...
- Page 14 Do not place food or liquid into the cooker base, it must be put into the • cooking pot only. Use only original Avalla silicone rings, do not use this product if the silicone ring is torn or damaged. Never use this product without the silicone ring in place •...
-
Page 15: Disposal
Does Not Rise directions Specifications K-45 K-90 Power 701-800W 1000-1200W Bowl Capacity 2.5L Dimensions 275*247*270mm 345*290*290mm Weight 3.0Kg 4.6Kg Working Pressure 50kPa 50/55/60kPa Avalla Ltd. Unit A 73, Common Road, Chandler’s Ford, Eastleigh, SO53 1HE. United Kingdom Company no. 13477899 support@avalla.com...


Need help?
Do you have a question about the K-45 and is the answer not in the manual?
Questions and answers