Table of Contents
Advertisement
Quick Links
Advertisement
Table of Contents

Summary of Contents for Amigo AeroTow T1
- Page 1 AeroTow User manual Are you ready to go? 989-777-0910 AmigoAeroTow.com...
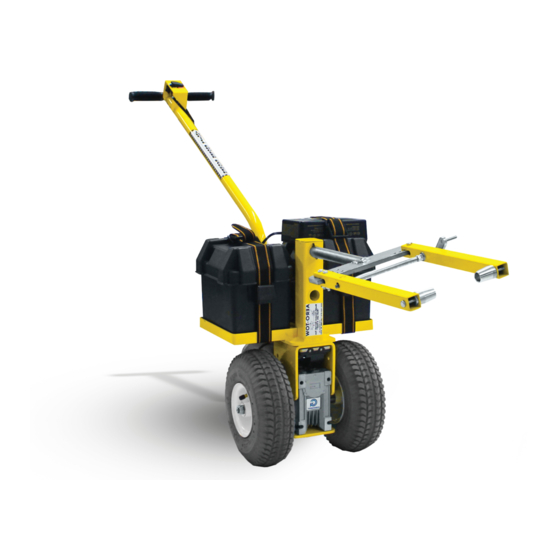
- Page 2 Specs & Precautions BOLT Battery- Drive train Battery & Charger Controls 445 watt / .6 hp x2 12V, AGM batteries. Electric, forward / drive Dual bank 2 amp QV reverse. charger Power, on / off Tires Weight capacity T1 Weight 10”...
- Page 3 Charging info For maximum range and battery life, it is recommended to fully charge the battery before each use Extended charging is good for the battery and will not overcharge them With a built-in overcharge protection feature, the battery should be charged whenever it is not in use The charger is preprogrammed to be optimized to charge the included AGM batteries.
-
Page 4: Charging Indicators
Charging indicators The 25% Charge LED will slowly pulse when the battery is less than 25% fully charged. When the battery is 25% charged, the Charge LED will be solid The 50% Charge LED will slowly pulse when the battery is less than 50% fully charged. -
Page 5: Diagnostic Codes
Diagnostic codes Error Conditions will be indicated by a solid LED light. If lights are flashing, then the charger internal temperature too high / charger will resume function once the charger internal temperature drops Charger is in Standby mode or Battery voltage is too low for charger to detect Battery voltage is too high for the selected charge mode. -
Page 6: Adjusting The Handle
Adjusting the handle Loosen the nut on pin (C) with a 7/16” wrench and remove 2. To remove pin (D), pull the ends apart and remove pin 3. Carefully adjust the height of the handle to desired height 4. Return pins and secure / tighten 5. - Page 7 Choose a comfortable height adjustment for pulling your aircraft, not for maneuvering the T1 without a plane attached 56” 39” 35” 26” 21” Height from ground when handle is parallel The handle can be adjusted by removing the handle bolt and repositioning the handle to a different hole on the handle connector, tighten the handle bolt using two (2) 7/16”...
- Page 8 Your AeroTow T1 comes with the recommended length prongs for the aircraft you provided (2) Tow pin adapters Your AeroTow T1 comes with the recommended adapter for the aircraft you provided at the time of order (3) Locking bar lever...
-
Page 9: Handle Controls
Moving your aircraft Check the surrounding area, and remove any obstacles or obstructions before moving your aircraft, remove chocks Return to the handle of the tug Turn power on and move your aircraft using the reverse / forward switch located on the front of the handle control box Disconnecting your aircraft Chock your aircraft. -
Page 10: Wiring Diagram
Wiring diagram 13004 12661 12773 13013 12663T1 12774 12700 13042 12771 12709 12771 8967 8967 12641 12642 Tacktile indicator Tactile indicator to the left to the left amigoaerotow.com 989-777-0910 service@myamigo.com... - Page 11 Documentation Date: Notes: Date: Notes: Date: Notes: Date: Notes:...
- Page 12 1-989-777-0910 1023-R4 service@myamigo.com amigoaerotow.com 989-777-0910 service@myamigo.com...
Need help?
Do you have a question about the AeroTow T1 and is the answer not in the manual?
Questions and answers