Advertisement
This quick start guide contains basic instructions to get you started. For the full picture, please refer to the
supplied manual which has comprehensive usage instructions and important safety advice.
A
Setting up the pizza oven
Your new pizza oven has a number of different options for cooking delicious pizzas, vegetables, roasts, and
1
baked goods.
Place the appliance on a flat, dry surface. Ensure there is at least 10 cm of space on both sides and
2
15 cm of space above the pizza oven, and that it is placed in a well-ventilated area (as it will emit smoke
during cooking).
Clean the oven and pizza stone, as described on pages 22-24 of the instruction manual.
3
Ensure the pizza stone has been placed in the pizza oven. Then, plug in the oven.
CAUTION: Do not touch hot surfaces!
4
during use. Always use oven mitts when the oven is operating.
Turn the MENU/TIME/TEMP dial to select the desired function (see section D of this quick start guide). The
selected function will illuminate on the display screen. Press the dial to confirm this option.
If you select the "Pizza" function, you can then use the PIZZA STYLE dial to select the desired pizza setting
If necessary, adjust the cooking time by turning the MENU/TIME/TEMP dial. Press the dial again to confirm.
Then, turn the MENU/TIME/TEMP dial to adjust the temperature. Press the dial for a third time.
Press the START button to begin the preheating process. Once the oven has preheated, an alert will sound.
Then, open the oven door and add your food. The oven and pizza stone will be extremely hot, so take care,
Quick Start Guide
The oven interior and other accessible surfaces can get very hot
6
Once the timer has ended, and your food is ready, an alarm will sound.
Please note, you can press the CANCEL button at any time to enter standby mode.
Press the oven light button at any stage to turn the internal light on or off.
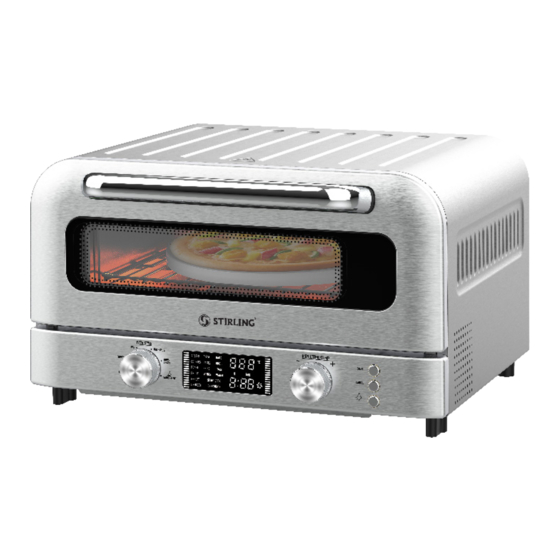
Let's get your new pizza oven
Using the control panel
(see section C of this quick start guide).
and wear heatproof gloves. Close the door.
Press the START button again to start the timer.
Model: STR-PO400
ready to use!
5
Turn over the page for usage
instructions ...
B
9
12
13
5
6
7
8
9
10
11
12
13
Advertisement
Table of Contents

Related Manuals for Stirling STR-PO400


Summary of Contents for Stirling STR-PO400
- Page 1 Quick Start Guide Model: STR-PO400 Let’s get your new pizza oven ready to use! This quick start guide contains basic instructions to get you started. For the full picture, please refer to the supplied manual which has comprehensive usage instructions and important safety advice.
- Page 2 Selecting a pizza style 180℃: The 180°C mode will allow for a traditional oven style cooking result.Please note that the cooking time can vary depending on the foodstuff being cooked. “Wood Fired”: This mode provides extremely high heat. It is ideal if you like your pizzas with a cooked yet malleable crust, with distinct blisters (please note, no actual wood is used in this mode).
Need help?
Do you have a question about the STR-PO400 and is the answer not in the manual?
Questions and answers