Table of Contents
Advertisement
Quick Links
Advertisement
Table of Contents

Summary of Contents for Turtle Tough TT640C
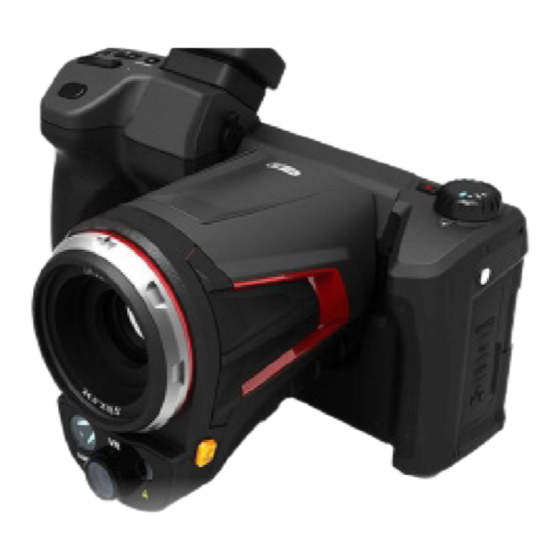
- Page 1 TURTLE ® TOUGH MANUAL TT640C THERMAL IMAGING CAMERA turtletoughsensors.com...
-
Page 2: Table Of Contents
Table of Contents Important Instructions ................... 5 Cautions ........................5 Dangers ................... 5 Warnings..................5 Product Introduction ..................... 7 Storage and Transportation ................. 7 Storage .................... 7 Transportation ................7 Included Accessories ..................... 8 Optional Accessories ..................... 9 Function Guide ..................... 10 Operation Interface Overview ................ - Page 3 Image Shooting ................23 Panoramic Stitching ..............25 Super-resolution ................25 Timed Shooting ................26 Setting Automatic Images ............26 Setting Automatic Shooting Interval ........27 Video Recording ................27 Timed Video Recording .............. 28 Analysis Operation ....................29 Real-time Analysis ............... 29 Add/delete Analysis Objects .............
- Page 4 Save Parameters ................53 Laser Ranging ................53 Report Parameters ..............54 Preference Settings ..............55 Password Lock ................55 Shutdown and Sleep ..............56 Cloud Service ................57 Wi-Fi ....................58 Network Connections ..............59 Bluetooth ..................62 General..................63 Software Upgrade ...............
-
Page 5: Important Instructions
Important Instructions This manual is a general manual for a series of products and means that the product of a specific model you received may differ from the picture herein. Please refer to the material object. This user manual is prepared for the convenience of users to understand our products. - Page 6 Do not use soluble or similar liquids for the device and cables, which may • cause damage to the device. Do not use the device at a temperature higher than its operating • temperature, which may cause damage. Do not place the battery in a high temperature environment or near high- •...
-
Page 7: Product Introduction
Product Introduction This product is specially designed for professional users in the infrared temperature measurement industry, equipped with a high-sensitivity and higher- resolution infrared detector, and can provide clearer infrared images and higher temperature measurement accuracy. Supplemented by the Android operating system, large screen display and rotatable lens structure, it is powerful and convenient to use. -
Page 8: Included Accessories
Included Accessories Thermal Imager Lens Cover Lithium Battery x2 Adapter Plug (5 pcs) TYPE-C to USB HDMI Cable Network Cable Shoulder Harness Interface Cable Adapter Calibration Certificate Hard Safety Box SD Card (64G) turtletoughsensors.com.au... -
Page 9: Optional Accessories
Optional Accessories Lithium Battery Desktop Charger Bluetooth Headset USB Adapter Cable Tele Lens Wide Angle Lens High Temp Filter Macro Lens 4G Module Carrying Bag Lens Bag Medium Telephoto lens turtletoughsensors.com.au... -
Page 10: Function Guide
Function Guide LCD/Eyepiece Switch Button Customize Laser Ranging Button Digital Zoom Photo/Video record Speaker IR lens Illuminator Laser Indicator View Finder Diopter Regulator Power on/off Mode dial Visible light Micro HDMI Type-C AC adapter RJ 45 turtletoughsensors.com.au... - Page 11 Direction key MENU Return Replay Auto/Manual (Brightness, Contrast Change) Microphone LCD Monitor Screen Tripod Connection SD Card Socket Battery Housing turtletoughsensors.com.au...
-
Page 12: Operation Interface Overview
Operation Interface Overview Real-time Image Interface Emissivity. Set the emissivity value based on the measured target. Temperature measurement range. Click to enter the interface of temperature measurement range setting. Temperature measurement parameters. Click to enter the interface of temperature measurement parameter setting (relative humidity, distance and atmospheric temperature, etc.). -
Page 13: Playback Main Interface
Playback Main Interface Press the “Gallery” button on the device body. • You will then enter the gallery browsing interface. • turtletoughsensors.com.au... - Page 14 Touch and select the image to view and edit. • turtletoughsensors.com.au...
- Page 15 In the Image Preview interface, click any image to enter the Image Edit interface. Click any area outside the menu to preview the current infrared image in full screen. Click to collect the current image. Click to modify the current image name. There are three ways of naming on this device: text recognition naming, keyboard input naming and voice naming.
-
Page 16: Shortcut Main Menu
Shortcut Main Menu The shortcut menu button is . The interface is used mainly for shortcut operations in Real-time Images, including image analysis, temperature measurement analysis, parameter modification, graphic stroke, isotherm, temperature difference and other shortcut operations. turtletoughsensors.com.au... -
Page 17: Quick Pull-Up Menu
Exit the shortcut menu: Press the “Back” button on the device or click {<} and other screens to exit the shortcut menu and return to the Real-time interface status. Quick Pull-up Menu In the Real-time Image interface, click or slide up the icon at the bottom of the screen to pop up a shortcut menu. -
Page 18: Observation
Observation Eyepiece Switch The LCD screen is set by default to display the main interface after startup. Press the LCD/Eyepiece Switch button, and then the LCD screen will be closed immediately, and the eyepiece will be opened. Press the LCD/Eyepiece Switch button again to restore the LCD screen display and close the eyepiece. - Page 19 Picture-in-picture (PIP) Navigate to the PIP identifier. Infra-Red (IR) Navigate to the IR identifier. turtletoughsensors.com.au...
- Page 20 C. Visible light (VL) Navigate to the VL identifier. D. MIF Navigate to the MIF identifier. turtletoughsensors.com.au...
-
Page 21: Temperature Measurement
Temperature Measurement In the Real-time Image state, select the emissivity of the measured object by clicking the “Emissivity” bar. Press “Back” button or click any area on the screen other than the menu to return to the real-time interface and aim the center cursor at the measured object for temperature measurement. -
Page 22: Manual Focus/Auto Focus
Manual Focus/Auto Focus Use the “Up” or “Down” key to adjust the far focus/near focus. To customize the function, use the “C” button as auto focus (set–button assist–auto focus, see the button assist section for details), aim at the object to be measured, press the custom “C”... -
Page 23: Shooting
Shooting Image Shooting In the Real-time Image state, press the “Shoot” button on the device to freeze the current scene, take images and save. Enter the Setting–Shoot mode, and directly set the function of Shoot button as image shooting, thus achieving one-button shooting. turtletoughsensors.com.au... - Page 24 Press the “Shoot” button on the device, and the image is frozen, as shown • in the figure. In the frozen interface, press “Shoot” again to automatically save the frozen • image. turtletoughsensors.com.au...
-
Page 25: Panoramic Stitching
Panoramic Stitching Users may enable the “Panoramic Stitching” shooting function according to their own requirements. This function is to stitch two or more images taken by the device into one panoramic image. This function needs to be supported by ThermoTools analysis software– “Image Stitching”. Super-resolution Users may enable the super-resolution shooting function according to their own requirements. -
Page 26: Timed Shooting
Timed Shooting In the Real-Time Image state, enter the settings–Shoot Mode–Image Shoot • Mode interface, and enable the timed shooting function. Setting Automatic Images Click the Image Number option and select the number of images. • Return to the Real-time Image status, click the “Shoot” button, and activate •... -
Page 27: Setting Automatic Shooting Interval
Setting Automatic Shooting Interval Click the Time Interval option to select the appropriate time interval. • Return to the Real-time Image status, click the “Shoot” button, and activate • the timed photo program according to the set number of timed shooting photos. -
Page 28: Timed Video Recording
Timed Video Recording Click the Delay Time option and select the delay time, provided with 20s, • 1min, 5min, 10min and 15min for selection. Click the duration option, and select the recording duration: 30s, 1min, • 5min, 10min, 30min and 60min respectively. Return to the Real-time Image status after setting. -
Page 29: Analysis Operation
Analysis Operation Real-time Analysis Add/delete Analysis Objects Click the shortcut menu on the right of the real-time interface to enter • the menu interface of adding analysis objects (See figure below). Providing temperature measurement for various analysis objects, such as point, line, circle and rectangle. - Page 30 Change the Size of the Analysis Object Select any analysis object, all its nodes are selected, and the color is • presented in yellow mark Move any node to change the area of the analysis object. • turtletoughsensors.com.au...
- Page 31 Linear Analysis Object Up to 3 linear analysis objects can be added and displayed synchronously in real time in the form of a line chart when the analysis objects are selected. Palette Switch Enter the main interface, click the palette area on the right side of the •...
- Page 32 Graphic Stroke Click the shortcut menu on the right of the real-time interface to manually draw the outline of the interested target. Click to generate the target and analyze the currently selected target. Editing and Deleting of Graphic Strokes Long press the stroked object through the touch screen, and the system will automatically pop up the object menu.
- Page 33 Temperature Difference Analysis Temperature difference analysis: first, add at least two analysis objects, and click the temperature difference button under the object label to activate the temperature difference mode. Exit the temperature difference analysis: enter the shortcut menu-temperature difference and click the △ icon again to exit the temperature difference mode.
- Page 34 LEVEL adjustment: In the real-time interface of infrared mode, click to enter the manual dimming mode, the dimming parameters are unlocked, and the "LEVEL" can be adjusted by the “Up” key or the “Down” key in the five-directional key. The “Up” key is to increase Tmax and Tmin values at the same time, and the “Down”...
-
Page 35: File Browsing
File Browsing Native files: Press the playback button to enter the main interface of file browsing, select native, and the system will automatically display all files stored in the ROM. SD card files: Press the playback button to enter the main interface of file browsing, select SD card, and the system will automatically display all files in the external SD card. -
Page 36: Image Analysis
Image Analysis Image Editing In the Image Preview interface, click any image to enter the Image Edit • interface. Click button, and the system will automatically pop up the annotation • menu, where you can perform voice and text annotation on the current image. - Page 37 Click “Parameter” to modify other attributes and save the settings after • exiting. As shown in the figure. Parameter Introduction Reflection The user may modify the parameters according to the Temperature actual situation, and the value range is -40–2000. Target The user may modify the parameters according to the Distance actual situation, and the value range is 0–100.
- Page 38 Image Zoom In the image editing mode, touch the screen with two fingers, and then splay your fingers on the screen to zoom in up to 10 times. Close your fingers and the image will be zoomed out. When the infrared image is enlarged, the infrared image can be moved for display by sliding a single finger in any area of the screen.
- Page 39 Create PDF Press the playback button to enter the image browsing interface. Click the “Select” button, and you can select 5 image information at will, • as shown in the figure. Click the “PDF” button below to generate a PDF preview file. •...
- Page 40 Video Playback Press the playback button to enter the gallery browsing interface and click • “Video” to enter the video interface. Click the “Play” button in the center of the screen to start playing the short • film. Click the screen to display the short film playback panel. To pause the video during playback, click the pause button at the bottom of the screen.
-
Page 41: Isotherms
Isotherms Upward Isotherm Click the shortcut menu and slide the object interface down to the isotherm bar. In the isotherm bar, touch to enter the upward isotherm real- time video image mode. As shown in the figure. Downward Isotherm Click the shortcut menu and slide the object interface down to the isotherm bar. - Page 42 Intra-field Isotherm Click the shortcut menu and slide the object interface down to the isotherm bar. In the isotherm bar, touch to enter the intra-field isotherm real- time video image mode. As shown in the figure. Extra-field Isotherm Click the shortcut menu and slide the object interface down to the isotherm bar.
-
Page 43: Custom Emissivity
Isotherm Cancellation Click the shortcut menu and slide the object interface down to the isotherm bar. In the isotherm bar, touch to turn off the isotherm display, as shown in the figure. Custom Emissivity Click to enter emissivity and select “Custom”. At present, various preset values are provided as shown in the figure. -
Page 44: Global Setting
Global Setting In the real-time video interface, click the Settings button to enter the global setting interface, where mainly various parameters of the system can be modified, including shooting mode, temperature alarm, image mark, unit, network connection and so on. Search Click the “Search”... -
Page 45: Settings Cancellation
Settings Cancellation After the user has set the required parameter settings, click the “Cancel” button to return to the higher-level setting interface. Temperature Alarm The alarm temperature thresholds contain high temperature and low • temperature. The alarm temperature value is the value of the currently set temperature •... - Page 46 Return to the real-time video interface. If the temperature in the scene is • higher than 35.6°C, the equipment will give an audible alarm. Click the alarm icon to immediately turn off the high temperature alarm • sound. Turn on the low temperature alarm switch, and the user may set the alarm •...
-
Page 47: Image Marks
Image Marks Enter Settings–Image Marks to find the GPS information, compass information, date, time, cursor, logo and color band provided by the system; The user may enable part or all the displayed information according to requirements. By default, the tracking modes of high temperature, low temperature and average temperature in the control real-time screen are not displayed. -
Page 48: Image Watermark
Image Watermark Enter Settings–Image watermark settings to enable some watermark • options, including logo watermark, date watermark, humidity watermark, GPS, orientation, emissivity, emission temperature and target distance watermark. Go back to the Real-time Image and take an example image. • Press the shortcut playback button to enter the image browsing interface, •... -
Page 49: Key Assist
Key Assist Set “C” key of the physical button of the device for quick operation, including task management, shutter compensation, replacement of color band, etc. turtletoughsensors.com.au... -
Page 50: Task Management
Task Management This device supports creating local task lists, including task name, place and time. Enter the task management interface through the “key assist” function. Click the “+” button in the upper right corner to create a new task list. Click “+” to enter the interface of creating tasks, click “Name”... - Page 51 After the task is created, the device supports creating multiple album names under the task list. As shown in the figure: Click the “Select” button to enter the editing album mode, under which • there are Rename, Delete and Start task. Rename Click this icon to enter the album renaming interface.
-
Page 52: Unit Switch
Unit Switch You may switch the units of Celsius, Fahrenheit and Kelvin displayed by the system as required, but the default temperature unit is °C There are three distance units to choose from: meters, yards and inches. The default distance unit is m. turtletoughsensors.com.au... -
Page 53: Save Parameters
Save Parameters For the resolution setting of visible light image, there are three options (providing 1024*768, 5M and 8M for some products), which are only applicable to infrared mode and visible light mode. In PIP or Blending Mode, the resolution is 640*480. Laser Ranging Enable the laser ranging function and go back to the real-time interface. -
Page 54: Report Parameters
Report Parameters PDF report parameters including Logo, header, footer and PDF template (three setting templates are provided) can be modified. turtletoughsensors.com.au... -
Page 55: Preference Settings
Preference Settings Users may add global preferences according to their own operating habits and can also change and delete preferences; The default of the system is: default preference (except that the color band can be adjusted, other parameters should be consistent with the factory values). Password Lock Users may utilize the password protection function in device startup. -
Page 56: Shutdown And Sleep
Shutdown and Sleep Set timing shutdown and sleep time. Set the automatic sleep option to 1min, 5min and 15min as available options. The default setting is “Never”. turtletoughsensors.com.au... -
Page 57: Cloud Service
Set the automatic shutdown option to 5min, 10min, 30min, 60min as available options. The default setting is “Never”. Cloud Service Users may register/log in to “Cloud Service” depending on their needs, upload pictures on this device to the server, or download them through “Thermal tools” software, analyze and share them. -
Page 58: Wi-Fi
Wi-Fi Select a network. Click on one of the listed networks and enter the password (if necessary). Enter the connection interface after the password is successfully inputted. Note: To ensure the reliable connection of Wi-Fi signals and stable data transmission, please try to ensure that the connection distance is within 10m and there are no obstacles. -
Page 59: Network Connections
Network Connections Mobile network: This device supports external 4G mobile networks. Wi-Fi hotspot: In the configuration interface, enter a valid hotspot name camera and • password 12345678, and click “OK” to save successfully. Return to the main interface of the real-time screen and pull up to pop up •... - Page 60 Native IP: users may set the IP address and DNS server address by themselves. IP address: enter a valid IP address (such as 172.16.14.216) and DNS • server address 202.103.24.68 (please set the IP address and DNS address by yourself according to the local area network situation of the user). Note: IP address cannot be set for the 192.168.42.xxx network segment, which will be prompted as “illegal IP address”...
- Page 61 Set host IP: set the local connection IP address of desktop computer as • 172.16.14.230, and DNS as 202.103.24.68. Then it can be used together with supporting software*. Important: It needs to be used together with PC-Side application software turtletoughsensors.com.au...
-
Page 62: Bluetooth
Bluetooth Turn on the Bluetooth headset, press and hold the Call Button for 3 • seconds to enter the pairing mode. (The blue indicator lights up continuously and stays for 3 minutes.) Enter Settings–Bluetooth, turn on the Bluetooth setting switch, and then •... -
Page 63: General
General Users may check the version and SN of native software through Settings– General, and may change information such as language, time, date and storage path. Software Upgrade turtletoughsensors.com.au... - Page 64 Put the latest version of APK upgrade package file in the path: • Computer\IrCamera\memory device\GCamera\update. Click the “SD card upgrade” button in the settings–Information interface to • enter the upgrade interface, and then click the “Install” button. turtletoughsensors.com.au...
- Page 65 Go to the installation interface. • After the installation is completed, the device will prompt “Application installed”. Click “Start” button to complete the upgrade! The new program version • can be viewed in “Settings–Information– Software version number”. Note: The whole upgrade process takes about 15 minutes. Please make sure that the battery power meets the demand before upgrading.
-
Page 66: Storage
Storage The main display contents are the remaining capacity of the internal storage device and the basic information of the external SD card. Users may also customize the storage options, including internal storage and external SD card storage. Select storage medium: enter the device storage interface, and the user may select memory storage device or SD card for data storage. -
Page 67: License Information
License Information Displays the software list of the third party used by this device. Date and Time Manually set the system date and time. turtletoughsensors.com.au... -
Page 68: Language
Language Multiple languages are available for use. Synchronous Data Enable SD card to synchronize with local data. turtletoughsensors.com.au... -
Page 69: Format Sd Card
Format SD Card To start formatting, you must select a memory card slot, and then select Yes. Please note that formatting will permanently delete all photos and other data on the memory card in the selected slot. Be sure to back up as needed before formatting. -
Page 70: Connection With External Device
Connection with External Device Port Connection This product connects with external devices by HDMI data cable, USB data cable and network cable. Micro HDMI port The Micro HDMI interface is mainly used for connecting the external HD • monitor. Please ensure that all monitors to be connected have HDMI ports. Connect the HDMI cable to the camera. - Page 71 View the SD card file • If you want to save the images in SD card, please navigate to Global Settings–Information–Storage Space, select SD card as the storage medium, and then files can be saved in the memory card after photographing.
- Page 72 Open LAN port: enter the main interface of real-time screen, open menu • options, click “LAN” button enable connection. (This function needs to be used together with PC application software) Connect with application software: Open the infrared analysis software • (Windows version), enter the video analysis interface, select the device model and enter the correct IP address.
-
Page 73: Install Memory Card And Lens
Install Memory Card and Lens SD cards can be used in this device, and the shot images and videos can be recorded on this device or SD card. This device supports SD cards with a maximum capacity of 64GB, with 64GB as standard configuration. SD cards successfully passing the test include: Samsung (64GB CLASS10) •... - Page 74 As shown in the figure below, make the label side of the memory card face you and insert the card until it clicks indicating in place. Close the slot cover and slide the slot cover in the direction indicated by the arrow until it locks.
- Page 75 Take Out the Memory Card Turn off the power of the device first, and then open the slot cover. (Make sure the indicator light is off before opening the slot cover) Gently push in the memory card and release it. Pull out the memory card and close the slot cover.
- Page 76 Install The Optional Lens Step 1 & 2 • Press the Change Lens button, rotate the lens decorative cover clockwise to remove the lens decorative cover. Step 3 • Select the lens to be extended, align the U-shaped groove of the lens with the red dot on the device standard lens, and then insert the extended lens.
- Page 77 Step 4 • Rotate the extended lens counterclockwise until hearing the “click” sound, indicating that the lens is installed successfully. Step 5 • Press the “Change Lens” button, rotate clockwise to remove the extended lens. See figure below. Cautions Handle with care to avoid direct collision and lens damage. When not in use, please place the extended lens in a safety box and keep it properly.
-
Page 78: Emissivity Of Common Objects
Emissivity of Common Objects Material Emissivity Wood 0.85 Water 0.96 Brick 0.75 Stainless Steel 0.14 Adhesive Tape 0.96 Aluminum Plate 0.09 Copper Plate 0.06 Black Aluminum 0.95 Human Skin 0.98 Asphalt 0.96 0.93 Black Paper 0.86 Polycarbonate Concrete 0.97 Copper Oxide 0.78 Cast Iron 0.81... -
Page 79: Common Faults And Troubleshooting
Common Faults and Troubleshooting Summary of Common Faults Phenomena Cause Measures Low battery Recharge the battery before use Take out the battery and place Poor battery contact it back in the battery housing Unable to start Plug of the external power Remove the power plug and supply not in place reinsert it in place... - Page 80 Phenomena Cause Measures Focus manually or automatically Failure in focusing on the to make the image clear, and target then read the temperature Change the parameter setting, Wrong parameters related to or directly restore the default temperature measurement parameter value Set the Customize button as compensation in the menu, Failure in non-uniformity...
Need help?
Do you have a question about the TT640C and is the answer not in the manual?
Questions and answers