
Summary of Contents for PaceBlade LDT-101
- Page 1 LDT-101 / MDT-801 10 / 8 Inch Rugged Android Vehicle Display Terminal User Manual Version 2.0...
- Page 2 About This Manual This user’s manual provides the general information and installation instructions for the PaceBlade LDT-101 and MDT-801 product. The manual is meant for the experienced users and integrators with hardware knowledge of personal computers. If you are not sure about any description in this manual, consult your vendor before further handling.
-
Page 3: Table Of Contents
Table of content ........................... 4 Chapter 1: Introduction 1.1 Product Highlights ........................4 1.1.1 Parts of the Device ......................4 1.1.2 Parts of the Accessories ....................5 1.2 Cradle Definition ..........................6 1.2.1 Full Features Docking Station ..................6 1.2.2 Basic Features Docking Station ................... -
Page 4: Chapter 1: Introduction
2 in 1 cradle which can be used as a vehicle cradle or desktop cradle 1.1.1 Parts of the Device Volume Button Customizable Buttons Power Button LDT-101 (10inch) Front camera Headphone Jack USB Type C Power Indicator Auto Backlight... -
Page 5: Parts Of The Accessories
External GPS Speaker antenna socket Rear Camera MDT-801 (8inch) Scanner/LoRa Hand strap Module connector serial number info Pogo pin 1.1.2 Parts of the Accessories 1. Vehicle cradle or Desktop docking station 2. Shoulder strap for LDT-101 (optional) 3. Hand strap... -
Page 6: Cradle Definition
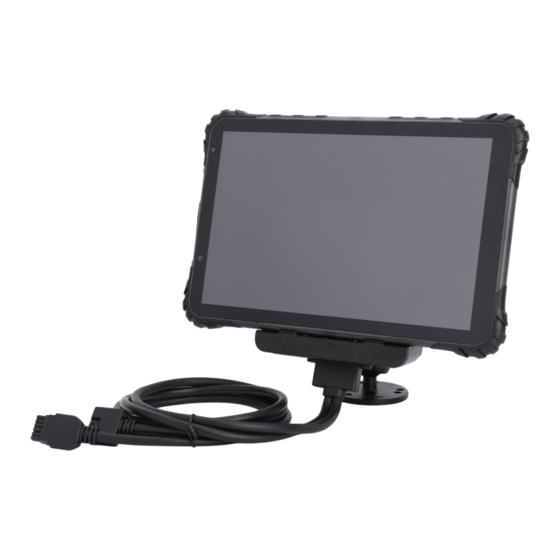
4. Metal Mount 5. Metal Stand (only use it when the cradle is being used as desktop station) (optional) 6. Tape is provided to hide the non-used ports (RJ-45, USB, etc) 7. NFC card 8. Keys to lock the device into the cradle (kensington lock) 9. - Page 7 Full features cradle interface Vehicle Input: DC12V to 32V, ignition control with optional switch in the cradle Fasting-charging AC adapter or charge input 5V/3A, 9V/2A, 12V/2A with Type-C USB connector. USB 2.0 OTG Connector x 2 RJ45 connector used for Ethernet Ignition switch: the ignition switch is switched to the right side, charging is independent of ignition ON/OFF.
- Page 8 Full features Cradle cable (CAB-MB-FULL) Item Definition Connect to the full feature cradle 20pin Micro-Fit connector 12pin Micro-Fit Connect to the extension cable (CAB-EX-FULL) connector Pin1 Pin2 Pin3 Pin4 Pin5 RS485-A RXD (CPU) TXD (USB) RXD (USB) Pin6 Pin7 Pin9 Pin10 Pin11 ACC ignition...
- Page 9 Cradle extension cable (CAB-EX-FULL) Item Definition Connect to the P2 connector on the cradle cable (CAB-MB-FULL) 12pin Micro-Fit connector Connect to the vehicle' battery. Power Supply wires Green Black VCC12-32V input ACC ignition Serial port wires 1 x RS485, 2 x RS232 (White/Purple RS232 same as model MDT760/MDT860 serial port) Blue Brown Yellow...
-
Page 10: Basic Features Docking Station
1.2.2 Basic Features Docking Station Ignition Switch The basic feature cradle can offer the below functionalities. Vehicle Input: DC 12V to 32V, ignition control with optional switch in the cradle Basic features cradle cable pin assignment overview... - Page 11 Basic features Cradle cable (CAB-MB-BASIC) Item Definition Cradle Pin3 Pin9 Pin13 Pin18 Pin19 Pin8 Pin8 Pin10 Connector VCC 12-32V VBUS 5V ignition input Pin2 Pin6 Pin11 Power Pin3 Pin9 Pin10 Connector VCC 12-32V ignition input USB Type-A (cannot be used simultaneously with USB Type-C on the device) Basic features Cradle extension cable (CAB-EX-BASIC) Item Definition...
- Page 12 L-Sharp cradle cable assignment overview L-Sharp cradle cable can be used for both full and basic feature cradle (MDT-801) The Basic feature extension cable (CAB-EX-BASIC) is optional. 1. L-Sharp cradle cable for MDT-801 (CAB-CRD865-BASIC) This is the L-sharp cable (thickness around 25mm) Item Definition Pin1...
- Page 13 2. Basic feature Cradle cable for MDT-801 (CAB-TRS-BASIC) Item Defi ni tion Pin2 Pin3 Pin6 Pin9 Pin10 Pin11 Power Connector ACC ignition Shield VCC 12-32V input 9 pin BMW Pin1 Pin2 Pin5 Pin6 Pin7 Pin8 Connector M VCC 12-32V input ACC ignition Shield L-Sharp cradle cable for connecting to the AVIN cable pin...
-
Page 14: Chapter 2: Getting Started
Item Definition Pin2 Pin3 Pin6 Pin9 Pin10 Pin11 Power ACC ignition Shield VCC 12-32V input Connector Pin1 Pin2 Pin4 4 pin Circular Camera DC12V output Connector M Video input Wires Black Yellow VideoTrigger Pin1 Pin2 Pin3 Pin4 9 pin BMW VCC 12-32V input ACC ignition Connector M... -
Page 15: Installing Micro Sd And Sim Card
For a easier way of removing the Nano SIM card and Micro SD card from the inside card slot, please assist with the Nano SIM card and Micro SD card tape as shown in the picture. c. SIM card and Micro SD card cover can be locked by screws for preventing loss or theft. LDT-101 MDT-801... -
Page 16: Charging The Battery
Metal mount, now connect the docking station to the vehicle power supply. Plug into vehicle power supply The LDT-101/MDT-801 could be charged by a PD fast-charging Adapter or car charger (5V/3A.9V/2A,12/2A) by Type C to C USB cable. -
Page 17: Chapter 3: Hand Strap And Shoulder Strap Mode
Please ensure that the input voltage of the docking station is within the range of 12V~32V. If the input voltage of the docking station is outside this range, the LDT-101/MDT-801 may be unable to charge and can get damaged. It may cause that the warranty will be invalid. - Page 18 2. How to use Easy to carry...
-
Page 19: Shoulder Strap Mode
3.2 shoulder strap mode... -
Page 20: Chapter 4: Docking Station Using Instruction
Chapter 4: Docking Station Using Instructions 4.1 Vehicle cradle 1. Mounting the RAM and Cradle Assemble with cradle (Vehicle cradle) Tablet Vehicle cradle Screws X 4nos. Port-cover tape for hiding non-used ports RAM Mount... - Page 21 For full-feature vehicle cradle or desktop dock, the port cover tape is being used to hide non-used ports. 2. Locking Device & Unlocking device Insert the key to lock or unlock the device Screw-in the screws to make the lock more secure...
-
Page 22: To Be A Desktop Dock Station
4.2 Desktop docking station 1. Install the Metal Stand 2. Assemble with cradle (Desktop docking station) - Page 23 It has 2 purposes. 1. To direct the cradle cabling behind the dashboard to the rear side. 2. It will be a support for the weight of the LDT-101. There are a few options for installation. See the below pictures and videos.
-
Page 24: Chapter 5: Using Hardware Interface
Chapter 5: Using Hardware Interface 5.1 Using Serial Port 1. RS232 purple/white wires are from the CPU. it works the same as the MDT-860 and MDT-760. It can work even without connecting a external power supply. 2. RS232 orange/yellow wires and RS485 blue/brown wires are converted from the USB Hub and will only work if there is an external power supply connected. -
Page 25: Using Gpio
5.2 Using GPIO 1. GPIO Tail Line Instructions Regarding the definition diagram of GPIO interface, please see the details in Chapter 1 “1.2 Cable definition”. 2. GPIO_DEMO Instruction This software is used for testing the GPIO functions of device only, and isn't suitable for the user's standard software. - Page 27 After activating the NFC function, place the NFC card close to the induction area. A prompt tone would be heard if the card is successfully identified. If the card contains some information (such as manufacturer’s information), there will be an interface popped up as shown in the below image. LDT-101 NFC MDT-801 NFC...
-
Page 28: Chapter 6: Specifications
Chapter 6: Specifications Durability Features IP67 Rating Certified 1.5m (5ft.) drop-resistance Raised bezel for LCD impact protection LCD Display Size 8 Inch Digital IPS Panel Resolution 1280x800 Brightness 400cd/m² Touch screen Type Multi-point Capacitive Touch System MediaTek 64-bit Octa-core Arm Cortex-A75@2GHz Arm Cortex-A55@1.8GHz Android 12 Memory... - Page 29 MDT-801: 3.8V 8000mAh Mechanical & Environmental Operating Temp. -20°C~60°C(-4°F~140°F) Storage Temp. -20°C~70°C(-4°F~158°F) Operating Humidity 90%(non-condensing) Dimensions LDT-101: 260mm L x 174mm W x 17mm D MDT-801: 207mm L x 137.5mm W x 15mm D Weight Tablet LDT-101: 930g MDT-801: 528g...
-
Page 30: Chapter 7: Software Support
We can provide demo applications such as AVIN camera, Serial port, GPIO and NFC etc. Please contact our Sales for details. Customization Services PaceBlade's Device Management server is developed to allow customers to update differential firmware as well as create a kiosk mode function: •... - Page 31 NOTE 1: This equipment has been tested and found to comply with the limits for a Class B digital device, pursuant to part 15 of the FCC Rules. These limits are designed to provide reasonable protection against harmful interference in a residential installation. This equipment generates, uses and can radiate radio frequency energy and, if not installed and used in accordance with the instructions, may cause harmful interference to radio communications.
- Page 32 This Class B digital apparatus complies with Canadian ICES-003. Cet appareil numérique de la classe B est conforme à la norme NMB-003 du Canada. This equipment complies with IC RSS-102 radiation exposure limits set forth for an uncontrolled environment. The guidelines are based on standards that were developed by independent scientific organizations through periodic and thorough evaluation of scientific studies.
- Page 33 PACEBLADE www.paceblade.eu sales@paceblade.eu...
Need help?
Do you have a question about the LDT-101 and is the answer not in the manual?
Questions and answers