Table of Contents
Advertisement
Available languages
Available languages
Advertisement
Chapters
Table of Contents

Summary of Contents for Star Power Pit Pat AS01
- Page 1 INTELLIGENT TREADMILL MANUAL Email: support@starpowergym.com AS01 V4.2...
-
Page 2: Table Of Contents
Content 01.Safety Instructions 02.Product Parts 03.Packing Details 04.Installation steps 05.Using The Treadmill 06.Maintenance Specification 07.General Troubleshooting Expand Size: 56*23.8*42.3 in Product Weight: 80 Pounds Product model: AS01 08.Warranty Terms Motor Power: 3.0HP Maximum Speed : 7.5MPH 09.Notes for Exercises Maximum load: 300 Pounds Rated Voltage:... -
Page 3: Safety Instructions
01 Safety Instructions 01 Safety Instructions 05.The minimum distance (between the treadmill and walls and furniture) required for the treadmill when it is fully unfolded should be no less than 3fts at front, left and right sides and 6fts at rear side. Danger: Do not use heart rate testing device or any other wireless heart rate devices at the 06.Do not use the treadmill if the power cord is damaged. -
Page 4: Product Parts
02 Product Parts 03 Packing Details Packing Details Accessories Parts Parts Quantity Phone Stand Safety lock Main Frame Safety Lock 1 piece Electronic Panel Electronic Panel Armrest T-shaped Allen Key Wrench 1 piece Column Phone Stand Lubricant 1 bottle Manual Running Belt USB charging port M8*16 Hex Socket Cap Screw... -
Page 5: Installation Steps
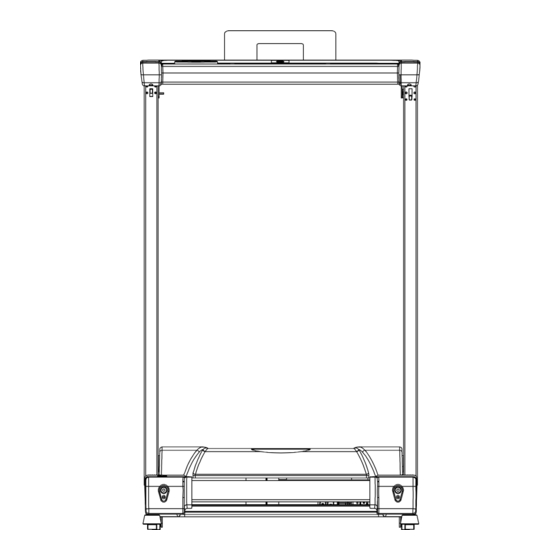
04 Installation steps 04 Installation steps Step 1 Step 2 Unfolding the frame: follow the demonstration below, hold the column with your hands and pull up slowly in the direction of the arrows, and use B# (T-shaped Allen Key Wretch) to fasten the bolts in the main frame in the direction of the arrows (clockwise). - Page 6 04 Installation steps 04 Installation steps Step 3 Step 4 Figure 1 Safety lock: Place the end of the magnet on top of this label. Figure 2 Product usage: when the power is on, wait till the light in the electronic panel to turn on. The treadmill is ready for use with a single press of the START button! (Note: The safety lock must be placed on the yellow sticker in the middle under the meters to start the treadmill.
-
Page 7: Using The Treadmill
04 Installation steps 05 Using The Treadmill Step 5 (1)Open the armrest Open the armrest limit lock in the direction shown in the figure and lift the armrest up (2)Close the armrest Press down the armrest directly in the direction shown in the figure Folding: fold the treadmill as shown in the figure below if it is not used for a long time. - Page 8 05 Using The Treadmill 05 Using The Treadmill 4.Keys and Functions WIFI indicator 01.Start/Pause button: In the standby state of the treadmill, press the Start button to activate the treadmill, and press the button again to start the treadmill. In the operating state of the treadmill, press the Start button to pause the treadmill while keeping the existing data of the exercises, and press the button again to continue exercising.
- Page 9 05 Using The Treadmill 05 Using The Treadmill Note: Treadmill supports connection to mobile phone via Bluetooth System requirements: ios13 or above ; android 6.0 1.Download PitPat app on your phone and install it Search for “PitPat” in or above. the app store or scan the following QR code to download and install the app.
-
Page 10: Maintenance
06 Maintenance 06 Maintenance Proper maintenance helps keep the treadmill in the best condition while improper mainte- A. Belt adjustment. nance may damage or shorten the life span of the treadmill. 1.Dedust the treadmill on regular basis to keep the parts clean. 2.After using the treadmill each time, wipe the meters and other parts with a clean towel or cloth to remove the sweat and debris. - Page 11 06 Maintenance 06 Maintenance Lubricant While using the treadmill, the pressure on the running belt is not balanced because the acting force from the left and right feet is not exactly the same while running, which could easily cause the running belt to become off centered. That’ s a The treadmill is lubricated before it leaves the plant, but frequent inspection of the lubrication status of the treadmill normal deviation.
-
Page 12: General Troubleshooting
07 General Troubleshooting 07 General Troubleshooting Error codes displayed on the electronic panel and related troubleshooting solutions Error Code Error Description Troubleshooting Solutions (1).Check for overload. Error Code Error Description Troubleshooting Solutions (2).Check if any mechanical moving part is stuck. (3).Check the level of film release agent. -
Page 13: Warranty Terms
07 General Troubleshooting 08 Warranty Terms FAQs and Troubleshooting Warranty scope Non-artificial damage occurring during normal use and proper maintenance of the treadmill excludes the FAQs Troubleshooting following conditions. 1.Open the upper case of the electronic panel and test if the keys are functioning. Some or all the keys 2.Check or replace the electronic panel do not work. -
Page 14: Notes For Exercises
09 Notes for Exercises • Consult your doctor before starting exercises or training program, and follow your doctor's advice and instructions. • Consult your doctor to set goals for exercises, make sure your plan is realistic and start your training program in no rush. 1.Stretch down: •... - Page 15 Content 01.Instrucciones de Seguridad 02.Componentes del producto 03.Detalles de Empaque 04.Pasos de instalación 05.Usar cinta de correr 06.Guia de mantenimiento Especificación 07.Tecnicas generales de solucionar problemas Tamaño de expansión: 56*23.8*42.3 in Peso del producto: 80 Pounds Modelo de producto: AS01 08.Terminos de Garantía Potencia del motor:...
-
Page 16: Instrucciones De Seguridad
01 Instrucciones de Seguridad 01 Instrucciones de Seguridad 05.La distancia mínima requerida cuando la caminadora está desplegada es: desde la pared y muebles de enfrente 3” a 4” Precauciones importantes pulgadas a la izquierda y derecha, mientras que la parte trasera no debe de exceder 6” a 7” pulgadas. Nuestro producto ha sido diseñado principalmente para su seguridad. -
Page 17: Componentes Del Producto
02 Componentes del producto 03 Detalles de Empaque Articulos previstos en el paquete Detalles de Partes Numero Parts Núm. Parte Quantidad Soporte móvil Cerradura de Seguridad Marco Principal Candado de seguridad Panel electrónico Marco Electrico Reposabrazos Llave Allen en forma de T Columna Soporte de Telefono Aceite lubricante... -
Page 18: Pasos De Instalación
04 Pasos de instalación 04 Pasos de instalación Step 1 Step 2 Al desplegar el marco, siga la demostración para que no tenga ningun problema.Sostendrás la columna con la mano y presionarás lentamente en la dirección indicada por la flecha en el icono para tirar hacia arriba usando el numero de parte como está... - Page 19 04 Pasos de instalación 04 Pasos de instalación Paso 3 Paso 4 Figure 1 Bloqueo de seguridad: ¡Coloque el extremo del imán en la etiqueta del medidor! Figure 2 Uso del producto: Después de encender la caminadora, espere hasta que la luz en el reloj electrónico se enciende. La caminadora está...
- Page 20 04 Pasos de instalación 05 Pasos de instalación Paso 5 (1) Abra el reposabrazos Abra el bloqueo del límite del reposabrazos en la dirección que se muestra en la figura y levante el reposabrazos. (2) Cierra el reposabrazos Presione hacia abajo el reposabrazos directamente en la dirección que se muestra en la figura.
-
Page 21: Usar Cinta De Correr
05 Usar cinta de correr 05 Usar cinta de correr 4. Llaves y sus funciones Indicador wifi 01.Las claves principales son para iniciar el sistema y luego pausar: Cuando la máquina para correr está en espera, debe presionar el botón de inicio una vez para activar y luego otra segunda vez para poner en marcha la máquina para correr. - Page 22 05 Usar cinta de correr 05 Usar cinta de correr Nota: La cinta de correr admite la conexión al teléfono móvil a Requisitos del través de Bluetooth sistema: ios13 o superior; Android 6.0 o superior. 1.Descargue la aplicación PitPat en su teléfono e instálela Busque "PitPat"...
-
Page 23: Guia De Mantenimiento
06 Guia de mantenimiento 06 Guia de mantenimiento Si realiza un mantenimiento adecuado, mantendrá su cinta de correr en excelentes condiciones; A. Ajuste de la tensión del cinturón un mantenimiento inadecuado podría dañar o acortar la vida útil de su cinta de correr. 1.Limpiar el polvo de la cinta de correr con regularidad mantendrá... - Page 24 06 Guia de mantenimiento 06 Guia de mantenimiento Aceite lubricante Mientras se utiliza la cinta de correr, la presión sobre la banda de correr no está equilibrada porque el acto de la fuerza constante de los pies izquierdo y derecho no es exactamente la misma mientras se corre, lo que puede provocar fácilmente que la cinta de correr se descentre. Esta desviación de la cinta es también un uso normal de la máquina esta volverá...
-
Page 25: Tecnicas Generales De Solucionar Problemas
07 Tecnicas generales de solucionar problemas 07 Tecnicas generales de solucionar problemas Código de error que aparece en el reloj electrónico y solución de problemas asociada Código de error Descripción del error Soluciones a los problemas soluciones (1).Comprobar la sobrecarga. Código de error Descripción del error Soluciones a los problemas... -
Page 26: Terminos De Garantía
07 Tecnicas generales de solucionar problemas 08 Terminos de Garantía Problemas comunes y métodos de solución de problemas Cobertura de la garantía Problema comun Método de exclusión Los daños non- artificiales que se produzcan durante el uso normal del producto y que estén bajo la condición de uso y mantenimiento inadecuados, excluyen los siguientes. -
Page 27: Notas De Ejercicio
09 Notas de Ejercicio • Consulte a su médico antes de iniciar un programa de ejercicio o entrenamiento, y siga los consejos de su médico y instrucciones para entrenar a un nivel adecuado. • Consultar a su médico para establecer objetivos de ejercicio garantizará que su plan sea realista y pueda comenzar su programa de entrenamiento sin problemas.
Need help?
Do you have a question about the Pit Pat AS01 and is the answer not in the manual?
Questions and answers