Advertisement
Quick Links
Advertisement

Related Manuals for travlfi JourneyXTR

Summary of Contents for travlfi JourneyXTR
- Page 1 TravlFi JourneyXTR Router User Manual...
-
Page 2: Federal Communication Commission Interference Statement
JourneyXTR Federal Communication Commission Interference Statement This equipment has been tested and found to comply with the limits for a Class B digital device, pursuant to part 15 of the FCC Rules. These limits are designed to provide reasonable protection against harmful interference in a residential installation. This equipment generates, uses and can radiate radio frequency energy and, if not installed and used in accordance with the instructions, may cause harmful interference to radio communications. -
Page 3: Rf Exposure Statement
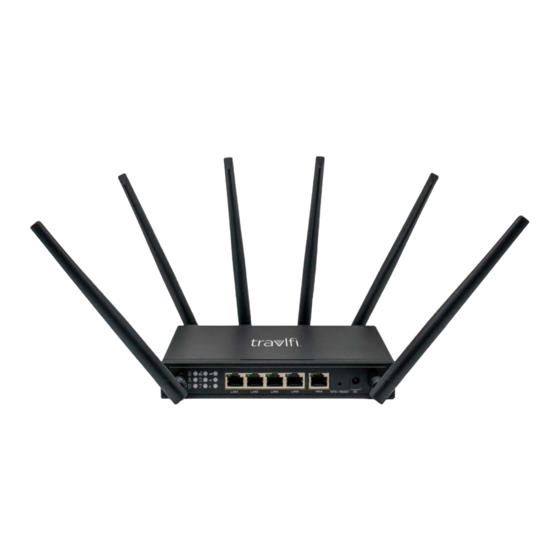
The use of another adapter could result in damage to the unit. The following power adaptor is qualified for use with this JourneyXTR. The unit must be powered by a model DCT18W120150US-A0 AC/DC adaptor. - Page 4 4G LTE product we've ever offered. JourneyXTR With it's 6 external antennas, the JourneyXTR allows customers to connect to the internet using 2.4GHz / 5GHz WiFi and Ethernet/LAN. Up to 32 devices may be connected at any time.
- Page 5 JourneyXTR 1.2. Front and Rear Features Front & Rear Panel...
- Page 6 JourneyXTR and connect the JourneyXTR to power. The JourneyXTR can be setup next to a window or windshield with adequate airflow. Cabinets may also be suitable, but can degrade cellular reception. Do not block side vents or set other devices on top of the JourneyXTR.
- Page 7 JourneyXTR Chapter 3 Accessing the Web User Interface: Log In and Set Up: Setup Wizard 3.1. Login After turning on the connect to it via Wi-Fi by following these steps: JourneyXTR 1. Locate the default SSID (network name) and the default Wi-Fi key (password) on the sticker located on the bottom of the router.
- Page 8 JourneyXTR After navigating to the Web User Interface, log in by following this step: 1. On your mobile device, login to the Web User Interface’s Home Page using the default user name of admin and the default password which will be a series of letters and numbers.
- Page 9 JourneyXTR Step 1: Operation Mode The Operation Mode page is used to toggle the JourneyXTR between different operational modes; Gateway, Bridge/AP mode, and Wireless ISP. To ensure your device works on your pre-selected data plan, you must start by selecting...
- Page 10 JourneyXTR Step 2: WAN Interface Setup The WAN Interface Setup page is used to set the WAN Access Type. You do not need to set up the WAN Interface at this moment, you can always go back and set it up at a later time.
- Page 11 JourneyXTR Step 3: LAN Interface Setup The LAN Interface Setup page is used to configure the IP Address and Subnet Mask if you are connecting an external router to the via LAN. JourneyXTR You do not need to set up the LAN Interface at this moment, you can always go back and set it...
- Page 12 JourneyXTR Step 4: Set Admin Account The Set Admin Account page is used to set the new user interface (router log-in) password. The pre-set user and password can be found on the sticker located on the bottom of the router.
- Page 13 JourneyXTR Step 5: Setup Wireless JourneyXTR JourneyXTR The Setup Wireless page is used to set the SSID and password for both the 2.4GHz and 5GHz Wi-Fi networks. It is also used to enable or disable either of the Wi-Fi networks.
- Page 14 JourneyXTR Step 6: Automatic Reboot JourneyXTR will reboot once you have clicked the finished button on Step 6 to apply the changes you have made. Remember to connect back to the router’s broadcasted Wi-Fi network to connect to it again.
- Page 15 JourneyXTR Chapter 3 Accessing the Web User Interface: Understanding the Home Page 3.3. Home Page/Main Section After completing the Setup Wizard, the Home Page of the will appear. JourneyXTR JourneyXTR The Home Page is where users can check the connection status between the JourneyXTR the Internet, and adjust settings such as Wi-Fi options, parental controls, and more.
- Page 16 JourneyXTR 3.3.1 Banner At the top of the Home Page, a banner consisting of icons is presented. Each of these icons represents a sub-section, we will explore each sub section in this guide. We have already explored the Wizard sub-section earlier in this chapter. To the left of the icons, the current firmware version (FW) of the is displayed.
- Page 17 JourneyXTR The Internet Globe image, the image, and the Desktop Image are all clickable and JourneyXTR reveal menus. 3.3.3 Internet JourneyXTR...
- Page 18 JourneyXTR The Internet section is divided into three distinct sections: IPv4, IPv6, and Mobile Network. 3.3.3.1 IPv4 or Internet Protocol Version 4 Item Description The MAC Address or the Media Access Control address is a unique serial number in the network circuitry of every Ethernet MAC Address and Wi-Fi device.
- Page 19 JourneyXTR 3.2.2.2 IPv6 or Internet Protocol Version 6 Item Description The MAC Address or the Media Access Control address is a unique serial number in the network circuitry of every Ethernet MAC Address and Wi-Fi device. Connection Type Dynamic Host Configuration Protocol Version...
- Page 20 JourneyXTR 3.2.2.3 Mobile Network Item Description The cellular signal strength of the JourneyXTR. Signal Intensity Network Provider The local cellular network your JourneyXTR connects to. The connection status between the JourneyXTR and the internet Network Status when using vSIM. The period of time the...
- Page 21 JourneyXTR IMEI or International Mobile Equipment Identity is a unique IMEI (1,2,3) number for identifying a device on a mobile network. Whether the JourneyXTR is connecting to the internet via Virtual SIM Type Sim or Physical Sim. JourneyXTR ’s Serial Number.
- Page 22 JourneyXTR Clicking the image provides a combined overview of the same internet sections that JourneyXTR were found under the Global Internet Image. Item Description The cellular signal strength of the JourneyXTR. MAC Address ’s IP address. JourneyXTR Router IP Address A number that resembles an IP address.
- Page 23 JourneyXTR 3.2.1 Connected Clients JourneyXTR There is a clickable number and logo above the Connected Client’s image which represents the number of devices connected at any given point in time. Item Description Name(s) of the connected personal devices to the JourneyXTR ’s...
- Page 24 JourneyXTR The MAC Address or the Media Access Control address is a unique serial number in the network circuitry of every Ethernet and Wi-Fi MAC Address device.
- Page 25 JourneyXTR Chapter 3 Accessing the Web User Interface: Settings 3.4. Settings After selecting the wrench tool icon on the banner atop the GUI, the Settings of the JourneyXTR will appear. The Settings is where users can toggle the JourneyXTR between Virtual and Physical Sim,...
- Page 26 JourneyXTR 3.4.1.1 Default Route The Default Route page enables the user to select which WAN connection (WAN1 or Cellular) provides the source of the internet to the JourneyXTR. Selecting “enable WAN failover to Cellular”, allows the JourneyXTR to automatically continue providing internet through Virtual Sim, if the router that you connected to it via the WAN port has failed.
- Page 27 JourneyXTR 3.4.1 SIM Mode The SIM Mode page is used a toggle between a Physical SIM inserted in the router for internet and a Virtual built into the router for internet. Virtual SIM Make sure that Virtual SIM is selected so that your will work on your data plan.
- Page 28 JourneyXTR When using a Physical SIM card, toggle to Physical SIM and a menu will appear. Once you have inputted your desired changes click “Save & Apply”. JourneyXTR will reboot with your saved changes after 30 seconds. Be sure to connect to the ’s Wi-Fi network once the reboot is complete.
- Page 29 JourneyXTR Item Description SIM Mode Physical Sim or Virtual SIM User Name The username associated with your physical sim data plan. Password The password associated with your physical sim data plan. The APN provided by your internet service provider. The PIN provider by your internet service provider.
- Page 30 JourneyXTR 3.4.1.1.1 DHCP (Dynamic IP) Selecting the Dynamic IP (DHCP) WAN Access Type will enable the router to automatically obtain IP addresses, subnet masks, and gateway addresses. Selecting Dynamic IP (DHCP) WAN Access Type also enables you to set the MTU to allow smaller or larger data packages to flow into the JourneyXTR.
- Page 31 JourneyXTR For large locations such as an office building or campus with a large grouping of computers or other devices all located in the same place, VLAN can be enabled. Item Description Minimum Transmission Unit (to be kept as default).
- Page 32 JourneyXTR 3.4.1.1.2 Static IP Selecting the Static IP Access Type will enable the router to support Static IP as a WAN connection type.
- Page 33 IP address are used for the network by masking the network Subnet Mask portion of the IP address Default Gateway The IP address of another router your JourneyXTR sends traffic too. Domain Name System 1 DNS 1 Domain Name System 2 DNS 2 Minimum Transmission Unit (to be kept as default).
- Page 34 JourneyXTR 3.4.1.1.2 PPPoE Selecting the PPPoE Access Type will enable the router to support PPPoE as a WAN connection type.
- Page 35 JourneyXTR Item Description VLAN ID Identifies the VLAN to which a data frame belongs. JourneyXTR Service Name Minimum Transmission Unit (to be kept as default). Connection Type: Continuous Continuous Connection Type: Connect on Demand Connect on Demand Connection Type: Manual Manual 3.4.1.2 IPv6...
- Page 36 JourneyXTR By enabling IPv6, a collapsable menu will appear, enabling the user to toggle between three distinct origin types, STATIC, AUTO, and 6RD. 3.4.1.2.1 STATIC Item Description The cellular signal strength of the JourneyXTR. IP Address...
- Page 37 JourneyXTR The IP address of another router your JourneyXTR sends traffic Default Gateway too. Domain Name System DNS 1 MLD Proxy Multicast Listener Discovery 3.4.1.2.2 AUTO Item Description DHCP will supply an IPv6 address. Stateful Address...
- Page 38 JourneyXTR Stateless Address DHCPv6 server does not provide IP addresses at all. The DUID identified a DHCPv6 device. DUID Prefix Delegation MLD Proxy Multicast Listener Discovery 3.4.1.2.1 6RD...
- Page 39 JourneyXTR Item Description WAN IPv6 prefix delegation. 6RD IPv6 Prefix WAN IPv4 Address WAN IPv4 Address. 6RD Border Relay IPv4 Border Relay IPv4 Address Address Domain Name System MLD Proxy Multicast Listener Discovery 3.4.1.3 Status The Status page will display the status of each WAN connection; WAN1, WAN2, WAN3, WAN4.
- Page 40 JourneyXTR 3.4.1.4 VLAN The VLAN page is used to configure the VLAN settings.
- Page 41 JourneyXTR 3.4.2.2 Operation Mode The Operation Mode page is used to toggle the JourneyXTR between the different operational modes; Gateway, Bridge Mode, and Wireless ISP. The JourneyXTR must remain on Gateway mode to work with your data plan.
- Page 42 JourneyXTR 3.4.3 Wi-Fi The Wi-Fi section is used to configure the JourneyXTR’s Wi-Fi settings.
- Page 43 JourneyXTR 3.4.3.1 Basic JourneyXTR...
- Page 44 Wi-Fi as a feature can also be shut off on this page by selecting the ‘Disable Wireless LAN Interface’ box. The JourneyXTR’s SSID (network name) and guest SSID can both be edited on this page. Edits include the ability to rename the SSID and toggle its broadcasting status (whether or not it comes up as an option when users are viewing available Wi-Fi networks to connect to on their mobile devices).
- Page 45 For optimal wireless performance, you may select the least interferential channel. It is advisable that you select an unused channel or “Auto” to let the JourneyXTR detect and select the Channel Number best possible channel for your wireless network to operate on from the drop-down list.
- Page 46 Selecting Show Active Clients leads to the Active Wireless Client Table which displays a list of the current devices that are connected to the JourneyXTR at any given point in time. Selecting Multiple AP leads to a view of the wireless settings for multiple APs.
- Page 47 JourneyXTR 3.4.3.2 Security The Security page is used to set the Wi-Fi encryption type. Item Description Select the security mode from the Encryption drop down list. There are 4 options in the Security Mode drop down list: Encryption ● Disable ●...
- Page 48 Remote Authentication Dial In User Service Enterprise (RADIUS) Temporal Key Integrity Protocol TKIP Advanced Encryption Standard 3.4.3.3 ACL The ACL page enables user’s to specify which wireless device MAC addresses are permitted to connect to the JourneyXTR’s Wi-Fi network and which are not permitted.
- Page 49 JourneyXTR Keep this mode disabled if you want to keep your Wi-Fi free for any device in your RV or home to connect to without limitation. Item Description If you choose 'Allowed Listed', only those clients whose wireless MAC addresses are in the access control list will be Wireless ACL Mode able to connect to your Access Point.
- Page 50 The Site Survey page enables user’s to scan all the Wi-Fi networks available to them in the immediate vicinity of the JourneyXTR. When the JourneyXTR is set in client mode, it can act as a repeater and connect to those specific Wi-Fi networks, rendering the plan unusable.
- Page 51 JourneyXTR 3.4.3.5 WPS The WPS page enables the user to change the settings for Wi-Fi Protected Setup. Specifically enabling the user to enable or disable WPS, and permit certain devices to connect to the JourneyXTR ia WPS.
- Page 52 JourneyXTR Item Description This page allows you to change the setting for WPS (Wi-Fi Protected Setup). Using this feature could let your wireless client automatically synchronize its setting and connect to an Access Point in a minute without any hassle.
- Page 53 JourneyXTR 3.4.5 The LAN section enables the user to configure the parameters for the local area network. 3.4.5.1 IPv4...
- Page 54 JourneyXTR The IPv4 page enables the user to change the settings for several LAN-related parameters with focus on settings around the DHCP function.
- Page 55 JourneyXTR Item Description The default is 192.168.0.1. You can change it according to your LAN IP Address needs. The router’s LAN subnet mask. Subnet Mask If this is selected, the router serves as the DHCP server and Work Mode automatically assigns IP addresses to all computers in the LAN.
- Page 56 JourneyXTR 3.4.5.2 Static DHCP Entering the Static DHCP page by clicking the “Set Static DHCP” button enables users to reserve a specific IP address for a device by granting them access to bind the MAC address of the said device to an IP address that is specified by the user on this page.
- Page 57 JourneyXTR 3.4.5.3 IPv6 The IPv6 page enables the user to permit the JourneyXTR to serve as the DHCP server and automatically assigns IPv6 addresses to all connected mobile devices on the LAN. Item Description Router’s LAN IPv6 address. IP Address...
- Page 58 JourneyXTR DHCP will supply an IPv6 address. Stateful Address Stateless Address DHCPv6 server does not provide IP addresses at all. WAN IPv6 prefix delegation. 6RD IPv6 Prefix...
- Page 59 JourneyXTR 3.4.5.4 RADVD...
- Page 60 JourneyXTR The RADVD page enables the user to set up all the settings around IPv6 RADVD, including the specified time delays between packets, maximum and minimum retry intervals, and advertisement settings. Item Description Interface name. radvdinterfacename Max retry advertisement interval.
- Page 61 JourneyXTR Advertisement valid lifetime. AdvValidLifetime Advertisement preferred life time. AdvPreferredLifetime Advertisement router address. AdvRouterAddr Enter the interface 6to4. If6to4 3.4.5.5 TUNNEL 6 over 4 The TUNNEL 6 over 4 page enables users to either enable or disable tunnel 6 over 4.
- Page 62 JourneyXTR 3.4.6 The VPN section enables the user to configure the settings for PPTP, L2TPv2, and L2TPv3 and view the Status of each.
- Page 63 JourneyXTR 3.4.6.1 PPTP The PPTP page enables user’s to configure the parameters for the internet network which connects to the PPTP server. Item Description The name of PPTP Server. Server The user name provided by the cellular carrier. Username...
- Page 64 JourneyXTR The password provided by the cellular carrier. Password You can keep the maximum transmission unit (MTU) as default. 3.4.6.2 L2TPv2 The L2TPv2 page is used to configure the parameters for the internet network which connects to the L2TPv2 server.
- Page 65 JourneyXTR The password provided by the cellular carrier. Password You can keep the maximum transmission unit (MTU) as default. 3.4.6.3 L2TPv3...
- Page 66 JourneyXTR The L2TPv3 page is used to configure the parameters for the internet network which connects to the L2TPv3 server. Item Description The address of the LAN side device of the local, Local Host Address eg:192.168.0.2. The address of the LAN side device of the remote host, Remote Host Address eg:192.168.8.2.
- Page 67 JourneyXTR 3.4.6.5 GRE The GRE page is used to configure the parameters for the internet network which connects to the Generic Routing Encapsulation tunneling protocol.
- Page 68 JourneyXTR 3.4.6.4 Status The Status page presents an overview of the status information for PPTP, L2TPv2, and L2TPv3.
- Page 69 JourneyXTR Chapter 3 Accessing the Web User Interface: Features 3.5. Features The Features section enables the user to configure QoS, Firewalls, Port Forwarding, URL filtering, Routes, and Dynamic DNS.
- Page 70 JourneyXTR 3.5.1 QoS...
- Page 71 The Quality of Service (QoS) page enables user’s to limit the upload and download speeds that a specific mobile device is receiving. Quality of Service is an excellent and underutilized tool that allows you to train your JourneyXTR to divide up your available bandwidth between applications. With good QoS rules, you can ensure that your streaming video doesn’t stutter because a big file is downloading at the same...
- Page 72 JourneyXTR 3.5.2 Firewall The Firewall page enables user’s to set up a plethora of firewall-related features and functions. 3.5.2.1 Advanced The Advanced page contains a series of checkboxes allowing user to toggle on or off specific fire-wall related functions, access, and VPN pass throughs.
- Page 73 JourneyXTR Item Description DMZ function. Enable DMZ UPnP function. Enable UPnP IGMP Proxy function. Enable IGMP Proxy Telnet by wan access. Enable Telnet Access on WAN Ping Access on WAN function. Enable Ping Access on WAN Enable Web Server Access on WAN function.
- Page 74 Enable or disable L2TP to pass through L2TP Enable L2TP pass through on VPN connection communication data. 3.5.2.2 Dos The Denial-of-Service (DoS) page enables users to protect their JourneyXTR from DoS attack’s by setting certain parameters relating to network security.
- Page 75 JourneyXTR 3.5.2.3 IP Filtering The IP Filtering page enables users to control what IP traffic will be allowed into and out of the JourneyXTR’s etwork.
- Page 76 LAN side source IPv6 address. Local IPv6 Address “TCP”, “UDP” or” Both”. Protocol 3.5.2.4 Port Filtering The Port Filtering page enables users to allow or block certain network packers from following into and out of the JourneyXTR’s network based on their port number.
- Page 77 Port Range Select “TCP”, “UDP” or” Both”. Protocol Comment for the rule. Comment 3.45.2.5 MAC Filtering The Mac Filtering page enables users to allow or block certain mobile devices from connecting to the JourneyXTR’s Wi-Fi network based on their MAC address.
- Page 78 JourneyXTR Item Description Block certain website URs from being accessed. Blacklist Allow certain website URLs from being accessed. Whitelist The MAC Address or the Media Access Control address is a unique serial number in the network MAC Address circuitry of every Ethernet and Wi-Fi device.
- Page 79 JourneyXTR The Port Forwarding page enables users to enable or disable port forwarding and set the port IP addresses that will be used to engage in allowing incoming traffic from outside the network to be sent to a local connected mobile device based on the requested port.
- Page 80 JourneyXTR 3.5.4 URL Filter The URL Filter page is used to deny LAN users from accessing the internet. Users can block certain URLs that contain specific keywords. Item Description Enable or disable URL Filtering function. Enable URL Filtering Blocking access to the URL list.
- Page 81 JourneyXTR Block or allow access URL. URL Address 3.5.5 Route The Static Route page enables user’s to enable or disable the Static route and input the items around it.
- Page 82 A number that resembles an IP address. It reveals how many bits in the IP address are used for the network by Subnet Mask masking the network portion of the IP address The IP address of another router your JourneyXTR Gateway sends traffic too. The routing metric.
- Page 83 JourneyXTR Item Description Select server from the drop-down list DynDNS Server Provider The host name. Domain Name The user name. User Name/Email The password. Password/Key...
- Page 84 JourneyXTR Chapter 3 Accessing the Web User Interface: Management 3.6. Management The Management section enables the user to perform key system updates such as setting the CPE-0001’s IP address log-in username and password, enabling or disabling TR069, and upgrading the CPE-0001’s firmware.
- Page 85 JourneyXTR 3.6.1.1 NTP Server The NTP Server page enables user’s to set the current time and time zone onto their JourneyXTR , in addition to setting NTP server. Item Description Select the time zone in your area. Current Time Copy time from computer.
- Page 86 Automatically Adjust Daylight Daylight savings function. Saving Select the well known NTP Server. NTP Server Enter the server manually. Manual IP Setting 3.6.1.2 Reboot Schedule The Reboot Schedule page enables user’s to allow their JourneyXTR to reboot automatically at a specified time.
- Page 87 JourneyXTR 3.6.1 System Log Item Description Log function. Enable Log Print all log information. System All...
- Page 88 JourneyXTR Print wireless log information. Wireless Print DoS log information. “Logging to Syslog Server”. Enable Remote Log Enter the Syslog server IP address. Log Server IP Address 3.6.2 System Settings The System Settings subsection contains several pages related to basic administration...
- Page 89 JourneyXTR 3.6.2.1 Administrator The Administrator page allows users to set the JourneyXTR’s IP address log-in username and password.
- Page 90 Once you provision your router to your liking, it is recommended to back up the settings so that they are saved as a file on your computer. In the future, you can then restore the JourneyXTR’s settings from this file.
- Page 91 JourneyXTR 3.6.3 Statistics The Statistics subsection contains several pages related to basic administration settings. 3.6.3.1 User Statistics...
- Page 92 JourneyXTR 3.6.3.2 Interface Statistics...
- Page 93 JourneyXTR 3.6.4 Diagnostics The Diagnostics page provides various diagnostics surrounding ping and traceroute for IP connection.
- Page 94 JourneyXTR 3.6.4.1 Ping...
- Page 95 JourneyXTR 3.6.4.1 Traceroute...
- Page 96 JourneyXTR 3.6.5 TR069 The TR069 page is used to configure the TR069 functionalities in addition to setting the ACS’s parameters.
- Page 97 JourneyXTR Item Description Technical Report 069 TR069 ACS server domain or IP Address. Username for connection to ACS. User Name Password for connection to ACS. Password Periodic inform. Periodic Inform Enable Periodic inform interval. Periodic Inform Interval User Name used form ACS connection to TR069.
- Page 98 JourneyXTR 3.6.5 Upgrade From time to time, new versions may be released of the JourneyXTR’s Firmware. Firmware updates contain improvements and fix existing problems. The Local Upgrade page enables users to upgrade the JourneyXTR’s software. The Online Upgrade section of the page enables users to upgrade the mobile module firmware to a new version.
Need help?
Do you have a question about the JourneyXTR and is the answer not in the manual?
Questions and answers