
Subscribe to Our Youtube Channel
Related Manuals for Click CPAC1609-H

Summary of Contents for Click CPAC1609-H
- Page 1 PORTABLE AIR CONDITIONER 2.64KW COOLING POWER 2.05KW HEATING POWER INSTRUCTION MANUAL Model: CPAC1609-H...
-
Page 2: Important Safeguards
IMPORTANT • Be sure the air conditioner is properly grounded. To minimize shock and fire hazards, proper SAFEGUARDS grounding is important. • Do not misuse the power cord. Never carry the appliance by the power cord or pull to When using electrical appliances, in disconnect it from the outlet. - Page 3 • Do not place heavy objects on top of the power • Any person who is involved with working cord, or bend or pinch the cord. Do not place on or breaking into a refrigerant circuit the power cord near a heater. Do not allow should hold a current valid certificate from water to run into the electric parts.
-
Page 4: Storage Of Equipment/Appliances
GETTING TO Storage of equipment/appliances: KNOW YOUR AIR • The storage of equipment should be in accordance with the manufacturer’s instructions. CONDITIONER • Appliance shall be installed, operated and stored in a room with a floor area larger than 12m Congratulations on the purchase of your new Portable Air Conditioner. -
Page 5: Performance Parameters
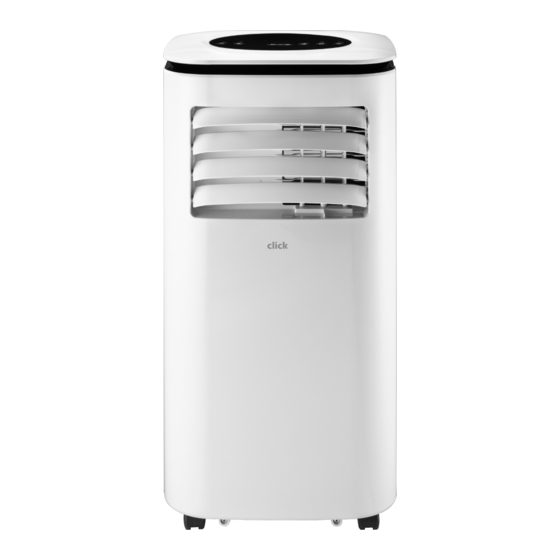
PARAMETERS DB/WB (°C) 35/24 21/15 Model CPAC1609-H 5. Wiring diagram of the air conditioner is attached on the unit. AC 220-240V Power ~ 50Hz 6. If the supply cord is damaged, it must be replaced by the manufacturer, its service agent... - Page 6 FEATURES OF YOUR PORTABLE AIR CONDITIONER Top panel Control panel Side Upper air filter panel Air outlet with Continuous adjustable drain port louvers Rear housing Exhaust host connector Front housing Wrapping bracket for power cord Lower air filter Drain port Castor Window slider kit Hose connector...
-
Page 7: Control Panel
CONTROL PANEL REMOTE CONTROL Speed Mode DEHUMID Timer Sleep Down Power 1. POWER: Press this button to turn the appliance on or off. 2. MODE: Press this button repeatedly to select desired operating mode: Cooling, Dehumidifying, Fan or Heating mode. 3. -
Page 8: Dehumidifying Mode
Sleeping mode • Press “SPEED” to select high speed or low speed. • Press “SLEEP” to enter into sleeping mode, • In fan mode, the sleep function cannot be the fan speed will be changed to Low setting activated, and temperature cannot be adjusted. automatically. -
Page 9: Location Requirements
INSTALLATION GUIDE Using the Remote Control to operate the appliance Location Requirements 1. For the best results, aim the remote control directly at the Remote Sensor on the front panel In the cooling mode, the appliance must be placed of the appliance. close to a window or opening so that the warm exhaust air can be ducted outside. -
Page 10: Exhaust Hose Installation
HOW TO ASSEMBLE THE WINDOW SLIDER Note: The window kit is only designed to be installed with sliding or sash windows or doors. The window kit is not designed or to be used with any other style of windows. 1. Disassemble the screw, washer and nut. 2. -
Page 11: Water Condensation Drainage
3. Extend the exhaust hose and insert window • The exhaust hose can be extended from its slider connector into window slider kit. Push original length of 50cm up to 150cm, but it the connector to the shorter end of Window is best to keep the length to the minimum Slider Kit and fix it by using the screw provided. -
Page 12: Continuous Draining
OPERATION OF AIR d) Once the water collection tank is drained, reinstall the rubber plug, making sure it is on CONDITIONER securely. Move the unit back to its position, reconnect exhaust hose, plug back into Domestic Power Outlet and switch appliance When using the unit, please ensure you leave it to On, reselect your desired operation mode. -
Page 13: Cleaning The Air Filter
• Auto Stop: 5. If the power cord is damaged, it should be repaired by manufacturer or its agency. While the unit is running, press the Timer button to activate the Auto Stop program, the Timer indicator Note: Move the unit carefully if the water illuminates and “01”... -
Page 14: Warning Display
After a Long Idle period and before next 3. General work area All maintenance staff and others working in the local area shall be instructed on the nature of work 1. Remove the drain plug and drain water being carried out. Work in confined spaces shall be completely. - Page 15 8. Checks to the refrigeration equipment 10. Repairs to sealed components Where electrical components are being changed, During repairs to sealed components, all electrical they shall be fit for the purpose and to the correct supplies shall be disconnected from the equipment specification.
- Page 16 13. Detection for flammable refrigerants Flushing shall be achieved by breaking the vacuum in the system with OFN and continuing to fill until Under no circumstances shall potentially sources the working pressure is achieved, then venting to of ignition be used in the searching for or detection atmosphere, and finally pulling down to a vacuum.
- Page 17 • Pump down refrigerant system, if possible. Before using the recovery machine, check that it • if a vacuum is not possible, make a manifold so is in satisfactory working order, has been properly that refrigerant can be removed from various maintained and that any associated electrical parts of the system.
-
Page 18: Troubleshooting
TROUBLE SHOOTING ATTENTION: Before contacting Customer Service support, please refer to the following guide. WARNING: Immediately turn off the air conditioner, pull out the plug and contact customer service if any of the following occurs: • Your electrical box switch often trips. •... -
Page 19: Warranty Exclusions
WARRANTY CONDITIONS FOR PURCHASE IN AUSTRALIA & NEW ZEALAND Any claim under this warranty must be made within 12 months of the date of purchase of the product. To make a claim under the warranty in Australia, take the product (with proof of purchase) to any Bunnings store (see www.bunnings.com.au in Australia or www.bunnings.co.nz in New Zealand for store locations). - Page 20 Cat. No. CPAC1609-H June 2022...
Need help?
Do you have a question about the CPAC1609-H and is the answer not in the manual?
Questions and answers