Table of Contents
Advertisement
Quick Links
Advertisement
Table of Contents

Related Manuals for VUGERA VG-F2K

Summary of Contents for VUGERA VG-F2K
- Page 1 User Manual VG-F2K...
- Page 2 This DashCamera (dashcam) is a specialized onboard device that continuously records video while the vehicle is in use. Some features may not be available depending on installation, driving conditions, and vehicle type. The video quality might vary for each device as a result of installed firmware.
-
Page 3: Before Use
Product is completely booted up after turning it on, and then begin operating the vehicle. • VUGERA is not responsible for any loss caused by an accident, nor is it responsible for providing any support regarding the outcome of an accident. -
Page 4: Caution
• Do not pull, insert, or bend the Power Cable using excessive force. Do not place heavy objects on the device and the Power Cable. • Do not modify or cut the Power Cable. VUGERA does not guarantee that devices or peripherals not authorized by VUGERA will be compatible with its Product. -
Page 5: Fcc Statement
■ FCC Statement This device complies with part 15 of the FCC Rules. Operation is subject to the following two conditions : (1) This device may not cause harmful interference, and (2) This device must accept any interference received, including interference that may cause undesired operation. User’s Caution Statement Caution : Any changes or modifications to the equipment not expressly approved by the party responsible for compliance could void user’s authority... -
Page 6: Table Of Contents
Manual Guide Before Use Scope of Product Liability Caution FCC Statement Cautions When using the Product When using the Micro SD card Introdution Specifications Device components and Optional items Components Key features Using GUI Main Menu Preview ADAS Front Vehicle Departure Warning Lane Departure Warning Select Vehicle Type Menu... - Page 7 Speed Unit Secret Mode Events pop-up Device and LED Operations Device and LED Operations VUGERA PC Viewer Software VUGERA PC Viewer Download Using the PC Viewer PC Viewer Preferences Recorded file creation rule Formatting your Micro SD card on PC...
- Page 8 VUGERA Mobile Viewer Software VUGERA Mobile APP Download Mobile Viewer Screen Layout Playing recorded Videos on the Mobile Viewer Installing the Device onto your Vehicle How to install the Device on your Vehicle How to connect the Hardwire Power Cable...
-
Page 9: Cautions
Cautions When using the Product When using the Micro SD card... - Page 10 Cautions When using the Product This section helps ensure user safety and prevent property damage. Please read carefully. Do not operate the product while driving. Distraction while driving may be the cause of vehicle accidents and result in an injury or death. The product should be installed where the driver’s view may be distracted.
- Page 11 Do not modify, disassemble, or repair the product. - Do not operate or handle the Power Cable with wet hands. Doing so may result in electrocution. - Do not use damaged Power Cables. Doing so may result in electrical fire or electrocution. - Do not modify or cut the Power Cable.
- Page 12 NOTICE : Touchscreen The touchscreen on your device, like most touch screens, is made of glass-like plastic. It can break if your device is dropped or receives a significant impact. To reduce the risk of personal injury, avoid touching the screen if the glass is broken, chipped, or cracked, and arrange to have the screen replaced.
- Page 13 Using a Micro SD card sold by others may result in data loss or device issues. Since this card is exclusive to the VUGERA dash cam, using it in a mobile phone or other external device may damage the card...
-
Page 14: Introdution
Introdution Specifications Device components and Optional items Components Key features... -
Page 15: Specifications
All rights for the content and maps in this guide are reserved by VUGERA and are protected under copyright laws. All unauthorized duplication, revision, publication, or distribution of this guide without written consent from VUGERA is prohibited and is eligible for criminal charges. Registered trademarks VUGERA is a registered trademark of CARNAVICOM. -
Page 16: Device Components And Optional Items
The list of components are subject to change without notice as we may change during the Product life-cycle stages. Device components VUGERA Rear Hardwire Rear Cable... -
Page 17: Components
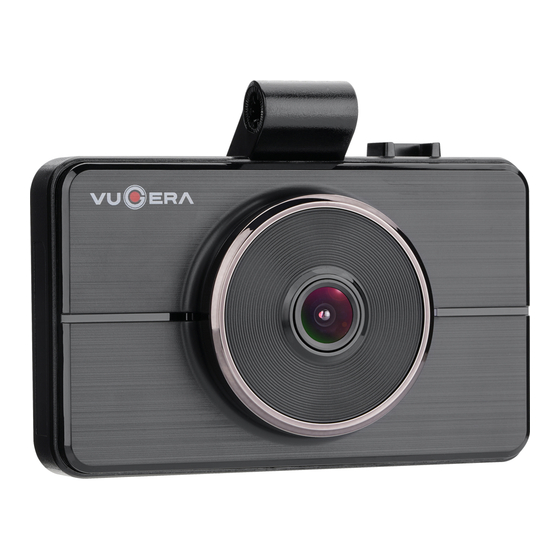
Components Each part of the VUGERA exterior. Front Camera Speaker Records the Front view. Outputs the voice guide and buzzer sounds to indicate the Product’s status. Touch LCD Enables the use to interact directly with what Voice recording is displayed. - Page 18 Power button Mounting Bracket Press : Manual Recording Cradle on which to mount the Press and hold : ON/OFF main body. Micro SD card slot Insert the memory card to save Recordings. Security LED Indicates that the video is being recorded. Adhesive mount Used to fix the Front&Rear Camera in the vehicle.
-
Page 19: Key Features
Key features Main features Auto delete Recording function If the memory card is full, the video files will be deleted sequentially from the oldest and the auto delete Recording function kicks in to keep the device continuously Recording while driving. Automatically deleted images cannot be recovered. - Page 20 Secret Mode The recordings can be saved and protected with a password, disabling anyone from modifying or deleting the saved footage on the micro-SD card. Mechanical Anti-theft Lock Protect your micro-SD card from loss or theft. Prevents and protects from third-party theft. A dedicated Hex Key is required to unlock the anti-theft lock.
-
Page 21: Using Gui Main Menu
Using GUI Main Menu Preview ADAS Front Vehicle Departure Warning Lane Departure Warning Select Vehicle Type Menu Playback Aud io Voice Recording Volume Control Sound Effects Audio Guidance System Settings Time Touchpad Format SD Card Storage Space Settings F/W version Configuration Impact Sensitivity Motion Sensitivity... - Page 22 Using GUI Main Menu Access path Product ON Menu button on the upper left 1. Touch “Menu” on the upper left of the LCD touchscreen to enter the Main Menu. Touch screen TIP If you find the touchscreen too small to touch, we recommend that you use a pointer or medium-tip ballpoint pen instead.
-
Page 23: Preview
Preview Access path Menu on the upper left Front Only / Front & Rear / Rear Only / LCD OFF Preview The main Menu consists of [Front Only / Front & Rear / Rear Only / LCD OFF]. (assuming both Front and Rear camera are installed) If the Rear camera is disconnected, only the Front image will be displayed. -
Page 24: Adas
ADAS Access path Menu on the upper left ADAS FVDW / LDWD / Select Vehicle Type ADAS ADAS consists of [Front Vehicle Departure Warning / Lane Departure Warning / Select Vehicle Type]. Front Vehicle Departure Warning (FVDW) Uses a warning sound and image to notify the driver when the vehicle ahead has begun moving. -
Page 25: Front Vehicle Departure Warning
Front Vehicle Departure Warning Access path Menu on the upper left ADAS Front Vehicle Departure Warning ON / OFF Front Vehicle Departure Warning Front Vehicle Departure Warning can be switched ON or OFF. The factory default setting is “OFF”. -
Page 26: Lane Departure Warning
Lane Departure Warning Access path Menu on the upper left ADAS Lane Departure Warning ON / OFF / 60km/h (37mph) / 80km/h (50mph) / 100km/h (62mph) - Page 27 Lane Departure Warning Lane Departure Warning consists of [ON / OFF / 60km/h (37mph) / 80km/h (50mph) / 100km/h (62mph)]. Activates regardless of the vehicle speed, even when a GPS signal is disconnected. Turn off the Lane Departure Warning System. 60km/h (37mph) If the car moves out of the lane while driving at a speed higher than 60km/h (37mph), a warning will sound, and an image will appear.
-
Page 28: Select Vehicle Type
Select Vehicle Type Access path Menu on the upper left ADAS Select Vehicle Type Car / Van / Pick-up Select Vehicle Type Type of Vehicle includes [Car / Van / Pick-up]. A motor vehicle with six or fewer seats. Choose between “up to a 7-Seater” and “Larger than a 9-Seater”. Pick-up A motor vehicle used for freight, maintenance or safety services. -
Page 29: Menu
Menu Access path Menu on the upper left Menu Menu Menu consists of [Playback / LCD / Audio / System Settings / Configuration / Convenience]. -
Page 30: Playback
Playback Access path Menu on the upper left Menu Playback Driving / Parked / Event / Manual Playlist Front Video / Rear Video REC2_220220413_201620 REC2_220220413_211720 REC2_220220413_221820 REC2_220220413_231920... - Page 31 Access path Menu on the upper left Menu Playback Driving / Parked / Event / Manual Playlist Front Video / Rear Video...
- Page 32 Playlist The Playback Menu consists of [Driving / Parked / Event / Manual] allowing you to Select and view the recorded video files on the screen. Playlist are stored video files in time sequence. Clicking a file will playback the file on the screen. Recording file Playlist consists of recorded files highlighting the type of Recording Mode.
-
Page 33: Lcd
Access path Menu on the upper left Menu Turn OFF after 1 min/ Turn OFF after 3 min/ Turn OFF after 5 min/ OFF/ Clock... - Page 34 LCD Settings include [Turn OFF after 1 min / Turn OFF after 3 min / Turn OFF after 5 min / Clock / OFF ]. Turn OFF after 1 min / Turn OFF after 3 min / Turn OFF after 5 min After the turn off time is set, the LCD screen will turn off accordingly.
-
Page 35: Audio
Audio Access path Menu on the upper left Menu Audio Voice Recording / Volume Control / Sound Effects / Audio Guidance Audio Allows you to change the Voice Recording, Volume Control, Sound Effects, Audio Guidance settings. Audio Settings consists of [Voice Recording / Volume Control / Sound Effects / Audio Guidance]. -
Page 36: Voice Recording
Voice Recording Access path Menu on the upper left Menu Audio Voice Recording ON / OFF Voice Recording Audio Recording can be switched ON or OFF. Record audio with video. Video Recording only. The factory default setting is “ON”. -
Page 37: Volume Control
Volume Control Access path Menu on the upper left Menu Audio Volume Control Low / Normal / High Volume Control Set the Volume to [Low / Normal / High]. The factory default setting is “Normal”. -
Page 38: Sound Effects
Sound Effects Access path Menu on the upper left Menu Audio Sound Effects ON / OFF Sound Effects Sound Effects can be switched ON or OFF. Touching the LCD screen will enable sound effects. Touching the LCD screen will disable sound effect. The factory default setting is “ON”. -
Page 39: Audio Guidance
Audio Guidance Access path Menu on the upper left Menu Audio Audio Guidance ON / OFF Audio Guidance Audio Guidance can be switched ON or OFF. Audio guidance will be heard according to dashcam operations. No audio guidance will be heard according to dashcam operations. The factory default setting is “ON”. -
Page 40: System Settings
System Settings Access path Menu on the upper left Menu System Settings Time / Touchpad / Format SD Card / Storage Space Settings / F/W version System Settings System Settings consists of [Time / Touchpad / Format SD Card / Storage Space Settings / F/W version]. -
Page 41: Time
Time Access path Menu on the upper left Menu System Settings Time Hour / Min / Sec Year / Month / Day GMT / / OK Time Allows you to Manually set the GMT. Click for Hour, Minute, Second, Year, Month, Day, GMT. If the GMT Settings have been changed or the clock has been set backward, the micro-SD card will be required to be formatted. -
Page 42: Touchpad
Touchpad Access path Menu on the upper left Menu System Settings Touchpad Touchpad Allows you to recalibrate the touch sensitivity in order to minimize LCD touch error. When you enter the touch pad calibration Menu, a plus sign (+) will appear as shown in the image above. -
Page 43: Format Sd Card
Format SD Card Access path Menu on the upper left Menu System Settings Format SD Card Pop-up (YES / NO) -
Page 44: Storage Space Settings
SD Card Format Allows you to delete all saved video files and initialize the SD card. (Stored system settings will NOT be reset after the Format) Selecting “Format SD Card” will create a pop-up Message, confirming whether if you wish to proceed with Formatting process. If you choose “YES”, all video data stored on the SD card will be permanently deleted. - Page 45 Storage Space Settings Access path Menu on the upper left Menu System Settings Storage Space Settings Default Setting / Prioritize Driving / Driving Only / Prioritize Parking Pop-up (YES / NO)
- Page 46 Storage Space Settings This allows you to Select your Preferred Storage Space Saving Settings. [Default Settings / Prioritize Driving / Driving Only / Prioritize Parking] Default Settings Driving 45% / Event 30% / Parking 20% / Manual 4% / System 1% Prioritize Driving Driving 65% / Event 15% / Parking 15% / Manual 4% / System 1% Driving Only...
-
Page 47: F/W Version
F/W version Access path Menu on the upper left Menu System Settings F/W version MODEL : VG - F2K VER. : 1.0.0 Firmware Selecting the Firmware Version Menu allows you to check the Model name and current firmware version of your device. -
Page 48: Configuration
Configuration Access path Menu on the upper left Menu Configuration Impact Sensitivity / Motion Sensitivity / Low Voltage Cut-off / Driving Mode / Parking Mode / Factory Reset Configuration Configuration Consists of [Impact Sensitivity / Motion Sensitivity / Low Voltage Cut-off / Driving Mode / Parking Mode / Factory Reset]. -
Page 49: Impact Sensitivity
Impact Sensitivity Access path Menu on the upper left Menu Configuration Impact Sensitivity Low / Normal / High Impact Sensitivity Upon impact detection, a bell sound will inform you that an event Recording has been initiated. Impact Sensitivity settings • In the Impact Sensitivity Menu, choose one of options [Low / Normal / High]. -
Page 50: Motion Sensitivity
Motion Sensitivity Access path Menu on the upper left Menu Configuration Motion Sensitivity Low / Normal / High Motion Sensitivity This Feature is enabled in Parking Mode only. When Motion is detected while parked, the device will be record and save a parked event file. Motion Sensitivity settings •... -
Page 51: Low Voltage Cut-Off
Low Voltage Cut-off Access path Menu on the upper left Menu Configuration Low Voltage Cut-off 11.8V/23.6V / 12.0V/24.0V / 12.2V/24.4V Low Voltage Cut-off The vehicle will NOT start if the battery voltage drops below 11.5V (23V for large vehicles). To prevent a battery discharge, the low voltage cut-off feature will enable the dashcam to automatically switch off the device when the vehicle battery voltage falls below the set value. -
Page 52: Driving Mode
Driving Mode Access path Menu on the upper left Menu Configuration Driving Mode Normal Recording / Hyperlapse Recording... - Page 53 Driving Mode Driving Mode Menu enables setting of the Recording Mode while driving. Normal Recording Constantly records and stores video files at 30 frames per second. (30fps) Hyperlapse Recording Constantly records and stores video files at 1 frame per second. (1fps) Voice Recording is disabled in Hyperlapse Mode.
-
Page 54: Parking Mode
Parking Mode Access path Menu on the upper left Menu Configuration Parking Mode Event Recording / Hyperlapse Recording... - Page 55 Parking Mode Parking Mode Menu enables setting of the Recording Mode while parked. Event Recording The system enters “Parking Mode” when the engine is switched off. Event Recording enables Motion and Impact detected Recording. (30fps) Hyperlapse Recording The system enters “Parking Mode” when the engine is switched off. Hyperlapse Recording stores video at 1 frame per second.
- Page 56 Factory Reset Access path Menu on the upper left Menu Configuration Factory Reset Pop-up (YES / NO)
- Page 57 Factory Reset This resets all functions and settings of the device to factory defaults. If you Select the Reset Settings Menu, a pop-up window will appear asking you to confirm you wish to reset the settings. This resets all functions and settings of the device to factory default values, including the format of the micro-SD card.
-
Page 58: Factory Reset
Factory Reset Access path Menu on the upper left Menu Configuration Factory Reset Pop-up (YES / NO) Factory Reset Upon Factory Reset, the system will reboot and display Time Settings. For more details on the Time Settings, please refer to page 40 in this manual. -
Page 59: Convenience
Convenience Access path Menu on the upper left Menu Convenience Front LED Settings / Speed Unit / Secret Mode Convenience Convenience consists of [Front LED Settings / Speed Unit / Secret Mode]. -
Page 60: Front Led Settings
Front LED Settings Access path Menu on the upper left Menu Convenience Front LED Settings ON / OFF Front LED Settings Front LED Settings can be switched ON or OFF. Turn on the Front Security LED. Turn off the Front Security LED. The factory default setting is “OFF”. -
Page 61: Speed Unit
Speed Unit Access path Menu on the upper left Menu Convenience Speed Unit mph / km/h Speed Unit Users can change the speed units they want for easy understanding. km/h Kilometres per hour Mile per hour... -
Page 62: Secret Mode
Secret Mode Access path Menu on the upper left Menu Convenience Secret Mode ON / OFF Secret Mode pad... - Page 63 Secret Mode Secret Mode protects the device owner from others using and modifying the video playlist by setting a password. The Secret Mode is a number consisting of a 4-digit number. If entered incorrectly for 5 times in a row, you can’t enter the Menu for 3 minutes.
-
Page 64: Events Pop-Up
Events pop-up Access path Pop-up appears when device is turned on after exiting Parking Mode Pop-up appears notifying Motion and event Recording while parked Informs the user of the number of Motion and event files recorded while parked. When the device is turned on, a caution pop-up notification will appear for 2 seconds after audio playback. -
Page 65: Device And Led Operations
Device and LED operations Device and LED operations... -
Page 66: Device And Led Operations
Device and LED operations Status Item Operation status Sound effect Booting progress SD card with different Format method (UnFormatted) Format progress (Rebooting) Booting Not supported Read-only SD Card (Repeat rebooting) SD card cannot be recognized (Repeat rebooting) ACC ON SD card not inserted When SD card is inserted Ding-dong SD card... - Page 67 SECURITY LED (Front LED in operation only when the Front LED Settings is used) Audio output Front-LED Rear-LED White(1) Blue(1) (Ignore Front LED Settings) Not supported SD Card will be formatted. System will restart. Flashing after booting (1 sec interval) Please check the SD Card.
-
Page 68: Vugera Pc Viewer Software
VUGERA PC Viewer Software VUGERA PC Viewer Download Using the PC Viewer PC Viewer Preferences Recorded file creation rule... -
Page 69: Vugera Pc Viewer Download
[PC viewer for Windows] Installing the PC viewer (for Windows) You can download the latest PC viewer software from the VUGERA website (www.vugera.com.au) The PC viewer installation file (setup.exe) is stored in the root folder of the memory card that is provided with the Product. Follow the instructions to install the PC viewer on your pc. -
Page 70: Using The Pc Viewer
Using the PC viewer Set up Flip Left to Right Back up Flip Top to Bottom Snapshot Select a language Flip Left to Right Homepage Flip Top to Bottom Information Full Screen Open Drive (Files) Switch Channels Press the Open button to Select the drive which contains the file. The drive created when the Micro SD card is inserted into the PC (drive designation will vary depending on the number of drives used on the PC) -
Page 71: Pc Viewer Preferences
PC Viewer Preferences Below settings are available on VUGERA Viewer by clicking preference setting button. Sensitivity setting : Impact sensitivity - Vehicle’s impact sensitivity can be adjusted between 3 levels. Motion sensitivity - Sensitiveness of Motion detection system can be adjusted into 3 levels when in Parking Recording Mode (Low, Normal, High). -
Page 72: Recorded File Creation Rule
Recorded file creation rule Files recorded by VUGERA can be viewed in any common video player without conversion. After connecting the Micro SD card to your PC, Select the removable drive to view the recorded videos. Name Name Date Modified fi... -
Page 73: Formatting Your Micro Sd Card On Pc
Formatting your Micro SD card on PC Micro SD Card Format... -
Page 74: Micro Sd Card Format
Format into your PC drive Remove the Micro SD card from VUGERA and connect it to your PC to find the drive location where the SD card is inserted. Right-click and Select Format to open the Removable Disk Format window. -
Page 75: Installing The Device Onto Your Vehicle
Installing the device onto your vehicle How to install the device on your vehicle How to connect the Hardwire Power Cable... -
Page 76: How To Install To Your Vehicle
Do not cut or modify the Power Cable yourself. Doing so may • damage the Product or the vehicle. For safe driving, arrange the Cables to prevent the driver's vision from being obstructed or interfering with driving. For more Information about arranging Cables, visit www.vugera. com.au... -
Page 77: How To Connect Hardwire Power Cable
GND (ground to the vehicle) GND : Vehicle grounding Connect the Power Cable to the fuse box of the vehicle. Precautions When Installing When installing VUGERA with the navigation system, please maintain a 20 cm distance between the two Products diagonally. -
Page 78: Product Warranty
Product Warranty General Information Warranty Registration... -
Page 79: General Information
VUGERA is NOT responsible for the loss of any recorded video during operation. Although the Product was designed to withstand high-impact car collisions, VUGERA does not guarantee the Recording of accidents when the Product is damaged as a result of the accident.
Need help?
Do you have a question about the VG-F2K and is the answer not in the manual?
Questions and answers
Keeps turning off then a warning pops up
The VUGERA VG-F2K may keep turning off and displaying a warning due to several possible reasons:
1. Micro SD Card Issues – If the Micro SD card is not replaced every 6 months or if a non-VUGERA card is used, it may cause data loss or device issues.
2. Power Connection Problems – If the Hardwire Power Cable is not properly connected to the fuse box, the device may not receive consistent power.
3. Extreme Temperature Exposure – If the device is exposed to high temperatures or direct sunlight, it may not function properly and could turn off to prevent damage.
4. Incompatible Accessories – Using non-genuine accessories or peripherals may cause compatibility issues leading to device malfunction.
5. Dirty Camera Lens or Windshield – Poor video quality due to dirt or obstructions may trigger warnings or affect performance.
Checking these factors and ensuring proper installation and maintenance can help resolve the issue.
This answer is automatically generated
Why does it keep restarting in Chinese words
The VUGERA VG-F2K may keep restarting due to issues with the Micro SD card. The manual recommends replacing the Micro SD card every 6 months and using only the one provided by VUGERA. Using a different Micro SD card may cause data loss or device issues, which could lead to continuous restarting.
This answer is automatically generated