Table of Contents
Advertisement
Quick Links
Advertisement
Table of Contents
Troubleshooting

Subscribe to Our Youtube Channel
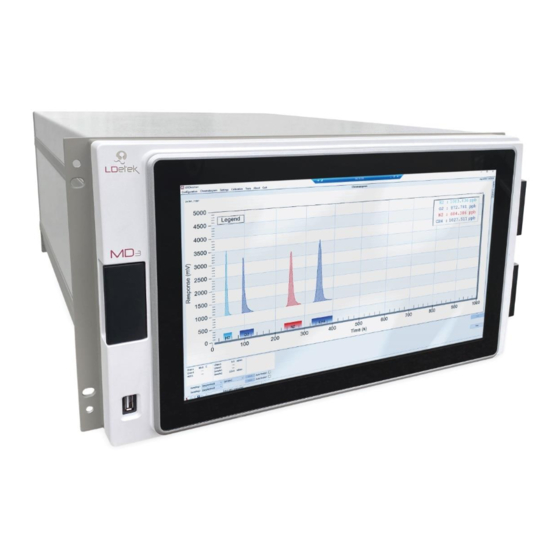
Summary of Contents for PST LDetek MULTIDETEK 3
- Page 3 MultiDetek 3 Trace impurities analyzer USER’S MANUAL V1.4 Printed in Canada Copyright 2023...
-
Page 4: Table Of Contents
Table of Contents Table of Contents ........................ 4 Table of Figures ........................6 1. Forewarning ........................8 2. Warranty, maintenance, and service policies ............... 9 3. Declaration of conformity ....................12 4. Specifications ........................14 5. Installation .......................... 15 5.1. Detector cautions......................15 5.2. - Page 5 11.1.Spare part list ......................107 11.2.Tools ......................... 108 11.3.Maintenance procedures ................... 109 11.4.Troubleshooting ......................113...
-
Page 6: Table Of Figures
Table of Figures Figure 1: Boot up screen ......................17 Figure 2: Boot-up alerts ......................17 Figure 3: Oven setpoint ......................18 Figure 4: Flow setpoint ......................19 Figure 5: Operating Parameters ..................... 20 Figure 6: Typical Installation ....................24 Figure 7: Same source actuation .................... - Page 7 Figure 50: LDepc diagnostic window ..................71 Figure 51: Modbus register window ..................72 Figure 52: Modbus information window ................72 Figure 53:Regeneration window .................... 73 Figure 54: About menu ......................74 Figure 55: Firmware Update ....................74 Figure 56: LDReport logo ...................... 88 Figure 57: LDReport local .....................
-
Page 8: Forewarning
MULTIDETEK3 User’s manual 1. Forewarning Any user that wants to use the MultiDetek3 Trace Impurity analyzer must read this manu- al. It contains important information to successfully operate this instrument. LDetek as- sumes that all operators have taken the time to read this information before installing, oper- ating and troubleshooting this analyzer. -
Page 9: Warranty, Maintenance, And Service Policies
MULTIDETEK3 User’s manual 2. Warranty, maintenance, and service policies Goods and part(s) (excluding consumables) manufactured by the seller are warranted to be free from defects in workmanship and material under normal use and service for twelve (12) months after installation and start-up and not exceeding eighteen (18) months from shipment date. - Page 10 MULTIDETEK3 User’s manual MANUFACTURED BY SELLER GIVING RISE TO THE CAUSE OF ACTION. BUY- ER AGREES THAT IN NO EVENT SHALL SELLER'S LIABILITY EXTEND TO IN- CLUDE INCIDENTAL OR CONSEQUENTIAL DAMAGES. CONSEQUENTIAL DAMAGES SHALL INCLUDE BUT ARE NOT LIMITED TO, LOSS OF ANTICIPAT- ED PROFITS, LOSS OF USE, LOSS OF REVENUE, COST OF CAPITAL AND DAM- AGE OR LOSS OF OTHER PROPERTY OR EQUIPMENT.
- Page 11 MULTIDETEK3 User’s manual RETURNING A PRODUCT FOR REPAIR Upon determining that repair services are required, the customer must: • Obtain an RMA (Return Material Authorization) number. • Supply a purchase order number or other acceptable information. • Include a list of problems encountered along with the name, address, telephone, and RMA number.
-
Page 12: Declaration Of Conformity
MULTIDETEK3 User’s manual 3. Declaration of conformity E U Declaration of Conformity 1. Product model: M ulti D etek 3 Compact gas chromatpgraph 2. Name and address of the manufacturer: LDetek Inc. Monfette E. Thetford Mines, QC G6G 7K6 (418) 755 - 1319 Email: info@ldetek.com This product is in conformity with the following EU Directives ,Standard(s) or Normative Document(s):... - Page 13 MULTIDETEK3 User’s manual...
-
Page 14: Specifications
MULTIDETEK3 User’s manual 4. Specifications • PED / TCD / FID Gas Chromatography Detector: • Quartz Crystal Microbalance / Ceramic Metal-Oxide / Electro- Online Detectors: chemical / Zirconia • Temperature-controlled process GC Standard features: • 15,6’’ wide touchscreen with 1366 x 768 HD resolution (IP65) •... -
Page 15: Installation
MULTIDETEK3 User’s manual 5. Installation 5.1. Detector cautions The MultiDetek3 utilizes multiple detection techniques that have been well-established in the industry for many years, including Plasma Emission Detector (PED), Flame Ionization Detector (FID), Thermal Conductivity Detector (TCD), and others upon request. The PED operates on the principle of spectroscopic emission. -
Page 16: Analyzer Application
MULTIDETEK3 User’s manual 5.2. Analyzer application The MultiDetek3 is specifically designed for analyzing impurities and samples as outlined in the instrument's specification sheet. Using this instrument with any other gas type may cause damage to the analyzer. To ensure safe and proper use, refer to the "Operating Parameters" document that accompanies the unit. -
Page 17: Figure 1: Boot Up Screen
MULTIDETEK3 User’s manual Figure 1: Boot up screen 9. Before proceeding, it is essential to resolve all active alerts, except for "Flow deviation on Sample" and "Low flow on Sample". To view the list of active alerts, double-click on the red alert bar to open the alert menu. Figure 2: Boot-up alerts... -
Page 18: Figure 3: Oven Setpoint
MULTIDETEK3 User’s manual Below are the principal alerts that you may encounter: Temperature deviation: This type of alert is normal during initial start-up and will typically resolve itself after a few minutes as the ovens, HCD or heated zone warm up. However, if the alert persists and no temperature change occurs, it may indicate a problem that requires further attention. -
Page 19: Figure 4: Flow Setpoint
MULTIDETEK3 User’s manual Figure 4: Flow setpoint Low flow on sample: This alert will typically resolve automatically within a few minutes. During initial start-up, the sample proportional valve needs some time to stabilize. The set- point for the sample flow can be found in the document “Operating Parameters”. You can also check the sample setpoint in the settings menu (Settings>>Settings>>Flow). -
Page 20: Figure 5: Operating Parameters
MULTIDETEK3 User’s manual After resolving all active alerts, except for "Flow deviation on Sample" and "Low flow on Sample", the system must purge. A partial purge will take about 2-3 hours and a good purge will take 12-24 hours depending on the system configuration. Note that for ppb systems with ranges of measurements below 1000 ppb, the purge may take 2-3 days. -
Page 21: Shut-Off
MULTIDETEK3 User’s manual peak(s) fit completely in their respective window(s). If some peaks aren’t perfectly inte- grated into their respective window, restart the analysis several times. If the issue persists, it is recommended to send the machine file (.md3m) to LDetek support for further instruc- tions. -
Page 22: Typical Installation
MULTIDETEK3 User’s manual 8. Put a male cap over the carrier inlet tube that was removed. 9. If the actuation gas is coming from the same source as the carrier gas, repeat steps 7 and 8 for the actuation gas inlet. 10. - Page 23 MULTIDETEK3 User’s manual higher (>99.999%). This grade is certified to have a maximum concentration of 10 ppm of total impurities. The grade 5 carrier is then purified by a filter-type heated gas purifier (LDP1000). Starting from grade 5, the outlet purity of the purifier will be 99.999999% (grade 8.0).
-
Page 24: Figure 6: Typical Installation
MULTIDETEK3 User’s manual Figure 6: Typical Installation... - Page 25 MULTIDETEK3 User’s manual 5.5.2. Valves actuation Separating the actuation from the reference carrier gas allows our gas chromatograph Mul- tiDetek3 to achieve better results and more stability. The reason for it is mainly because of pressure changes when valves are actuating during cycles. This causes an impact on the carrier gas pressure and results in baseline fluctuation which can affect the response of the detector.
-
Page 26: Figure 7: Same Source Actuation
MULTIDETEK3 User’s manual Figure 7: Same source actuation... -
Page 27: Figure 8: 2 Sources Of Actuation
MULTIDETEK3 User’s manual Figure 8: 2 sources of actuation... - Page 28 MULTIDETEK3 User’s manual 5.5.3. O2 doping Figure 6 shows a typical installation that requires O2 doping. This feature is only required when O2 is measured at the ppm/ppb level and is used to keep our system saturated with Oxygen. In chromatography, it is well known that oxygen is adsorbed by the Molecular Sieve and the porous polymer-type columns used for separating and measuring trace oxy- gen.
-
Page 29: Figure 9: O2 Doping
Figure 9: O2 doping... -
Page 30: Hardware Description
MULTIDETEK3 User’s manual 6. Hardware description The MultiDetek3 has major components included in its chassis. This section will describe each component that can be replaced for maintenance or upgrade. 6.1. Detectors The PED detector module is a 155 mm (6.1”) x 82 mm (3.22”) x 63 mm (2.48”) box that contains all components needed to proceed to accurate measurement. -
Page 31: Motherboard
MULTIDETEK3 User’s manual 6.2. Motherboard This I/O board controls all components inside the analyzer (flow, detectors acquisition, temperatures, etc.). When replacing this motherboard be sure to avoid any electrostatic contact. The motherboard conception is modular, which makes it easy to replace even on the field. Flow sensors for the carrier and sample, the 4-20 mA modules and the microcontroller can also all be replaced on-site. -
Page 32: Sample Gas Proportional Valve, Mini Pump And Septum Injector
MULTIDETEK3 User’s manual 6.3. Sample gas proportional valve, mini pump and septum in- jector This valve is used to control the sample flow inside the instru- ment. This is a very low dead volume valve that allows minimal purging time at start-up and is very quick for flow stabilization. This valve has been designed by LDetek to achieve good stability and the possibility of working at ppb level without contamina- tion. -
Page 33: Carrier Gas Electronic Pressure Regulator (Ldepc)
MULTIDETEK3 User’s manual 6.5. Carrier gas electronic pressure regulator (LDepc) The carrier gas flow control in the MultiDetek3 is managed by a high-purity LDetek electronic pressure controller (EPC). The car- rier flow control can be mounted inline or in bypass mode depend- ing on the application. -
Page 34: Large 15.6'' Touch Screen Lcd & Ldchroma
MULTIDETEK3 User’s manual 6.7. Large 15.6’’ touch screen LCD & LDChroma+ The MultiDetek3 offers an easy and complete interface working on Windows 10 IoT. With its clear 15.6’’touch screen LCD, it allows the operator to easily navigates through the different menus. More- over, the system includes an Ether- net port for remote control. - Page 35 MULTIDETEK3 User’s manual Handling highly flammable gas like silane or any other hazardous or explosive gases re- quires a high level of safety, and it is what LDetek offers with its built-in sample purging and monitoring system inside the MultiDetek3 compact GC. This system consists of 4 steps of safety: Step 1: The sample gas flow path external to the purged box is fully welded offering no possibility of leakage.
-
Page 36: Bolt-On Compact Purifier
MULTIDETEK3 User’s manual 6.9. Bolt-on compact purifier A compact purifier can be bolted on the MultiDetek3 back panel. It offers the same per- formance as the standard gas purifier but with a more compact design. The maintenance is easy since the compact unit is mounted on the back panel of the MultiDetek3. The unit of- fers intelligence, and the LED diagnostic system will turn red when the unit must be re- placed. -
Page 37: Ldchroma
MULTIDETEK3 User’s manual 7. LDChroma+ The MultiDetek3 system is powered by a powerful dual-core micro- controller, with one core specifically dedicated to digital signal pro- cessing (DSP). This microcontroller communicates with a 15.6-inch touchscreen panel PC that runs on the Windows 10 operating system. The system is designed to offer users a user-friendly and comprehen- sive interface called LDChroma+. -
Page 38: Figure 18: Method Manager
MULTIDETEK3 User’s manual 7.1.2. Method Manager The Method Manager allows you to manage all the methods you have on your Multi- Detek3. You can double-click on a row to open the method. Figure 18: Method Manager Delete: This button allows you to delete the selected method. Copy: This button allows s you to copy the selected method. -
Page 39: Figure 19: Calib Manager
MULTIDETEK3 User’s manual 7.1.3. Calib Manager The Calib Manager allows you to manage all the calibrations you have on your Multi- Detek3. Figure 19: Calib Manager Delete: This button allows you to delete the selected calibration. Copy: This button allows you to copy the selected calibration. Rename: This button allows Allows you to rename the selected calibration. -
Page 40: Figure 21: Set Language
MULTIDETEK3 User’s manual 7.1.6. User and Admin Mode User Mode: In this mode, the user has limited access to settings. He cannot change set- tings or force the analog and digital I/O. Admin Mode: In this mode, the user has access to all the menus. By default, the password to access the admin mode is “12345”, but it can be changed in the setting menu (see section 7.3.1.8). -
Page 41: Chromatogram Tab
MULTIDETEK3 User’s manual 7.2. Chromatogram tab 7.2.1. Chromatogram The Chromatogram menu is the hub for running analyses, providing access to crucial in- formation such as chromatograms, results, alerts, oven temperature, sample flow, and car- rier flow. This section aims to provide a comprehensive overview of the menu, enabling users to easily navigate its features and capabilities. -
Page 42: Figure 24: Bottom Bar
MULTIDETEK3 User’s manual 4- The button located at the bottom left is called Peak Scale (PS), which allows users to adjust the display of the chromatogram. By clicking on the PS button, three display modes become available - on sensor, automatic, and manual. In the 'on sensor' mode, peaks are integrated directly onto the raw signal. -
Page 43: Figure 25: Left-Bottom Bar Menu
MULTIDETEK3 User’s manual The third icon displays the letter ' '. If it is coloured, it indicates that one or more outputs are forced. This may occur when the system's outputs have been manually forced for diag- nostic purposes. The icon serves as a reminder to the user that the system's outputs are cur- rently forced. -
Page 44: Figure 26: Alerts Menu
MULTIDETEK3 User’s manual 7.2.2.2. Middle-bottom bar The middle part of the bottom bar displays the "device status", which indicates the status of communication between the panel PC and the motherboard. When the communication is established, it shows "MD3-XXXX connected". If there is no communication between the two, it will display "MD3-XXXX not connected". -
Page 45: Figure 27: Historic Menu
MULTIDETEK3 User’s manual 7.2.3. Historic The Historic menu enables users to access previous analysis results. By clicking on a row, the selected analysis will automatically load into the chromatogram menu. A green bar sit- uated at the top of the historic menu indicates that LDChroma+ is connected to LDReport, and it turns red if the connection is not established. -
Page 46: Figure 28: Historic Advanced Tools
MULTIDETEK3 User’s manual Moreover, a context menu will open after you right-click on an analysis. Figure 28: Historic advanced tools Export Historic: The export button allows you to export the selected historic on the hard drive or external storage. Chromatograms can be exported in .md3h or .xls. Calib Method: Allows you to calibrate a method using the selected analysis. -
Page 47: Figure 29: Historic List Window
MULTIDETEK3 User’s manual By right-clicking on the top-bar, a context menu opens up that allows the user to select dif- ferent filters. For example, selecting the "Today" filter will display only the analyses per- formed on the current day. Figure 29: Historic list window Last Historics: Shows the most recent historical data. -
Page 48: Figure 30: Peak Results
MULTIDETEK3 User’s manual After double-clicking on a row in the historic menu, a new window will appear displaying more detailed information about the analysis, such as concentration, area, retention time, height, and noise. The top-left section of this window displays the currently selected peak, and the top-right section allows you to modify detection parameters. -
Page 49: Settings Menu
MULTIDETEK3 User’s manual 7.3. Settings Menu 7.3.1. Setting The MultiDetek3 has a menu where all the parameters of the system can be accessed. However, It is important to note that making changes to these settings without proper knowledge and guidance can negatively impact the performance of the system. Therefore, any changes made to the settings in this category should be done only after consulting with LDetek support. -
Page 50: Figure 31: Settings Menu
MULTIDETEK3 User’s manual 7.3.1.1. Methods Figure 31: Settings menu Analysis Time: The cycle time of the method. Stream Change Time: It is the time when it is possible to change the current stream with- out affecting this analysis. This parameter is used only when running a sequence and if the next analysis in the sequence has a different stream. - Page 51 MULTIDETEK3 User’s manual Moving Average: This button opens a window that allows the user to configure the mov- ing average. (A) Resp axis max: The maximum value of the chromatogram’s Y axis. (B) Resp axis min: The minimum value of the chromatogram’s Y axis. (C) Time axis min: The minimum value of the chromatogram’s X axis.
-
Page 52: Figure 32: Peak Setting Menu
MULTIDETEK3 User’s manual 7.3.1.2. Peak Figure 32: Peak setting menu The peak detection algorithm can be changed by double-clicking on “set- Setup: up” Start: The start time of the current peak End: The stop time of the current peak LDL: The lowest detectable limit (LDL). - Page 53 MULTIDETEK3 User’s manual The parameters below “LDL” may vary depending on the peak detection algorithm used. The detection algorithms are described below. There are 7 types of detection for a peak. Biggest Peak: The algorithm will detect every rise and every drop using the start and end slopes.
-
Page 54: Figure 33: Flow Setting Menu
MULTIDETEK3 User’s manual 7.3.1.3. Flow Figure 33: Flow setting menu Setup: By double-clicking on it you can change: • The name of the flow • The type of flow o Sample o Carrier • The flow control type o Automatic (closed-loop control) o Manual (just for reading, no output) o LDepc (extern control) •... - Page 55 MULTIDETEK3 User’s manual Low Alert: Below this value, the Low Flow alert will turn ON The percentage of deviation allowed before the flow deviation Pct Alert: alert The lowest value to be considered as a normal condition. If Low Limit: we have readings lower than that, the system will stop trying to control it.
-
Page 56: Figure 34: Oven Setting Menu
MULTIDETEK3 User’s manual 7.3.1.4. Oven Figure 34: Oven setting menu Setup: By double-clicking on it you can change: • The name of the oven • T° sensor you want to use for this oven • The type of oven o On/Off (isothermal oven) o On/Off+fan (programmed ramping oven) o Proportional (HCD) •... - Page 57 MULTIDETEK3 User’s manual The lowest value to be considered as a normal condition. Low Limit: If we have readings lower than that, the system will stop trying to control it. Because there is probably something wrong, a broken sensor for instance. The highest value to be considered as a normal condition.
-
Page 58: Figure 35: Detector Setting Menu
MULTIDETEK3 User’s manual 7.3.1.5. Detector Figure 35: Detector setting menu Setup: By double-clicking on it you can change: • The name of the detector • The type o Plasma o TCD o FID • Input / Output needed for the control and monitoring Power Output: The value in % for the power delivered to the detector Selection of a relay to cut power to the detector. -
Page 59: Figure 36: Sensor Setting Menu
MULTIDETEK3 User’s manual 7.3.1.6. Sensor Figure 36: Sensor setting menu Setup: By double-clicking on it you can change: • The name of the sensor • The colour on the chart • The type of filter: Average, Median, FIR or Curve Fitting Base Offset: If you enter 0, this parameter has no effect. -
Page 60: Figure 37: Valve Setting Menu
MULTIDETEK3 User’s manual 7.3.1.7. Valve Figure 37: Valve setting menu Setup: By double-clicking on it you can change: • The name of the valve • The digital output associated with it Type: Configuration of the valve (Injection, Heartcut, Backflush, etc.) It shows the sampling loop volume if it is a valve that contains a Sampling Loop: sample loop. -
Page 61: Figure 38: Machine Setting Menu
MULTIDETEK3 User’s manual 7.3.1.8. Machine Figure 38: Machine setting menu Automatic Analysis To activate automatic printing after each analysis printing: Default Printer: To select a default printer TagName: Alias of MD3 Password: To manage passwords for the admin mode Recording: To manage the folder or drive where the analysis re- sults are recorded Save Windows Po-... -
Page 62: Figure 39: 4-20Ma Settings Menu
MULTIDETEK3 User’s manual 7.3.1.9. 4-20mA Figure 39: 4-20mA settings menu Setup: By double-clicking on it you can change: • The name of the 4-20mA • The analog output associated with it Meas- The current measured during the calibration should be ured put there. -
Page 63: Figure 40: Stream Settings Menu
MULTIDETEK3 User’s manual 7.3.1.10. Stream Figure 40: Stream settings menu Setup: By double-clicking on it you can change: • The name of the stream • The digital output associated with it Use for Calib.: This is used to determine the stream used for calibration of the analyzer Display order: This determines the order this stream will have in the menu. -
Page 64: Figure 41: Sequence Setting Menu
MULTIDETEK3 User’s manual 7.3.1.11. Sequence Figure 41: Sequence setting menu Setup: By double-clicking on it you can change the name of the Sequence Disable Stream at If it is enabled, at the end of the sequence, no stream will be selected Add: To add analysis to the current sequence... -
Page 65: Figure 42: Column Setting Menu
MULTIDETEK3 User’s manual 7.3.1.12. Column Figure 42: Column setting menu Setup: By double-clicking on it you can change • the name of the column • the oven that contains this column • the valve(s) and state of it(them) when column regeneration is in process Description: Additional description in the column... -
Page 66: Figure 43: Modbus Setting Menu
MULTIDETEK3 User’s manual 7.3.1.13. Modbus Figure 43: Modbus setting menu Slave ID: The SlaveID is a unique number for each Slave in your Modbus network. The SlaveID can be any number between 1 and 254. If a Slave receives a communication with the wrong SlaveID, it will be ignored High byte Options to adapt the communication to different DCS default language /High word... -
Page 67: Figure 44: Qma Setting Menu
MULTIDETEK3 User’s manual 7.3.1.14. QMA Figure 44: QMA setting menu Enable: Enable or disable the QMA Peak: Assign the QMA to a peak. Valve: Assign a valve to the QMA. The selected valve will control the sensor. Oven: Assign an oven to the QMA. The selected oven will control the sensor temperature. -
Page 68: Figure 45: Maintenance Menu
MULTIDETEK3 User’s manual 7.3.2. Maintenance This menu showcases the percentage of use of various components. These parameters should not be changed without contacting LDetek support. The available settings may vary depending on the software version. To update the software, please contact LDetek support to ensure the versions are compatible with your system. -
Page 69: Calibration Menu
MULTIDETEK3 User’s manual 7.4. Calibration Menu Figure 46: Calibration menu Peak: The name of the impurities _Area: The area of calibration Unit: The concentration calibration Apply: To save all the change that were made Calibration It displays the historic of the previous calibration. It is possible to load Historic: a previous one if needed. -
Page 70: Diagnostics Menu
MULTIDETEK3 User’s manual 7.5. Diagnostics Menu 7.5.1. Analog input This menu displays all analog inputs in the MultiDetek3 with their actual value in counts and converted into units. The progress bar in the corner shows the refreshing rate Figure 47: Analog input window 7.5.2. -
Page 71: Figure 49: Digital Output Window
MULTIDETEK3 User’s manual 7.5.3. Digital output This menu displays all digital output in the MultiDetek3 with their actual value. If the square is grey, the state of the output is unknown (probably a communication problem), if the square is dark green, the output is OFF, if the square is light green, the output is ON. You can force any output OFF or ON. -
Page 72: Figure 51: Modbus Register Window
MULTIDETEK3 User’s manual 7.5.5. Modbus/Register This menu displays the actual values of every Modbus registers Figure 51: Modbus register window 7.5.6. Modbus/Connection This menu displays which IP is connected the MD3 and if there is some activity (send and receive data) Figure 52: Modbus information window 7.5.7. -
Page 73: Regeneration
MULTIDETEK3 User’s manual 7.6. Regeneration This menu is used to start a regeneration. The settings are pre-configured in the setting menu. Figure 53:Regeneration window... -
Page 74: About Menu
MULTIDETEK3 User’s manual 7.7. About menu The PC software version appears in this menu. The serial # of the unit appears as well. The firmware version of the LDPECs and motherboard installed are also displayed. It is used to evaluate the compatibility of parts and software versions installed in the unit. Figure 54: About menu 7.8. -
Page 75: Ldchroma+ Procedures
MULTIDETEK3 User’s manual 7.9. LDChroma+ Procedures This section will show a few procedures that can be helpful while using LDChroma+. Feel free to contact us at support@ldetek.com if you have any questions. 7.9.1. How to switch from the user to the admin mode 1. - Page 76 MULTIDETEK3 User’s manual 3. This window will open and you need to enter the password. By default, it is “12345” 4. Once in admin mode, you will see the “A” icon in the bottom left. 7.9.2. How to export a machine file If you are in user mode, you will see the “U”...
- Page 77 MULTIDETEK3 User’s manual 7.9.3. How to import a machine file 1. If you are in user mode, you will see the “U” icon in the bottom left of LDChroma+. If that is the case, you must switch to admin mode by following procedure from section 7.9.1.
- Page 78 MULTIDETEK3 User’s manual 7.9.4. How to export a historic file 1. Open LDChroma+ and click on Chromatogram >> Historic 2. Right-click on the analyse you want to export and select “Export Historic…”. You can chose between exporting a historic file (.md3h) or an Excel file (.xls). 3.
- Page 79 MULTIDETEK3 User’s manual 7.9.6. How to do a calibration 1. LDetek recommend to run at least 3 cycles before calibration. Once you are ready, go to Chromatogram>>Historic. 2. Right-click on the cycle that you want to use for calibration. You can use the latest anayse or if needed, you can calibrate with an older analysis.
- Page 80 MULTIDETEK3 User’s manual 5. Makes sure that the calibration value matches your certificate of analyse (COA). If they don’t, double-click on the cell to edit the value. 6. Click on “Apply”. Calibration values Apply button 7. Right-click on the left-bottom bar and click on “Save Settings”. 7.9.7.
- Page 81 MULTIDETEK3 User’s manual 3. Give a name to the new sequence and click “OK”. 4. Click on “Add” to add an analysis to the sequence. For each analysis, you must select the method, the purge time and the stream. 5. Repeat point 4 for each analysis you need in the sequence. 6.
- Page 82 MULTIDETEK3 User’s manual 7.9.8. How to automatically calibrate at the end of a sequence Sequences work only on systems that has integrated stream selector (ISS) or LDGSS. 1. If you are in user mode, you will see the “U” icon in the bottom left of LDChroma+. If that is the case, you must switch to admin mode by following procedure from section 7.9.1.
- Page 83 MULTIDETEK3 User’s manual 7.9.9. How to force a valve or a relay ON/OFF For diagnostic purpose, you might be ask to force relays ON or OFF. The following proce- dure will show you how. 1. If you are in user mode, you will see the “U” icon in the bottom left of LDChroma+. If that is the case, you must switch to admin mode by following procedure from section 7.9.1.
- Page 84 MULTIDETEK3 User’s manual Checkboxes to force relays ON/OFF 7.9.10.How to see the sensors voltages For diagnostic purpose, you might be ask to monitor the sensors’ voltages. The following procedure will show you how. Note that in most cases, voltage should be checked when the anayzer is idle (not running cycles).
- Page 85 MULTIDETEK3 User’s manual 7.9.10.2. Method 2 1. If you are in user mode, you will see the “U” icon in the bottom left of LDChroma+. If that is the case, you must switch to admin mode by following procedure from section 7.9.1.
- Page 86 MULTIDETEK3 User’s manual 5. Once the regeneration started, you have to wait until it end. By default most column are configured for an 8 hours regeneration. 7.9.12.How to use remote desktop to controle the analyzer remotely 1. To use Remote Desktop, you must know the IP address of the MultiDetek3. To see it, open LDChroma+ and click on Configuration>>Network…...
- Page 87 MULTIDETEK3 User’s manual 4. Remote desktop will ask for the login information. By default, the username is “user” and the password is “ldetek”. 5. You can now control the MultiDetek2 remotely. If needed, you can create a shortcut that opens Remote Desktop with the right IP or pins it to Windows launch bar.
-
Page 88: Ldreport
MULTIDETEK3 User’s manual 8. LDReport The MultiDetek3 has a built-in panel PC running LDChroma+ our chro- matographic software. This software is used to control the internal com- ponents of the MD3 gas chromatograph offering full control of your in- strument. LDReport is another software installed on the panel PC along- side with LDChroma. -
Page 89: Machine List
MULTIDETEK3 User’s manual LDReport (server) MultiDetek3 #1 MultiDetek3 #2 MultiDetek3 #3 (client) (client) (client) Figure 58: LDReport remote 8.2. Machine list On the MultiDetek3’s desktop, there is an icon you can use to open LDReport. By double- clicking on it, a web browser will open, and you will see the home page of LDReport as shown in Figure Figure 59: LDReport - Machine List... -
Page 90: Settings Menu
MULTIDETEK3 User’s manual 1- In the top-right corner, we can see if the LDReport is in user or admin mode. When in user mode, you can click on this button to switch it to admin mode. By default, the username is “admin”, and the password is “12345”. -
Page 91: Figure 61: Ldreport - Template And Data Sections
MULTIDETEK3 User’s manual Figure 61: LDReport - Template and Data sections 1- The button “Data” allows you to export and import LDReport’s database. By clicking on “Data Folder”, you can see and change the folder path where the data is saved. 2- The auto-flush feature allows you to automatically delete old analyses when the hard drive is almost full (more than 90% of its capacity). -
Page 92: Analysis Menu
MULTIDETEK3 User’s manual 8.4. Analysis menu From the machine list, it is possible to get to the analysis menu. To do so, you must click on the pencil “ ” beside the serial number of your analyzer. A new tab will open and will look like Figure Figure 62: Analysis menu 1- This button allows you to see the peak graph and the sensor graph. -
Page 93: Analyze Menu
MULTIDETEK3 User’s manual 8.5. Analyze menu From the analysis menu, it is possible to get to the analyze menu. To do so, you must click on the pencil “ ” beside the analysis you want to open. A new tab will open and will look like Figure 64 Figure 64: Analyze menu... -
Page 94: Report Generation
MULTIDETEK3 User’s manual 8.6. Report generation As shown in the previous section, reports can be generated by pressing the button “Report” from the Analyze menu. Figure 65 shows an example of the report that comes standard with all the MultiDetek3. Details like analyzer model, stream ID, analysis date and calibra- tion date are automatically read from the raw data and put on the report. -
Page 95: Figure 65: Default Report
MULTIDETEK3 User’s manual Figure 65: Default report... -
Page 96: Figure 66: Custom Report
MULTIDETEK3 User’s manual Add your logo Add your address Change text & font Display custom data using prompt com- mands Add or remove parameters Add and/or remove col- umns and rows Figure 66: Custom Report... -
Page 97: Figure 67: Pass-Fail Template
MULTIDETEK3 User’s manual Automatically show pass or fail based on specifica- tions Figure 67: Pass-Fail template... -
Page 98: Ldreport's Procedures
MULTIDETEK3 User’s manual LDReport’s procedures 8.7. This section will show a few procedures that can be helpful while using LDReport. Feel free to contact us at support@ldetek.com if you have any questions. 8.7.1. How to switch from the user to the admin mode 1. - Page 99 MULTIDETEK3 User’s manual 8.7.5. How to export the database 1. Make sure that you are in admin mode. 2. Go to the setting menu and go to the section Data. 3. If you want to export the entire database, un-tick “Use Date Time”. Alternatively, tick the checkbox if you want to export part of the database.
- Page 100 MULTIDETEK3 User’s manual 8.7.8. How to filter data by streams 1. From the analysis menu, select the start and end date you want to see on the graph. 2. Click on the refresh button “ ” to update the table. 3.
-
Page 101: Back Panel Terminal Identification
MULTIDETEK3 User’s manual 9. Back panel terminal identification 4-20mA1+ to 4-20mA10+: Analog output positive terminals for peak #1 to peak #10. Use a 500ohm resistor between + and – terminals for 0-10VDC reso- lution on data recorders. 4-20mA1- to 4-20mA 10-: Analog output negative terminals for peak #1 to peak #10. -
Page 102: Drawings & Schematics
MULTIDETEK3 User’s manual Drawings & Schematics... - Page 103 MULTIDETEK3 User’s manual...
- Page 104 MULTIDETEK3 User’s manual...
- Page 105 MULTIDETEK3 User’s manual TCD detector PED detector Easy front access door Panel PC Accessible isothermal ovens (6x)
- Page 106 MULTIDETEK3 User’s manual...
-
Page 107: Maintenance And Troubleshooting
MULTIDETEK3 User’s manual Maintenance and troubleshooting Every MultiDetek3 is custom-built, therefore, the maintenance requirements will vary from system to system. Feel free to contact LDetek at support@ldetek.com. if you want the maintenance schedule specific to your analyzer. 11.1. Spare part list The below table shows consumables and capital spare parts that can be required in a Mul- tiDetek3. -
Page 108: Tools
MULTIDETEK3 User’s manual LDP1000 or Large- LDP1000 TCD-filament- Standard TCD filament Consumable 3-5 years TCDgold-filament- Gold-plated TCD filament Consumable 3-5 years Collector-MD3 Collector electrode for FID Consumable 3 years Ignitor-MD3 Ignitor element for FID Consumable 3 years FK-MD3 Fuse kit (2 x Fuse 3Amp glass + 2 Capital part fuse 100mA PCB + 2 fuse 1Amp PCB) -
Page 109: Maintenance Procedures
MULTIDETEK3 User’s manual Torkwrench Tork wrench Wiha for valve screws General 7/64”Hex Allen 7/64” Hex Allen Key for valve screws General 9/64”Hex Allen 9/64” Hex Allen Key for valve screws General 1/16TubeCuttingTo 1/16'' Tube Cutting tool. Used to cut Repair 1/16”... -
Page 110: Figure 68: Hcd Box
MULTIDETEK3 User’s manual HCD box Figure 68: HCD box 11.3.2.How to replace the fans in a MultiDetek3 1. Open the front door of the MultiDetek3. 2. You will then have access to the 2 fans located on each side. Disconnect the green con- nector to remove the power from the fans. - Page 111 MULTIDETEK3 User’s manual 11.3.3.How to replace the diaphragm in a MultiDetek3 Diaphragm replacement pro- Step 1 Skip this step if your valve doesn’t have relief Step 6 Re-install the valve cap on the cylinder cedure. pins. Actuate the valve by pressurizing the actuator body by aligning the cylinder dowel pins with (ON position).
- Page 112 MULTIDETEK3 User’s manual 11.3.4.How to replace a purifier with a MultiDetek3 1. Note the sensor’s signal (Tools>>Diagnostic>>Analog Input>> Page 3). 2. Power off the old purifier and remove the power cable. 3. Remove the new purifier from the shipping box and protective wrapping. Make sure that both end caps are tight, and that the unit is in good condition.
-
Page 113: Troubleshooting
MULTIDETEK3 User’s manual 11.4. Troubleshooting 11.4.1.Low flow/flow deviation on sample 1. Check if the sample flow setpoint matches the value in the document operating pa- rameters. The flow setpoint can be found in the menu Set- tings>>Settings>>Flow>>Sample. 2. Check if the sample pressure matches the value in the document operating param- eters. - Page 114 MULTIDETEK3 User’s manual 11.4.4.Detector off 1. Check if the raw signals for the sensors match the values shown in the document “Operating Parameters”. 2. Open the front door and check if the connectors on the detectors are well connect- 3. Contact LDetek support (support@ldetek.com) with the results obtained in the previous steps.
- Page 115 MULTIDETEK3 User’s manual 5. If the connections are good, measure the voltage on the connector on the Panel PC. The voltage should be 19VDC. 6. Contact LDetek support (support@ldetek.com) with the results obtained in the previous steps.
- Page 120 Where innovation leads to success...
Need help?
Do you have a question about the LDetek MULTIDETEK 3 and is the answer not in the manual?
Questions and answers