Table of Contents
Advertisement
Quick Links
Advertisement
Table of Contents

Subscribe to Our Youtube Channel
Related Manuals for Renu Electronics WP6 Plus Web HMI Series

Summary of Contents for Renu Electronics WP6 Plus Web HMI Series
- Page 1 User Manual ® WP6 Plus Web HMI Series...
-
Page 2: Table Of Contents
WP6 Plus Web HMI Series Table of Contents INTRODUCTION ................................3 BEFORE YOU START ..............................3 SAFETY PRECAUTIONS ..............................4 PRODUCT OVERVIEW ..............................5 ........................5 NSTALLATION OF THE PRODUCTS ............................... 8 RODUCT PECIFICATIONS ..................... 8 RODUCT OMENCLATURE RDERING UMBER .............................. -
Page 3: Introduction
This user manual gives a detailed information regarding the hardware specifications, operating conditions, installation, mounting and wiring. All the information published in this manual is produced and governed by RENU Electronics Pvt. Ltd. and is protected by Indian Copyright Act. Before you start ... -
Page 4: Safety Precautions
This section of the manual provides information which is critical regarding safety and therefore the user is advised to go through the information in detail before installing the product. User may contact RENU Electronics’ technical support team at support@renuelectronics.com for any specific question(s) related to safety. -
Page 5: Product Overview
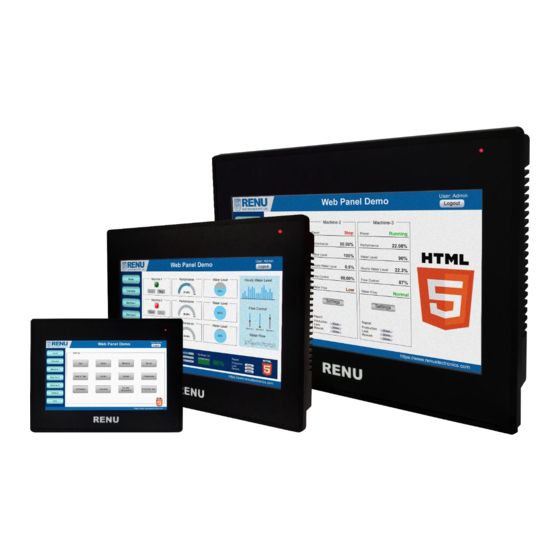
WP6 Plus Web HMI Series Product Overview This section of the manual provides an overview of Web HMI series products, its front and back view, installation details, dimensional details, mounting method and details. Installation of the Web HMI products Web HMI series products are designed for front panel mounting. Before installing the products, user should review the panel guidelines, panel cutout dimensions, product dimensions and minimum clearances. - Page 6 WP6 Plus Web HMI Series WP6070TN Plus WP6101TN Plus © RENU Electronics Pvt. Ltd. Page 6 of 23...
- Page 7 WP6 Plus Web HMI Series Minimum Clearances Maintain minimum clearance of 2” from enclosure walls, wires and other adjacent devices on all sides for adequate ventilation. Plan for adequate space around the product and inside the enclosure for ventilation and cabling. Take into consideration the heat produced by other devices in the enclosure.
-
Page 8: Product Specifications
WP6 Plus Web HMI Series Product Specifications This section of the manual provides detailed specifications of Web HMI series products, ordering part numbers, operating conditions, environment and approvals. Product Nomenclature / Ordering Part Number Web HMI series has three models, depending on the display size. The detailed part number or ordering information... -
Page 9: Cpu, Memory And Power Supply
WP6 Plus Web HMI Series CPU, Memory and Power Supply CPU: 2xARM Cortex-A9 upto Power Supply: 1GHz with GPU 2D/ GPU 3D 24VDC (±15%) with isolation support RTC: Built-in. eMMC:4GB RAM:1GB Power Rating Unit Voltage Current Wattage WP6043TN Plus 24VDC 220mA 5.5W... -
Page 10: Communication Interfaces
WP6 Plus Web HMI Series Communication Interfaces This section provides detailed information regarding various communication interfaces supported by the Web HMI series. Interfaces WP6043TN Plus WP6070TN Plus WP6101TN Plus USB Type C USB Host 1x 2.0 1x 2.0 1x 2.0... -
Page 11: Default Product Settings
WP6 Plus Web HMI Series USB Host Port The Web HMI devices support one USB Host port that connect to a USB 2.0 compatible USB Flash drive. This port can be used to upgrade the firmware and the browser. Pin number... -
Page 12: Powering Up The Web Hmi Series
WP6 Plus Web HMI Series Powering up the Web HMI Series To use the Web HMI as a browser, follow these steps to connect the device to a web-server. 1. Connect an Ethernet cable to the device. 2. Power up the device using 24VDC power supply by connecting it to the device’s pluggable terminal block. -
Page 13: Entering Into Device Settings
WP6 Plus Web HMI Series Entering into device settings 1. At power on the user will see the screen as shown below. To change configuration of the device, press the button within 5 seconds to enter into device configuration settings. - Page 14 WP6 Plus Web HMI Series Network Setting The first tab on the left is the Device Settings Tab. Clicking on it Network Setting screen will appear. On this screen the IP of the device can be set. The device defaults to acquire a dynamic IP from the network when connected. In order to provide a static IP, the user should click on the “Static”...
- Page 15 WP6 Plus Web HMI Series Calibration Settings This setting is used to set the calibration of the touch-screen of the device. The device is already calibrated at the factory before shipping. In case re-calibration needs to be done, this setting screen can be used to calibrate the touch-screen.
- Page 16 WP6 Plus Web HMI Series 3. After entering into the calibration mode the following screens open up. Follow the directions given on the screen to calibrate the touch-screen by touching and releasing the crosshairs. stage stage stage stage stage The device restarts with new calibrated touch-screen.
- Page 17 WP6 Plus Web HMI Series Password Setting Use this screen to change the system password of the device. The factory set password is ‘admin@123’. Click the right arrow on the bottom right corner of the Calibration settings screen. The following screen will open up.
-
Page 18: On-Screen Keyboard Setting
WP6 Plus Web HMI Series 2. The following screen will appear. Here the user can select the brightness of the screen as required by clicking on the brightness control button. ATTENTION: Home button and Left Arrow ATTENTION The user can exit the settings screens by clicking on the Home button placed at the bottom center of the screen. -
Page 19: Web Application
WP6 Plus Web HMI Series 2. The following screen will appear. Here the user can select the language for the On-Screen Keyboard by clicking on the Language selection radio button. Web Application A Web Application button is provided below the Settings button, as highlighted below. On this screen the user can set the URLs of the web servers to which the HMI would connect. - Page 20 WP6 Plus Web HMI Series Device Information This screen shows the information of the device. This is the only screen that is not password protected. This provides information like the Product Name, the MAC Address, the IP Address, Subnet Mask and the Default Gateway address of the device.
- Page 21 WP6 Plus Web HMI Series Entering into the Browser On powering up the Web HMI shows the screen as shown below. Do not click on the ‘Configuration’ button and let the timer of 5 seconds time out. The browser will open up the URL that was selected in the Web Application settings and will open up as shown below ©...
-
Page 22: Revision History
RENU Electronics is not responsible for any damage to the Web HMI or any other device used in this process. This document is solely for the purpose of providing the user a general direction of configuring the Web HMI. -
Page 23: Notes
WP6 Plus Web HMI Series NOTES © RENU Electronics Pvt. Ltd. Page 23 of 23...
Need help?
Do you have a question about the WP6 Plus Web HMI Series and is the answer not in the manual?
Questions and answers