Polaris PRESTIGE PAG19SF, PAG22SF - Prestige Above Ground Sand Filter Manual
- Owner's manual (36 pages)
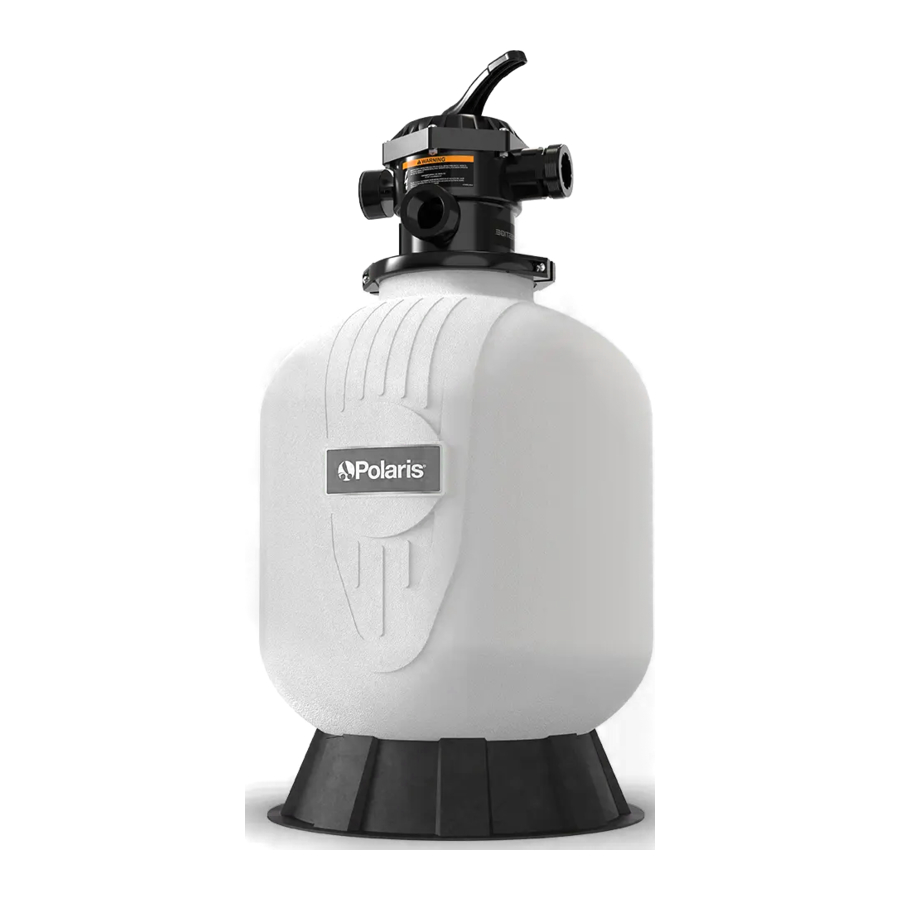
Advertisement
Package Contents
Contents
Unpack and check contents. If any parts are missing or damaged, please call Customer Support at 800.822.7933.

| ITEM | DESCRIPTION | QTY. |
| 1 | Multiport Valve | 1 |
| 2 | Sand Guard | 1 |
| 3 | Filter Tank | 1 |
| 4 | Lateral Hub Assembly | 1 |
| 5 | Laterals | 8 |
| 6 | Base | 1 |
| 7 | PTFE Tape | 1 |
| 8 | Pressure Gauge | 3 |
| 9 | Valve O-Ring | 3 |
| 10 | Clamp Arm | 2 |
| Retaining Bolt | 2 | |
| Capture Nut | 2 |
Required Tools/Equipment
The following list of equipment should be present and available to the installer at the time of install. Failure to use the appropriate safety and installation equipment could lead to personal injury or property damage.
 | Safety Eyewear |  | Level |
 | Scoop |  | Channel Locks |
 | Gloves |  | Screwdriver, Phillips Head |
Equipment Location
All pool water recirculation system components need to be installed in accordance with the standards and instructions in effect in your county or municipality. Utmost care must be taken to ensure that the equipment is located such that it is able to be safely operated and maintained.
Equipment Pad
The filter along with the other primary components of your pool water recirculation system should be installed on a level, prepared footing, which is capable of supporting the weight of the filter and which will accommodate the use of anchoring bolts to secure the equipment in place. A solid level surface needs to be used but concrete is not required. Check local building codes for any additional requirements.
If possible the equipment pad area should be:
- Dry.
- Well ventilated.
- Supplied with sufficient drainage.
- Out of direct sunlight.
- Located away from eaves or overhangs where rain gutters are not installed.
- Away from overhanging trees or other foliage that may produce waste or debris of any kind that could clog, block or otherwise disrupt the regular operation and maintenance of the equipment.
- As close to the primary body of water as possible. Additional pipe length reduces efficiency due to pipe friction.
- Position the filter a minimum of 5 ft (1.5 m) from the pool or separated by a permanent barrier. Position the filter and all components of the filtration system so they can NOT be used as a means of access to the pool by young children.


Filter Location
On the equipment pad, the filter should be positioned so that it is:
- At least 5 feet away from any electrical controls or inputs, except for GFCI-protected grounding-type receptacle supplying pool pump motor located at least 6 ft from inside wall of pool, 3m (10 feet) in Canada.
- In line with other equipment in order to minimize turns in plumbing which can result in diminished efficiency.
- Stationary and not subject to movement.
- Equipment must be installed on a firm, solid, nonabsorbent level surface; and per the requirements of local codes and Authority Having Jurisdiction (AHJ). Equipment can weigh up to 325 lbs. Use suitably rated mounting surface materials to avoid risk of settlement, and never use sand to level the equipment as the sand will wash away. Check local building codes for additional requirements.
- Position the filter a minimum of 5 ft (1.5 m) from the pool or separated by a permanent barrier. Position the filter and all components of the filtration system so they can NOT be used as a means of access to the pool by young children.
Initial Setup
System Pack Installation
Install Filter
- Position the tank on the base so that the drain assembly is accessible, not facing the pool and will not drain on the pump.
- Align filter feet in base as shown. Rotate 1/4 counterclockwise.
NOTE: Filter tank may have movement on the base until sand is placed inside the tank.
Install Hub and Laterals
- Inspect the laterals and lateral hub assembly for damage or debris. Replace or clean where needed. Reach into filter tank and install the remaining
- Attach the breather tube to the lateral hub.
- Bring the hub over the tank opening.
- Align and connect one of the eight (8) laterals to the hub. Turn ¼ clockwise to click into place.
- Tilt the hub with the attached lateral and insert into the tank.
NOTE: Place the breather tube head over the edge of the tank opening. - Connect the remaining seven (7) laterals to the hub inside of the tank. Do not overtighten.


Fill With Sand
The proper type, amount and cleanliness of your filter sand is critical to the proper function and longevity of your equipment.
| #20 Silica Sand (for pool filter use only) Size Range.40 -.55 mm | NOTE: Alternate Filter Media | |
| Model | Lbs. (kg) | Manufacturers directions must be |
| PAG19SF | 150lbs (68kg) | followed for any alternate media. Use of other media may deliver unexpected |
| PAG22SF | 250lbs (113kg) | results and may void the warranty. |
- Make sure the filter is level on the equipment pad.
NOTE: Move the breather tube inside the tank on top of the sand surface. - Prepare filter for sand.
- Fill the filter 1/3 - 1/2 full of water before adding sand.
- This will minimize any undue strain on the laterals when adding sand.
- Ensure stand pipe is seated at the bottom of the filter tank.
- Install the sand guard.
- The sand guard should completely cover the pipe opening.
- Special care should be taken to avoid getting filter sand into the stand pipe.
- Using a small scoop, slowly and evenly add sand to the filter.
- Be sure to allow the sand guard to fully drain between each scoop to avoid spilling.

![]()
The Sand Guard must be used at any time filter media is being added to the filter. Failure to use the Sand Guard may result in filter media intrusion into the pool and/or malfunction, damage or failure of the filter components.
NOTE: Be sure to use pool filter sand only.
When all filter sand has been added:
- Be sure to allow the sand guard to fully drain between each scoop to avoid spilling.
- Fill the filter 1/3 - 1/2 full of water before adding sand.
- Remove sand guard and store for future use.


Assemble Multi-port Valve
- Install pressure gauge.
- Remove the plug from the pressure gauge port.
- Install pressure gauge.
- Screw into place until snug. DO NOT OVERTIGHTEN.
- If possible, orient the gauge so that it is horizontally aligned. The included Teflon® tape can be used to aid in getting the appropriate orientation and fit.
- If possible, orient the gauge so that it is right reading and perpendicular to ground level.
- Apply 4-6 wraps of PTFE (plumbers) tape for each union adapter installed at the multi-port valve. Only install PTFE (plumbers) tape on the adapter threads at the valve ports.
- Do not use PTFE (plumbers) tape on union nut threads.


Install Multi-port Valve
- Flip the valve assembly upside down. Install the valve/tank O-ring so that it is seated below the valve body flange.
- Seat valve onto filter tank with standpipe secured in center port of the multi-port valve body.
- Make sure pump and return ports are oriented so that bends and/or joints in plumbing are minimized.
- Position the valve clamp so that it captures both the valve body flange and the filter tank.


- Position multi-port valve clamp so that the bolts will be accessible after the filter has been plumbed.
- Use a Phillips head screw driver to secure the clamp.
- Alternate tightening of the valve clamp from side to side.
- Do not overtighten clamp.


Plumbing

PVC cement and primer can produce vapors that can be hazardous to your health. Use PVC cement to join pipes only in a well ventilated area where vapors cannot accumulate. Pipe dope should NEVER be used on plastic threads.
Pipe dope will severely weaken the plastic, causing leakage and may cause the plastic to fracture. DO NOT OVERTIGHTEN.
Make sure all plumbing connections are in accordance with local plumbing and building codes.

- Using appropriate pipe adhesive, connect the filter to the pool water recirculation system.
- Plumb the pump discharge line to the Pump Port on the Multi-port Valve.
- Plumb the return line to the Return Port on the Multi-port Valve.
- Plumb the waste line to the Waste Port on the Multi-port Valve.
- Connect the pipes using the unions supplied with the filter. Do not use PTFE (plumbers) tape or pipe dope on any union nuts. Assemble the unions dry and hand tighten.
- Piping adapters are sized for 1.1/2" PVC pipe.
Operation
This filter operates under pressure. When clamped properly and operated without air in the water system, this filter will operate in a safe manner. All plumbing connections should be in accordance with local plumbing and building codes. Do not use pipe joint compound, glue or solvent on the union nut threads.
Filter Valve Functions
Filter pump must be turned off prior to making any adjustments to the multiport valve. When starting the pump after making adjustments to the valve be sure to stand clear of the filter. Ensure that all provisions for waste water disposal meet local, state or national codes.
Set Valve Handle to:
- FILTER: Water passes through filter sand and returns back to the pool. Set for Normal filtration operation. Multiport Valve should be in this position for all typical filtration and sanitation circulation.
- WASTE: Water bypasses filter sand and is routed to waste port.
- RECIRCULATE: Water bypasses filter sand and is returned to the pool.
- CLOSED: Closes all passages through the Multiport Valve.
- WINTER: This valve position leaves the multiport valve handle disengaged and all passages through the valve open for draining. Once the filter is drained, it is recommended that the valve handle be kept in the Winter position. See winterization instructions.
- BACKWASH: Water passes through filter sand in reverse and is sent to the waste port. With pump running, periodically check water clarity in sight glass. Once water is visibly clear, the backwash cycle is complete.
- RINSE: Water passes through filter sand to waste. Use after backwash cycle to clean debris from the Multiport Valve. Rinse should run for 1-2 minutes.
Initial Start up
- Make sure that all connections are secure and that any glued piping connections or joints have had sufficient time to cure.
- Backwash filter sand.
- Set multiport valve to backwash.
- Turn on filter pump.
- Water will discharge from waste port.
- While pump is running, periodically check the water clarity through the sight glass or at the waste port.
- Once water is visibly clear the backwash cycle is complete.
- Turn off filter pump.
- Set valve to rinse.
- Stand clear of filter and turn on the filter pump.
- Water will discharge from waste port.
- Allow filter to run for 1-2 minutes.
- Turn off filter pump.
- Set multiport valve to filter.
- Stand clear of filter.
- Turn on filter pump and allow it to run normally.
- Water will discharge to pool from return port.
- Take the pressure reading from the pressure gauge while the filter pump is running at its typical filtration RPM.
- Record the PSI on the pressure gauge, this is the initial startup pressure and and the filter is clean. A backwash is required when the pressure consistently reads 10 PSI greater than the initial startup pressure.
Operating Pressure
MAXIMUM OPERATING PRESSURE OF THE FILTER IS 35 PSI. NEVER SUBJECT THE FILTER TO ANY OPERATING PRESSURE EXCEEDING 35 PSI
- Do not connect the system to an unregulated city water system or other external source of pressurized water producing pressures greater than 35 PSI.
- This filter operates under high pressure. When any part of the circulating system, i.e., filter, pump, valve(s), etc. is serviced, air can enter the system and become pressurized when the system is restarted.
- Pressurized air in a system can cause product failure or also cause the dial valve to be blown off which can result in death, serious personal injury or property damage.
- To minimize risk of severe injury or death, the filter and/or pump should not be subjected to the piping pressurization test. Local codes may require the pool piping system to be subjected to a pressure test. These requirements are generally not intended to apply to the pool equipment such as filters or pumps. Polaris pool equipment is pressure tested at the factory.
If however, this cannot be followed and pressure testing of the piping system must include the filter and/or pump BE SURE TO COMPLY WITH THE FOLLOWING SAFETY INSTRUCTIONS.
- Check all clamps, bolts, lids, lock rings and system accessories to ensure they are properly installed and secured before testing.
- RELEASE ALL AIR in the system before testing.
- Water pressure for test must NOT EXCEED 35 PSI
- Water temperature for test must NOT EXCEED 100°F (38°C).
- Limit test to 24 hours. After test, visually check system to be sure it is ready for operation.
NOTE: These parameters apply only to Polaris equipment. For non-Polaris equipment, consult the equipment manufacturer.
The filter is designed to operate effectively based on the performance curve listed below. At no time is the filter to be subjected to internal pressures greater than 35 psi.
- After initial startup run the filter pump for several minutes.
- Take note of the running pressure and record the initial startup pressure reading.
- Check the operating pressure regularly at least once a week.
- Performing a backwash procedure is required once the pressure consistently reads 10 PSI greater than the initial startup pressure, DO NOT EXCEED 35 PSI.
- Follow backwash and rinse procedure.
- If after backwashing the filter you are unable to get the pressure to lower sufficiently to ensure operational pressures below 35 PSI you will need to replace the filter sand.
Changing the Filter Sand
Filter sand will need to be removed from the multi-port valve opening.
- Loosen bolts from clamp.
- Remove clamp.
- Remove Multiport Valve.
- Use a wet/dry vacuum or similar suction device to vacuum old sand from filter tank.
- To protect the laterals, the sand around the laterals can be emptied using the bottom drain plug.

- Keep enough water in filter tank to keep sand in a semi fluid "slurry" state
- Replace the sand in the filter.

NOTE: Sand should be replaced every 3-5 years.
Be sure to dispose of used filter sand appropriately. Used filter sand is not appropriate for human or pet contact.
Winterizing
Turn off the pump.
- Turn off the filter pump.
- Change Multi-port Valve to recirculate.
- Blow out all plumbing lines.
- Vent the filter by removing the pressure gauge or disconnecting one of the unions.
- Remove drain plugs from the filter pump and filter to drain.
- Change Multi-port Valve position to "Winter."
- Cover the system with a tarp or plastic sheet to protect from weather.
Specifications
| Model | Diameter | Filtration Area | Filtration Sand (0.4 - 0.55 mm #20 silica) | Flow Rates | Maximum Working Pressure | Maximum Temp. |
| PAG19SF | 19 in (485 mm) | 1.90 ft2 (0.176 m2) | 150 lbs (68 kg) | 40 gpm (9.10 m3/h) | 35 psi (2.4 bar) | 104°F (40°C) |
| PAG22SF | 22 in (559 mm) | 2.69 ft2 (0.250 m2) | 250 lbs (113 kg) | 53 gpm (12.10 m3/h) |

Documents / ResourcesDownload manual
Here you can download full pdf version of manual, it may contain additional safety instructions, warranty information, FCC rules, etc.
Download Polaris PRESTIGE PAG19SF, PAG22SF - Prestige Above Ground Sand Filter Manual
Advertisement

Need help?
Do you have a question about the PRESTIGE PAG19SF and is the answer not in the manual?
Questions and answers