Table of Contents
Advertisement
Quick Links
User manual
(EN)
Full HD
H265
1080p
codec
CPU
RAM
NEW CORE
HIGH SPEED
1GHz
DDRIII MEMORY
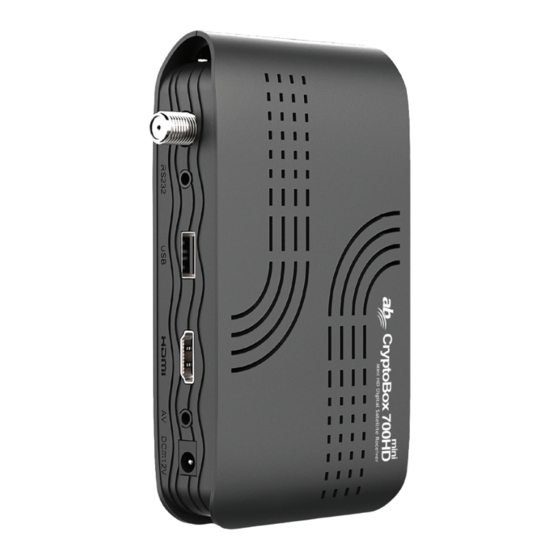
CryptoBox 700HD
Media
Auto
Player
FastScan
Display
WiFi
7 - SEGMENT
SUPPORT FOR
DISPLAY
WIFI EXTENSION
Mini HD Digital Satellite Receiver
Auto
DLNA
DiSEqC
CA
USB
SMARTCARD
UNIVERSAL
READER
SERIAL PORT
1x
2x
PVR
Android
TimeShift
iOS app
LAN
SPDIF
100 MBit
COAXIAL
ETHERNET
OUTPUT
1x
1x
Eco
friendly
RS232
SERVICE
PORT
1x
Advertisement
Table of Contents

Related Manuals for ab CryptoBox 700HD mini

Summary of Contents for ab CryptoBox 700HD mini
- Page 1 User manual (EN) Full HD H265 Media Auto Auto Android DLNA 1080p codec Player FastScan DiSEqC TimeShift iOS app friendly Display WiFi SPDIF RS232 NEW CORE HIGH SPEED 7 - SEGMENT SUPPORT FOR SMARTCARD UNIVERSAL 100 MBit COAXIAL SERVICE 1GHz DDRIII MEMORY DISPLAY WIFI EXTENSION READER SERIAL PORT ETHERNET OUTPUT PORT CryptoBox 700HD Mini HD Digital Satellite Receiver...
-
Page 3: Table Of Contents
Content ..............Safety Precaution 1. Reference ········································································· 4 1.1 General Features ·························································· 4 1.2 Accessories ································································ 4 2. Product Overview ································································ 6 2.1 Rear Panel ································································· 6 3. Installation ········································································ 9 3.1 Antenna Settings ························································· 9 3.2 Fast scan ································································· 15 3.3 Factory Default ·························································... - Page 4 6.1 Calendar ································································· 29 6.2 Games ···································································· 29 6.3 Network Apps ·························································· 29 7. Multimedia ····································································· 30 7.1 Basic Operations ······················································· 31 7.2 Setting ··································································· 32 7.3 Play Files ································································ 34 8. Basic Operation ································································ 37 8.1 Audio ···································································· 37 8.2 Satellite List ·····························································...
-
Page 5: Safety Precaution
!Safety Precaution This STB has been designed and manufactured to satisfy the international safety standards. Please read the following safety precautions carefully before operating this receiver. Main Supply: Before operating, please check the units operating voltage is 90~250V AC 50/60Hz. Overload: Do not overload a wall outlet, extension cord or adapter, neither use damaged power cord or touch it with wet hand as this may result in electric shock. -
Page 6: Reference
1. Reference 1.1 General Features DVB-S/DVB-S2 Satellite Compliant (MPEG-II/ MPEG-IV/ H.264) SCPC & MCPC receivable from Ku and C band satellites Universal, Single, Single S & C Band Wideband LNB Sensitive Tuner with Loop-Through DiSEqC1.0/1.1/1.2/ (USALS) Unicable Supported Blind search supported Auto DiSEqC Search PAL/NTSC Conversion True full Color (32 bits) on screen display (OSD) - Page 7 Figure 1.Accessories...
-
Page 8: Product Overview
2. Product Overview 2.1 Rear Panel Figure2. Rear Panel (A) 1. LNB IN Connect the satellite antenna cable. 2. RS232 Connect to the computer using serial line. 3. USB2.0 One USB 2.0 Host Port. 4. HDMI Connect to the TV using an HDMI cable. 5. - Page 9 Digital Audio output. 2. LAN Connect to the internet using an Ethernet cable. 3. USB2.0 One USB 2.0 Host Port. 6. IR-EX Connect the Front Panel, to receive the signal from remote control. 2.2 Remote Control Unit (RCU) You can control this receiver by this remote controller with full function. 1.
- Page 10 20. FAV: Display favorite channel list you set before. 21. NUMERIC KEY (0~9): Enter a TV/radio channel number or menu option number 22. PAGE-/PAGE+: Page up/down on menu or channel list. 23. MEDIA: Access to the USB menu. 24. SAT: Show the scanned satellite list. 25.
-
Page 11: Installation
3. Installation You should install the receiver when powering on your product for the first time after purchase. Tip: The default password is 0000. If you have forgotten your password, please contact your local product distributor. 3.1 Antenna Settings Antenna Settings allows you to configure the antenna setting parameters. Menu->Installation->Antenna Settings 1. - Page 12 2. Transponder: Press the ◄/► button to change the TP. 3. LNB Type: Press the ◄/► button to change the LNB frequency. 4. LNB Power: Press the ◄/►button to select the required LNB power. 5. 22 KHz: Press the ◄/► button to select ON, OFF or Auto. 6.
- Page 13 ØØ Move In this menu, you can select the satellite that you want to move from the satellite list by pressing the Green button, and press OK, you will be asked to move the satellite to put where, input the destination number and press OK. Then you can move one satellite from one position to another.
- Page 14 want to use, then press OK to confirm the setting. ØØ You can press the Red button to add a transponder. Here you can input new Transponder frequency, choose polarization (Ver, Hor), input new symbol rate, and choose FEC (1/2, 2/3, 3/4, 6/5, 7/8, Auto). And press OK to confirm the settings, and then this new Transponder will be added to the TP list in ascend order sorted by frequency.
- Page 15 configured to your DiSEqC Switch before press the OK to mark them. 3. Press Exit will start searching programs of the satellites you have marked. C: Blind Search 1. Highlight the Satellite and press the OK button to enter satellite list. And then select one satellite you want to search.
- Page 16 1. Motor Mode: Select DiSEqC 1.2 or USALS using the ◄/► button. DiSEqC 1.2: General motor antenna using DiSEqC 1.2. USALS: Motor antenna using USALS. ØØ Move Auto[W/E] Press ◄/► button, the dish will be motorized to East/West continuously, and it will stop until it find the best signal.
-
Page 17: Fast Scan
You can set the maximum motor limit for both East to prevent damage to the antenna. ØØ Disable Limit Disable West limit and East limit. ØØ Go to X.X Press OK button to move the dish to the USALS Setup. Tip: Before you use USALS, you should go to Main Menu →... -
Page 18: Usals Setup
deleted. 3.4 USALS Setup Menu-> Installation ->USALS Setup If you set the Motor Mode to USALS, you need set the longitude and the latitude in USALS Setup. -
Page 19: Edit Channel
4.Edit Channel : You can press the Sat button to choose different satellite according to the help information, press OK to confirm, then all the channels of this sat will be display. 4.1 TV Channel Menu->Edit Channel->TV Channels / Radio Channels Edit Channels enables you to move, delete, rename, lock/unlock, and swap the channels in the channel list conveniently. -
Page 20: Radio Channel
move. Then press the Blue button to sign the channel one by one. 3) Press the ▲/▼to the destination in the channel list and press OK to confirm. 2. Delete Channels 1) Highlight the Delete function using ◄/► button or press Green button directly. - Page 21 button. 1.1 Move Group Channels 1) Highlight the channel you want to group move. Then press the Blue button to sign the channel. 2) Press the ▲/▼ or ◄/► button to highlight other channels you want to group move. Then press the Blue button to sign the channel one by one. 3) Press the ▲/▼to the destination in the channel list and press OK to confirm.
-
Page 22: Tv Favorite
4.3 TV Favorite Menu-> Edit Channel ->Favorites You can add or remove channels from the favorite groups. 1) Highlight the channels you want to add or remove from the favorite channel list. 2) Press the ◄/► button to change the favorite group and press the OK button to mark the channel as selected favorite group. -
Page 23: Sort Channels
channels in this favorite list. 4.5 Sort Channels You can sort the channels list. Menu-> Edit Channel ->Sort Channels Highlight the option you want and press the OK button to sort the channel list. You can sort by Alphabet, Transponder, FTAToCAS, Favor and Default. 4.6 User Channel List User Channel List allows you to save or load all the data and settings. -
Page 24: Settings
5. Settings 5.1 System Settings Menu->Settings->System Settings : You can set all the settings here by pressing ◄ /► button. 1. Menu Language: Set the menu language. 2. Audio1: Set the preferred audio language. 3. Audio2: Set the sub-prime audio language. 4.AD server:You can set on or off. -
Page 25: Osd Setup
press OK on a Highlighted channel. If you set OFF, the channel list will disappear when you press OK on a playing channel. 12. Recall List: You can turn Recall List on or off. If you set ON, when you press Recall button of RCU you can get the recall list. -
Page 26: Parental Control
or 576p. 4. TV Type: Set the TV Type on PAL/NTSC/Auto state. 5. Screen Mode: Set the display format according to the screen ratio. Select TV screen mode either 4:3 or 16:9 according to the TV type. 6. OSD Timeout: Set the display time of the program information. 5.3 Parental control Menu->... - Page 27 automatically according to the timer event list that you set. 1. Menu-> Settings ->TIMES-> Event Timer or press the TIMER button directly. 2. Press the Green button to setup a timer, and press the OK button to save the timer after setup. Channel Select the Channel from Channel List.
-
Page 28: Ip Setting
If set YES, only if there is a USB device, it will be recorded automatically when the timer is started. And the recorded PVR will be saved in USB device. If set NO, it will not be recorded. 3. In Event Timer menu, highlight one event, press the Red button will cancel this timer and press the Yellow button can go to edit this timer. -
Page 29: Wi-Fi
is connected,it will display "Connect". 5.7 Wi-Fi (Wireless LAN) 1. Plug in the wireless USB dongle to the USB port. 2. Enter Menu-> Settings ->Wireless Setting->Search Access Pointer. 3. Select the network name of your Wi-Fi access point from the list. -
Page 30: Usb Update
“Connect”. 5.8 USB Update Menu-> Settings ->USB update USB Update can update software by using USB HDD or USB disk. 5.9 About STB Menu-> Settings ->ABOUT STB ABOUT STB can get the information about the STB, such as product name, software &... -
Page 31: X-Tras
6. X-tras 6.1 Calendar Menu->X-tras-> calendar Calendar can get the date information. And you can add the memo of the day. 6.2 Games Menu->X-tras-> games Games offer 9 funny games you can play. 6.3 Network Apps 6.3.1FTP Download You can Download S/W, music, photo and other media files from the FTP. 1. - Page 32 6.3.3 RSS Menu-> X-tras->Network Apps ->RSS You can press the Red button to add the RSS websites and then you can read content of the websites. And also you can press the Yellow button to delete the RSS websites.
-
Page 33: Multimedia
7. Multimedia Menu->Multimedia or press the MEDIA button directly Multimedia can play many kinds of media files, you can record program and playback it and you can do various operations when using USB HDD or USB disk. Note: It supports FAT, FAT32 and NTFS format USB disk or USB HDD. If hard-disk is to be used with the receiver, please make sure it is inserted befo re booting up. -
Page 34: Setting
1) Press the Red button and Highlight the Create New Folder. Press the OK button to create a new folder in current folder. ØØ Sort 1) Press the Red button and Highlight the Sort. 2) Select the sort type. (First Name/Date/Size) 3) Press the OK button to sort by sort type which you selected. - Page 35 2S-10S. ØØ Photo View Mode Set the Photo View Mode state on Full Screen, 2x2 Thumbnail or 2x3 Thumbnail. 2. PVR Setting ØØ Record Partition Select the Partition where save your record or other result of your operation. ØØ Record Mode Set the Record Mode Channel or Transponder.
-
Page 36: Play Files
7.3 Play Files 1. Music 1) Press the ◄/► to highlight the Music. 2) Press the ▲/▼ to change the folder or file and press the OK button to open the folder or play the music file. OK: Play the selected file. ▲/▼: Change the highlighted item. - Page 37 I◄◄: Play the previous file. ►►I: Play the next file. PAUSE/||: Pause. EXIT: Exit the current menu. 3. Movie 1) Press the ◄/► to highlight the Movie. 2) Press the ▲/▼ to change the folder or file and press the OK button to open the folder or play the movie file.
- Page 38 PAUSE/||: Pause or Step. ■: Stop playing file. ◄◄: Fast rewind. ►►: Fast forward. I◄◄: Play the previous item. ►►I: Play the next item. INFO: Display playing progress. In this menu, press the INFO button again to display the EPG information. AUDIO: Set the audio language.
-
Page 39: Basic Operation
8. Basic Operation 8.1 Audio You can select the language you prefer in Audio if the current program is available in multiple audio languages. Press the AUDIO button 2. Press ▲ / ▼ button and then press the OK button to select the audio language you prefer. -
Page 40: Subtitle
2) Press the ◄ /► button to change the date, and it displays the EPG list in one day of the selected channel. 3) Press OK button, then press ▲/▼▼ button to highlight the EPG event which you want, and the current EPG detail information will display on the bottom of screen. -
Page 41: Program Information
8.7 Program Information You can view the program information by pressing the INFO button while watching a program. 1. General Information : It is a FTA program. : It is a scramble p rogram. : The sound of current program is not Dolby. : The sound of current program is Dolby. -
Page 42: Channel List
9. Channel List This chapter will help you manipulate the channel list. You can press the Sat button to choose different satellite when you are operating on a channel list, press OK to confirm, then all the channels of this sat will be display. 9.1 OK List 1) Press the OK button to enter the channel list while watching a program. - Page 43 name. 6) Press the Blue button can help you quickly find the channel you want. Note: If you selected a favorite list, press the CH+/CH- button can only change the channels in this favorite list and press the OK button can only display the channels in this favorite list.
-
Page 44: Usb Control
10. USB Control 10.1 Recording and Timeshift 1. Start Recording 1) You can press the ● button to start recording while watching program. 2) If you have set the timer, and set the Time Record on, it will start recording automatically according to the start time of the timer. -
Page 45: Pvr List
10.2 PVR List You can enter the PVR list directly and then play the PVR file. In the PVR list you also can delete the PVR files. 1. Press ► button enter the PVR list when watching program. 2. Press the ▲/▼ to highlight the PVR file you want to play, press the OK button to play in small screen. -
Page 46: Additional Information
11. Additional Information 11.1 Trouble Shooting Before contacting your local service centre, please read the tips below carefully. If the problem persists after completing the following procedure, please contact your local product distributor or service centre for further instructions. 1. No message displayed on the front display. (The product will not switch on.) •... -
Page 47: Technical Specification
order. • [Satellite] Check the signal levels and adjust your antenna if the level is too low. The signal level may be affected by weather conditions. • [Terrestrial] Adjust the antenna direction to get a better picture. • [Terrestrial] Set the antenna power in menu to On, if you use the active antenna to improve the reception.(where applicable) 4. -
Page 48: Glossary
DiSEqC Control Version DiSEq C 1.0/1.1/1.2/1.3(USALS)Compatible, Tone burst A/B MPEG Transport Stream MPEG-2 ISO/IEC 13818Transport stream specification Profile Level MPEG1, MPEG-2 MP@ML,H.264, VC1, DV, DivX, and MPEG4 Input Rate 80 Mbps for MPEG Transport Stream and 25 Mbps for DV streams Aspect Ratio 4:3, 16:9 Video Resolution 576i, 576p, 480i, 480p, 720p50, 720p60, 1080i.1080p Audio Decoding MPEG-2 layer I and II (Music cam), MPEG4 AAC and MPEG4 AAC-HE (AAC+), Dolby... - Page 49 Ø4 DiSEqC DiSEqC(Digital Satellite Equipment Control)system, it is a communication bus between satellite receivers and peripheral equipment using only the existing coaxial cable. Ø4 The Digital Video Broadcast group was created to establish a technical framework for the introduction of digital video broadcasting systems. Ø4 LNB (low-noise block converter) or LNBF An electronic unit mounted on the satellite dish.
- Page 50 Phase-shift keying in which four different phase angles are used. Ø4 Transponder An automatic device that receives, amplifies and retransmits a signal on a different frequency. Ø4 Symbol rate Speed of the digital transmission. Ø4 Scrambled TV programmer Some TV programmer are transmitted in scrambled form.
- Page 52 CryptoBox 700HD Mini HD Digital Satellite Receiver...
Need help?
Do you have a question about the CryptoBox 700HD mini and is the answer not in the manual?
Questions and answers
My box is only doing radio channels,how do I get it back to tv
To switch the CryptoBox 700HD mini from radio channels back to TV channels, use the channel list and select TV channels. The operation for radio channels is similar to TV channels, so navigate accordingly within the channel list menu.
This answer is automatically generated