Table of Contents
Advertisement
Quick Links
Advertisement
Table of Contents

Related Manuals for harvst WaterMate


Summary of Contents for harvst WaterMate
- Page 1 WaterMate Setup and installation guide V7 upwards control unit Doc version 9...
-
Page 2: Table Of Contents
Operating mode - online or offline?................7 Part 3 - The control unit..................8 Solar powered systems....................8 Mains powered systems....................10 Controlling your WaterMate..................11 Setting up : Online mode.....................12 Setting up : Offline mode.....................14 The Harvst web app.....................15 Manual watering / override..................16 Automatic watering..................... -
Page 3: Part 1 - Contents
With 3 large Water valves Jubilee clip x3 jubilee clips Hose connector With pipe fitted 13-23mm WaterMate Pro pump & inlet strainer WaterMate Mini pump & inline filter Inline filter Water pump Inlet strainer Water pump Optional extras, available via our website: Pump extension cable (4m or 10m) ●... - Page 4 13mm distribution pipe 10m LDPE End plug Tee joiner Elbow joiner x1 mini / x2 pro Straight joiner x2 Pipe fixing kits - depending on your choice at time of purchase For greenhouses (P clips & bolts) For polytunnels (wire & cable ties) Garden wire P-clip M6 nut...
-
Page 5: Part 2 - System Overview
Part 2 - System overview Introduction Thank you for buying a Harvst WaterMate - this guide will walk you through the concepts, modes of operation, and how to install the system. WaterMate is a complete kit of parts; containing everything you need to set up automatic irrigation. - Page 6 Control unit options Watering options Sensors - Solar power 1 - Mini pump (submersible) - Temperature (supplied) - Mains power 2 - Pro pump (inline) - Humidity (optional) - 4-Season 3 - Garden hose - Soil moisture (optional)
-
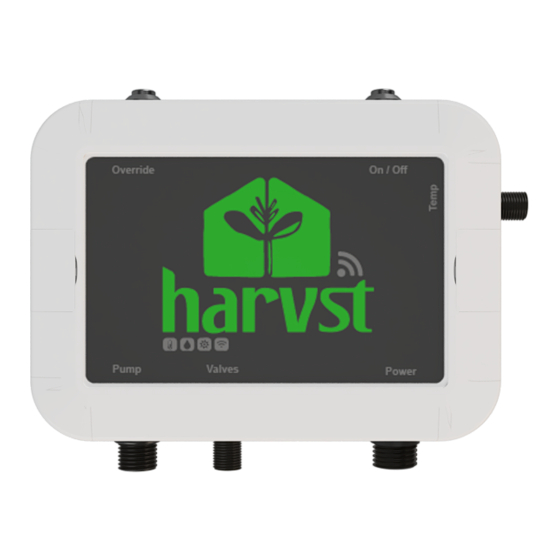
Page 7: Control Unit
Irrigation parts Supplied with the Watermate are a range of pipes, hoses and fittings for you to install into your own greenhouse or polytunnel. See how to install the valves, pump and other components in Part 4 of this guide. -
Page 8: Operating Mode - Online Or Offline
Operating mode - online or offline? -
Page 9: Part 3 - The Control Unit
Solar powered control boxes have a built-in battery, which must be kept charged using the solar panel. As soon as you receive your WaterMate system, plug in the solar panel and put it in a sunny location so that the battery is fully charged when you come to set up and test. - Page 10 Power saving (sleep) The control unit will go to sleep when it is not doing anything, to save battery power. It wakes up every 30 minutes to take readings, and to turn on the water pump if required. To change settings, or override the watering, the control box needs to be awake. To wake the unit up press the override button on the top until you hear a rising tone.
-
Page 11: Mains Powered Systems
Mains powered systems Mains, 4-season : full environmental control 240v power supply included. 3 additional output ports for either heaters, grow lights, or extra pumps. Mains (Irrigation only) 240v power supply included. -
Page 12: Controlling Your Watermate
Controlling your WaterMate There are two ways WaterMate can operate: online or offline. Online mode Offline mode Control unit is within range of a WiFi Control unit is not in range of a WiFi network. network. The unit connects to the internet on a... -
Page 13: Setting Up : Online Mode
Step 2 On your phone or tablet, look for the wifi network which starts HARVST (you may have to refresh your wifi on your phone a few times). The next 4 characters are unique to your control box. - Page 14 Assign the control unit to your Harvst account For online mode, you will need a Harvst web account (itʼs free). The control unit will send data to the Harvst cloud, and your web account will let you view the data, and let you update settings from anywhere.
-
Page 15: Setting Up : Offline Mode
The device is now set and will always turn on in offline mode. Connecting to the device dashboard The control unit will transmit its own WiFi signal with SSID “harvst-XXXX”. The number XXXX is specific to your system. -
Page 16: The Harvst Web App
The Harvst web app Free with every WaterMate kit is the Harvst web app. It runs on any smartphone, tablet or computer, in a web browser. It provides three main features: Control system settings and data view (for units in online mode only) ●... -
Page 17: Manual Watering / Override
Wait until the box is awake. 2. Log onto the control unit WiFi network (harvst-xxxx). 3. Wait until you are directed to the system control panel, and then choose a blue button on the appropriate zone. -
Page 18: Automatic Watering
Here you are accessing the device control panel directly. Wake the control unit up. Connect to the control unit WiFi network (harvst-xxxx) and wait to be directed to the dashboard. It might take a few seconds. Change your settings there. They will take effect... - Page 19 Automatic watering using temperature On a hot day, plants will want more water. Watermate can deliver an extra dose of water, using the temperature settings in the web app (online mode), or on the system control panel (offline mode).
-
Page 20: Low Water Alerts
Low water alerts If the system is trying to water but there is none le in the tank, youʼll hear a two-tone beeping while the pump is running. Low water is detected by the pump itself. If your system is running in online mode then you can choose to receive an alert when the system detects that there is no water le : set this up on the notifications tab in the web app. -
Page 21: 4-Season Environment Control (Heating And Lighting)
4-season environment control (heating and lighting) 4-season control boxes are supplied with 3 additional outputs which can be used to power Harvst 12v devices: Heater cable Grow lights Additional pumps Each output is rated to a maximum of 6 Amps. -
Page 22: Part 4 - Installation
WiFi network before you start installation in the greenhouse or polytunnel. If a firmware update is due, it will be automatically downloaded by the control unit. The watermate control unit is a sealed unit. To ensure that it lasts as long as possible, follow these guidelines. -
Page 23: Install The Water Valves
Install the water valves Mounting the valves securely, in the correct position for your setup, will prevent the pipes from kinking, which obstructs the water flow. The valves are water resistant, not waterproof. Mount them away from direct watering or spray. Fit the water valve mounting bracket First mount the bracket to the greenhouse or polytunnel. -
Page 24: Assemble And Mount The Water Pump (Pro Model)
Assemble and mount the water pump (Pro model) Note the direction of flow marked on the pump casing. It points away from the water tank. The filter element is always connected to the water inlet side of the pump. Fit the push-in hose connectors and filter to the water pump on the inlet side. -
Page 25: Fit The Water Pump (Mini Model)
Fit the water pump (Mini model) The WaterMate “Mini” version is supplied with a submersible pump which is placed into your water tank or water butt. Itʼs designed to remain underwater permanently. The mini pump comes fitted with a 1.5m cable, designed for water tanks kept within the greenhouse. -
Page 26: Installing Sprayers, Emitters, Drippers Etc
Soak hose / porous hose (not supplied) Soak hose is good for distributing water along rows of plants, and for keeping soil moist over a larger area than drippers. WaterMate Pro supports up to 20m of soak hose per zone. - Page 27 To fit a soak hose to the WaterMate valves, you will need to use a section of garden hose and jubilee clips to prevent leaks due to the higher pressure.
-
Page 28: Mount The Control Box
Place it outside, where it gets the most sun. You may need to change the angle and position as the seasons change. Solar panel extension cables are available at harvst.co.uk The solar panel comes complete with two brackets, each made up from two parts. -
Page 29: Pipe Installation In A Polytunnel
Pipe installation in a polytunnel Every polytunnel is different, so you will need to adapt the guide for your own situation. Water is distributed around the perimeter of the polytunnel using a 13mm LDPE (semi rigid) pipe which is fixed to straining wires around 1m above the ground. Into this pipe, you can connect sprayers directly, or 4mm take-off... - Page 30 Polytunnel installation process To prevent the support wire causing heat damage where it comes into contact with your polytunnel skin, thread the wire through 4mm micro irrigation pipe first, or use a foam barrier between the wire and the polytunnel. Using pliers or wire cutters, cut a short (30cm) section of wire and thread it through the small hole in the flat end of the wire tensioner.
-
Page 31: Pipe Installation In A Greenhouse
Pipe installation in a greenhouse Every greenhouse is different, so you will need to adapt the guide for your own situation. Water is distributed around the perimeter of the greenhouse using a 13mm LDPE (semi rigid) pipe which is fixed to the frame around 1m above the ground. Into this pipe, you can connect sprayers directly, or 4mm take-off... - Page 32 You may need to drill a hole in the aluminium at the ridge, or through the base. - For the WaterMate Pro, mount the pump securely near where the inlet pipe comes into the greenhouse, somewhere it will not get wet. The WaterMate Mini pump is placed into...
-
Page 33: Regular Maintenance
Regular maintenance To keep your WaterMate running smoothly, youʼll need to do some regular maintenance. We recommend every week you: Clean the inlet filter on the pump. Ensure drippers and spray nozzles are clear of debris. Wipe the solar panel clean with a dry cloth, and position it for the best sun...
Need help?
Do you have a question about the WaterMate and is the answer not in the manual?
Questions and answers