Table of Contents
Advertisement
FCC STATEMENT
This device complies with Part 15 of the FCC Rules. Operation is subject to the following two conditions:
(1)
This device may not cause harmful interference, and
(2)
This device must accept any interference received, including interference that may cause undesired
operation.
Note:
This equipment has been tested and found to comply with the limits for Class B digital devices, pursuant to Part 15
of the FCC rules. These limits are designed to provide reasonable protection against harmful interference in a
residential installation.This equipment generates uses and can radiate radio frequency energy and, if not installed
and used in accordance with the instructions, may cause harmful interference to radio communications. However,
there is no guarantee that interference will not occur in a particular installation. If this equipment does cause harmful
interference to radio or television reception, which can be determined by turning the equipment off and on, the user
is encouraged to try to correct the interference by one or more of the following measures:
Reorient or relocate the receiving antenna.
Increase the separation between the equipment and receiver.
Connect the equipment into an outlet on a circuit different from that to which the receiver is connected.
Consult the dealer or an experienced radio/TV technician for help.
Use of shielded cable is required to comply with Class B limits in Subpart B of Part 15 of the FCC rules.
Do not make any changes or modifications to the equipment unless otherwise specified in the manual.
If such changes or modifications should be made, you could be required to stop operation of the
equipment.
EN-1
Advertisement
Table of Contents

Related Manuals for Vivitar Vivicam 4345


Summary of Contents for Vivitar Vivicam 4345
-
Page 1: Fcc Statement
FCC STATEMENT This device complies with Part 15 of the FCC Rules. Operation is subject to the following two conditions: This device may not cause harmful interference, and This device must accept any interference received, including interference that may cause undesired operation. -
Page 2: Read This First
This User Manual is a general reference guide for the product. The product and accessories that come with your digital camera may be different from those described in this manual. This is due to the fact that different retailers often specify slightly different product inclusions and accessories to suit their market requirements, customer demographics, and geographical preferences. -
Page 3: Safety Instructions
SAFETY INSTRUCTIONS Read and understand all Warnings and Cautions before using this product. Warnings If foreign objects or water have entered the camera, turn the power OFF and remove the batteries and the AC power adapter. Continued use in this state might cause fire or electric shock. Consult the store of purchase. If the camera has fallen or its case has been damaged, turn the power OFF and remove the batteries and the AC power adapter. - Page 4 Cautions Insert the batteries paying careful attention to the polarity (+ or –) of the terminals. Inserting the batteries with its polarities inverted might cause fire and injury, or damage to the surrounding areas due to the battery rupturing or leaking. Do not fire the flash close to anyone’s eyes.
-
Page 5: Notes On Battery Usage
Notes on Battery Usage When you use the battery, carefully read and strictly observe the Safety Instructions and the notes described below: Different battery types and surrounding temperatures may affect the battery performance. Avoid using batteries in extremely cold environments as low temperatures can shorten the battery life and reduce camera performance. -
Page 6: Table Of Contents
CONTENTS INTRODUCTION ... 8 Package Contents... 9 GETTING TO KNOW YOUR VIVICAM 4345... 10 Front View... 10 Rear View... 11 Mode Dial ... 12 LCD Monitor Information... 13 PREPARING VIVICAM 4345... 15 Installing the Batteries (Optional Accessory) ... 15 Using the AC Power Adapter (Optional Accessory)...16... - Page 7 PLAYBACK MODE - THE BASICS... 36 Viewing Images ... 36 Magnifying Images ... 37 Thumbnail Display ... 38 Slideshow Display ... 39 Resizing an Image ... 40 VIDEO MODE... 41 Recording Video Clips ... 41 Playing Back Video Clips ... 42 PLAYBACK MODE –...
-
Page 8: Introduction
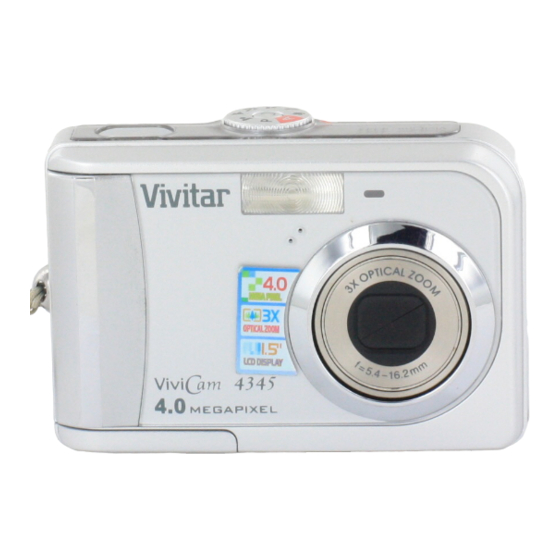
INTRODUCTION Thank you for purchasing the new ViviCam 4345! Equipped with a 4.0 Megapixels CCD sensor, your ViviCam 4345 delivers good quality, 2304 x 1728 resolution images. Other features provided by the camera include the following: 4.0 Megapixels A high-resolution CCD sensor provides 4.0 megapixels for good quality of images. -
Page 9: Package Contents
Carefully unpack your kit box and ensure that you have the following items. In the event that any item is missing or if you find any mismatch or damage, promptly contact your dealer. Common Product Components: ViviCam 4345 Digital Camera User’s Manual USB Cable... -
Page 10: Getting To Know Your Vivicam 4345
GETTING TO KNOW YOUR VIVICAM 4345 Front View 1. Shutter button 2. Flash 3. Microphone 4. Lens 5. Power button EN-10 6. Mode dial 7. Self-timer LED 8. PC (USB) / AV Out terminal 9. DC IN 3V terminal... -
Page 11: Rear View
Rear View Rec-play button Menu button Delete button Arrow button (Up) Arrow button (Right) Self-timer button Arrow button (Down) Arrow button (Left) Flash button 8. Battery / SD card cover Zoom out (wide-angle) button Thumbnail button Zoom in (telephoto) button 11. -
Page 12: Mode Dial
Mode Dial You can select from seven shooting modes and setup mode according to shooting conditions to achieve the desired effect. Mode Power button Program Auto Video Portrait Landscape Sports Night Setup EN-12 Description Press to turn on/off the power. Select this mode to permit the shutter speed and aperture to be set manually. -
Page 13: Lcd Monitor Information
LCD Monitor Information Camera Mode 1. Mode indication [ A ] Auto Mode ] Setup Mode ] Video Mode ] Landscape Mode ] Program Mode ] Sports Mode ] Portrait Mode ] Night Mode 2. Image quality ] FINE ] NORMAL ] ECONOMY 3. - Page 14 Video Mode 1. Video mode 2. Recordable movie time available 3. SD memory card indicator (if present) 4. Battery power indicator 5. Focus area Image Playback 1. Playback mode 2. SD memory card indicator (if present) 3. Battery power indicator 4.
-
Page 15: Preparing Vivicam 4345
PREPARING VIVICAM 4345 Installing the Batteries (Optional Accessory) You can use 2 AA size batteries to power the camera. Make sure that the power of ViviCam 4345 is off before inserting or removing the batteries. 1. Make sure the camera is turned off. -
Page 16: Using The Ac Power Adapter (Optional Accessory)
"DC IN 3.0V". 3. Connect the other end to an electrical outlet. Make sure to use only the AC power adapter specified for ViviCam 4345. Damage caused by the use of an incorrect adapter is not covered under the warranty. -
Page 17: Inserting And Removing An Sd Memory Card (Optional Accessory)
Inserting and Removing an SD Memory Card (Optional Accessory) ViviCam 4345 comes with 12MB of internal memory, allowing you to store captured still images or video clips in the digital camera. Moreover, you can also expand the memory capacity by using an optional SD (Secure Digital) memory card so that you can store more files. -
Page 18: Attaching The Camera Strap
LED indicator Blinking green LED indicator Blinking red Self-timer indicator Blinking red EN-18 Description/Activity ViviCam 4345 is powering up. ViviCam 4345 is ready to record images (or movies). USB communication/transfer in progress Charging the flash. The self-timer function is activated. -
Page 19: Getting Started
To turn the power off, press the Choosing the Screen Language When ViviCam 4345 is turned on for the first time, a language-selection screen will be displayed in the monitor. Follow the steps below to choose the desired language. 1. Rotate the mode dial to and turn your camera on by pressing button. -
Page 20: Setting The Date And Time
Setting the Date and Time Follow the steps below to set the date display style, current date and time. 1. Rotate the mode dial to and turn your camera on by pressing button. 2. Press to select the [CUSTOM] menu. 3. -
Page 21: Formatting An Sd Memory Card Or Internal Memory
Formatting an SD Memory Card or Internal Memory The term “Formatting” means preparing an “SD Memory Card” to record images; this process is also called “initialization”. This utility formats the internal memory (or memory card) and erases all stored images and data. -
Page 22: Using The Lcd Monitor
Using the LCD Monitor Your ViviCam 4345 is equipped with a 1.5" full color TFT LCD monitor to help you compose images, replay recorded images/video clips or adjust menu settings. The mode icons, text and numbers displayed on the monitor may very according to the current settings. -
Page 23: Photography Mode
PHOTOGRAPHY MODE Shooting Images - The Basics 1. Rotate the mode dial to A , P , camera on by pressing the 2. Compose the image on the monitor screen so that the main subject is within the focus frame. 3. -
Page 24: Setting Image Resolution And Quality
Setting Image Resolution and Quality As you get to know ViviCam 4345, you can set the image resolution (number of vertical and horizontal pixels) and image quality (compression ratio) based on the types of images you want to shoot. These settings affect the number of images that can be stored in memory, or on a memory card. -
Page 25: Using The Zoom Function
Using the Zoom Function ViviCam 4345 is equipped with 3x optical zoom. The lens moves during the optical zoom photography, allowing you to capture telephoto and wide-angle shots. By using the optical zoom function; images appear closer by pressing the... -
Page 26: Using The Flash
LCD monitor. 4. Compose your scene and press the shutter button. ViviCam 4345 has four flash modes:Auto Flash (default), Red Eye, Forced Flash and No Flash. The table below will help you to choose the appropriate flash mode: Flash mode... -
Page 27: Using The Self-Timer
Using the Self-Timer The self-timer can be used in situations such as group shots. When using this option, you should either mount the camera on a tripod (recommended) or rest it on a flat, level surface. 1. Secure the camera to a tripod or place it on a stable surface. 2. -
Page 28: Adjusting The Exposure (Ev Compensation)
Adjusting the Exposure (EV Compensation) You can manually adjust the exposure determined by ViviCam 4345. Use this mode when the proper exposure cannot be obtained, for example, when the contrast (different between light and dark) between the subject and the background is extremely large. The EV compensation value can be set in the range from –2.0EV to +2.0EV. -
Page 29: Setting White Balance
Setting White Balance This feature lets you make adjustments to compensate for different lighting types according to your shooting conditions. 1. Rotate the mode dial to P , 2. Press the button to turn on the power. 3. Press , then toggle to select the [AE/AWB] menu. -
Page 30: Using The Mode Dial
USING THE MODE DIAL Auto Mode A (Auto) mode is the simplest way which allows you to take still pictures without having to set special functions or manual adjustments. The camera sets the optimal focusing and exposure. 1. Rotate the mode dial to A mode and turn your camera on by pressing the button. -
Page 31: Portrait Mode
Portrait Mode Select this mode to make people stand out with the background out-of-focus. 1. Rotate the mode dial to mode and turn your camera on by pressing the button. 2. Compose your subject within the focus frame. 3. Press the shutter button to capture the image. Landscape Mode This mode allows you to take photographs of distant scenery or landscapes. -
Page 32: Sport Mode
Sports Mode This mode allows you to shoot fast moving objects. 1. Rotate the mode dial to pressing the button. 2. Compose your subject within the focus frame. 3. Press the shutter button to capture the image. Night Mode This mode allows you to take photographs of people against a dusk or night-time background. 1. -
Page 33: Advanced Shooting
ADVANCED SHOOTING Burst This mode is used for continuous shooting. Pictures are taken continuously while the shutter release button is pressed. 1. Rotate the mode dial to P , camera on by pressing the 2. Press , then use to select the [FUNCTION] menu. 3. -
Page 34: Auto Exposure Bracketing (Aeb)
Auto Exposure Bracketing (AEB) In this mode, ViviCam 4345 automatically changes the exposure within a set range to take three shots after you press the shutter button once. AEB settings can be combined with exposure compensation settings to extend the adjustment range. -
Page 35: Selecting The Metering Mode
Selecting the Metering Mode You can select the metering mode that sets which part of the subject to measure to determine the exposure. 1. Rotate the mode dial to P , camera on by pressing the 2. Press , then use to select the [FUNCTION] menu. -
Page 36: Playback Mode - The Basics
PLAYBACK MODE - THE BASICS Viewing Images You can display the still images you have just captured at a time. 1. Press the button to turn on the camera. 2. Press the (Playback) button. The last recorded image appears on the LCD monitor. 3. -
Page 37: Magnifying Images
Magnifying Images While reviewing your images, you may enlarge a selected portion of an image. This magnification allows you to view fine details. The zoom factor displayed on the screen shows the current magnification ratio. 1. Press the (Playback) button. The last recorded image appears on the LCD monitor. -
Page 38: Thumbnail Display
Thumbnail Display This function allows you to view 9 thumbnail images on the LCD monitor simultaneously so you may search for a particular image. 1. Press the (Playback) button. The last recorded image appears on the LCD monitor. 2. Press the button once. -
Page 39: Slideshow Display
Slideshow Display The slide show function enables you to play your images back automatically in sequential order. This is very useful and entertaining feature for reviewing recorded images and for presentations. 1. Press the (Playback) button. The last recorded image appears on the LCD monitor. 2. -
Page 40: Resizing An Image
Resizing an Image You can change the image size of a captured image to one of the following sizes: 2304 x 1728 pixel, 2048 x 1536 pixel, 1280 x 960 pixel and 640 x 480 pixel. 1. Press the (Playback) button. The last recorded image appears on the LCD monitor. -
Page 41: Video Mode
VIDEO MODE Recording Video Clips This mode allows you to record video clips with sound via built-in microphone. 1. Rotate the mode dial to mode and turn your camera on by pressing the button. 2. Press the shutter button to start recording. 3. -
Page 42: Playing Back Video Clips
Playing Back Video Clips You can play back recorded video clips. A guide to operation appears on the LCD monitor during the video playback. 1. Press the (Playback) button. 2. Use to go through the images until the video clip you want to play back is displayed. -
Page 43: Playback Mode - Advanced Features
NTSC/PAL system to match the video output system of the video equipment you are going to connect to ViviCam 4345, then turn all connected devices off. 1. Connect one end of the A/V cable to the A/V terminal of ViviCam 4345. -
Page 44: Deleting Images/Video Clips
Deleting Images/Video Clips Use this function to delete one or all images/video clips stored in the internal memory or memory card. Please note that the deleted images or video clips cannot be recovered. Exercise caution before deleting a file. To delete the latest single image/video clip 1. -
Page 45: Protecting Images/Video Clips
Protecting Images/Video Clips Set the data to read-only to prevent images from being erased by mistake. 1. Press the (Playback) button. The last recorded image appears on the LCD monitor. 2. In (Playback) mode, use To view the previous image, press the To view the next image, press the 3. -
Page 46: Transferring Files From Your Vivicam 4345 To Computer
TRANSFERRING FILES FROM YOUR VIVICAM 4345 TO COMPUTER After using USB cable to establish a USB connection between ViviCam 4345 and your computer, you can use your computer to share recorded images or video clips with your family or friends via e-mail or post them on the Web. -
Page 47: Step 1: Install The Usb Driver
Follow the on-screen instructions to complete the installation. 3. After the USB driver has been installed, restart your computer. Installation on MAC OS 9.0 For Mac OS 9.0 or higher, the computer will automatically recognize ViviCam 4345 and load its own USB drivers. EN-47... -
Page 48: Computer
Step 2: Connect ViviCam 4345 to your computer 1. Rotate the mode dial to and turn your camera on by pressing button. 2. Connect one end of the USB cable to an available USB port on your computer. 3. There will be a new “Removable Disk” icon detected in “My Computer”, in which contains your recorded images or video... -
Page 49: Step 3: Download Images Or Video Clips
Step 3: Download images or video clips When ViviCam 4345 is turned on and connected to your computer, it is considered to be a disk drive, just like a floppy disk or CD. You can download (transfer) images by copying them from the “Removable disk”... -
Page 50: Editing Software Installation
EDITING SOFTWARE INSTALLATION Installing Photo Explorer Ulead Photo Explorer provides a simple and efficient way to transfer, browse, modify and distribute ® digital media. Acquire photos, video or sound clips from various digital device types and easily browse or add personal descriptions; make timely modifications; or distribute the media through the medium of your choice: E-mail, Print, Slideshow Presentations. -
Page 51: Installing Photo Express
Installing Photo Express Ulead Photo Express is complete photo project software for digital images. The step-by-step workflow, ® visual program interface, and in-program help assist users in creating exciting photo projects. Acquire digital photos effortlessly from digital cameras or scanners. Organize them conveniently with the Visual Browse mode. -
Page 52: Installing Adobe Acrobat Reader
INSTALLING ADOBE ACROBAT READER The CD-ROM includes a PDF (portable document format) copy of the user’s manual. To view a PDF you must have Adobe Acrobat Reader installed in your computer. Adobe Acrobat Reader is included on the camera CD ROM. Using Adobe Acrobat Reader, you can read the user’s manual and print sections of interest. -
Page 53: User Manual
User Manual on the CD-ROM is that you have Acrobat Reader (Adobe Reader) installed on your computer. Updates to this manual, and versions in other languages may be found on the Vivitar website (www.vivitar.com). 1. Insert the CD-ROM that came with the camera into the CD-ROM drive. -
Page 54: Menu Options
MENU OPTIONS Camera Menu This menu is for the basic settings to be used when capturing still images. PICTURE FUNCTION AUTO IMAGE SIZE IMAGE SIZE QUALITY QUALITY AUTO FOCUS SHARPNESS COLOR 1 / 4 1. Rotate the mode dial to A , P , 2. - Page 55 Item Functional Description FOCUS You can take images with the distance to the subject set by auto focus, macro or infinity. AUTO MACRO INFINITY CAPTURE Sets the recording method at the time of taking pictures. MODE SINGLE BURST In P , Mode PICTURE Item...
- Page 56 PICTURE Item COLOR SATURATION FUNCTION Item FOCUS CAPTURE MODE METERING EN-56 Functional Description Sets the color of the image that will be captured. FULL COLOR BLACK & WHITE SEPIA To capture an image, your camera offers you three different degrees of color to match with your preference.
- Page 57 AE/AWB Item Functional Description EXPOSURE Sets to obtain the correct exposure when the subject is much brighter or darker than the background. The EV compensation value can be set in the range from –2.0EV to +2.0EV. W. BALANCE Sets the white balance photographing under a variety of lighting conditions and permits photographs to be taken that approach the conditions that are seen by the human eye.
-
Page 58: Video Menu
Video Menu This menu is for the basic settings to be used when recording video clips. VIDEO COLOR SET : SET : EXIT : 1 / 1 1. Rotate the mode dial to 2. Press , then use to select the [COLOR]. 3. -
Page 59: Playback Menu
Playback Menu In the (Playback) menu, set which settings are to be used for playback. PLAYBACK RESIZE COPY TO CARD COPY SET : 1. Press the (Playback) button. The last recorded image appears on the LCD monitor. 2. Press , then use to select the desired setting and press the 3. - Page 60 1280 x 960 640 x 480 COPY TO Allows you to copy your files from the digital camera’s internal memory to a CARD memory card. Of course, you can only do this if you have a memory card installed and some files in internal memory.
-
Page 61: Setup Menu
Setup Menu This feature allows you to set up the default settings by preference for using your ViviCam 4345. BASIC RESET NUMBER LOUDER 3 MIN. DATE IMPRINT POWER OFF FORMAT DIGITAL ZOOM SET TO DEFAULT SET : 1. Rotate the mode dial to (Setup) mode and turn your camera on. - Page 62 Item Functional Description SET TO Returns all basic settings to the digital camera’s default settings. The time DEFAULT setting will not be reset. * YES / NO RESET Set whether or not to reset the file number when you take photographs. This NUMBER creates a new folder.
- Page 63 CUSTOM settings Item Functional Description DATE & TIME This sets the date and the time. Refer to section in this manual titled “Setting the Date and Time” for further details. * Y/M/D Y/M/D * D/M/Y * M/D/Y Sets video output system of the video equipment that you are going to connect to the camera.
-
Page 64: Devices
CONNECTING VIVICAM 4345 TO OTHER DEVICES EN-64... -
Page 65: Specifications
SPECIFICATIONS Item Description Image Sensor Effective pixels 4.0 Mega pixels Image size Still image: 2304 x 1728, 2048 x 1536, 1280 x 960, 640 x 480 Video clip: 320 x 240 Image quality Still image: Fine, Normal, Economy Movie image: Economy Recording media 12MB internal memory SD memory card (Optional, up to 512 MB) -
Page 66: Appendix
APPENDIX Troubleshooting Guide Symptom Possible causes * The battery has run out. Power does not turn on. * The battery is not oriented correctly. * The battery cover is not closed properly. * The AC power adapter (optional) is disconnected. * The function of POWER OFF in Camera suddenly mode has been activated.
Need help?
Do you have a question about the Vivicam 4345 and is the answer not in the manual?
Questions and answers