Advertisement
Available languages
Available languages
Quick Links
7.
DT-201
Digital wireless
Stereo
Headphones
= Operating Instructions
English
= Instructions pour l'utilisation
Français
= Modo de empleo
Español
= Bedienungsanleitung
Deutsch
" 使 用 说 明 书 繁体 中 文
"使
用 说 明 书 简体 中 文
Printed in China
Product Main Features
e
2.4GHz, wireless digital transmission : it allows freer, more personalized music listening and movie
watching without interfering with others.
e
USB / Analog (3.5mm & 6.3mm pins): double audio input, it facilitates bundled applications of all
kinds of players.
e
Low Power Consumption Headphone: regular alkaline battery (1.5V AAA x2) may sustain more
than 20 hours.
e
Large Size Headphone of 40mm Speaker Unit : heavy and distinct bass sound, clear and bright
mediant and treble, it reproduces hi-fidelity of the mediant-bass effects and the original audio
sound.
€
Automatic Sleeping Device: after the audio source terminates for about 10 minutes, the
headphones and transmitter will be shut off automatically.
@
Applicable to any type of player with USB connection port and audio source output port with &
3.5mm plug pin or ¢ 6.3mm plug pin such as TV set, Audio Equipment, DVD/CD Player, Desktop
Computer, Handheld Computer, PDA, iPod, iPhone, MP3 and Cellular Phones, etc.
Components and Accessories
SES
DT-201
Digital Wireless Headphone
Alkaline Battery 1.5V AAA x 2
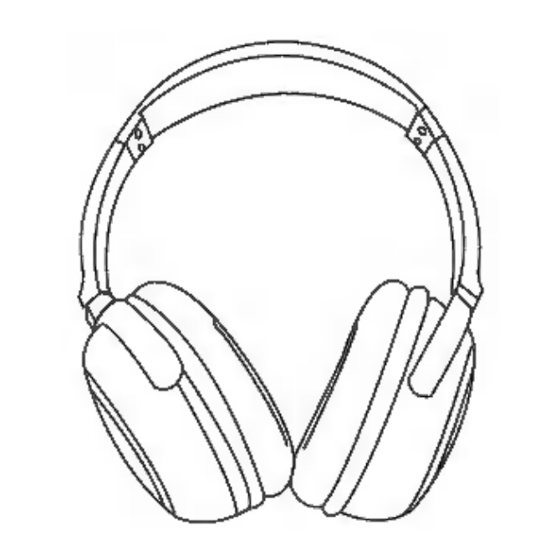
Parts Location and Function
Ear Pad (Left)
= : Power Switch, press and hold lightly for 3 seconds to turn on or shut off.
Battery Cover: please use AAA 1.5V 2 xalkaline batteries
Ear Pad (Right)
Power and Frequency Verification Indicator (Green): it blinks in slow pace after turning on the
power, it keeps on lighting up after frequency verification completes.
6. PAIR: Frequency Verification Push Button, it is used for frequency verifying with the transmitter.
7. VOL: Volume Adjust Button to adjust the volume level.
A PYON>
Battery Inserting (Installation)
E
1. Pressing down lightly the battery cover and opening the cover.
2. Inserting the batteries (AAA 1.5V x 2 Alkaline Batteries)
3. Restoring the battery cover and pushing up lightly and close up the battery cover.
Transmitter and Headphone Frequency Verification as well as Usage
a.
Connecting the transmitter with connection cable to the player device (iPod, iPhone, MP3, PC, NB,
etc.,), proceed to input audio source and confirm that the player has been turned on for music
playing.
. Pressing lightly on the transmitter power switch (.*) for 3 seconds to turn on the transmitter power,
now, the power and frequency verification indicator (Blue) will be kept constant on.
Using pen tip to press lightly on the transmitter frequency verification button (1D) for 3 seconds,
now, the power and frequency verification indicator (Blue) will blink in quick pace.
. Press lightly on the headphones power switch for 3 seconds to turn on headphones power, now,
the power and frequency verification indicator (Green) will blink in slow pace.
. Hand-pressing on the headphones frequency verification push button (PAIR) to proceed the
frequency verification (pairing) operation with the transmitter (for about more than 3 seconds), until
one hears the "bi" sound in the headphones and the transmitter frequency verification indicator
has been kept constant on, it indicates that frequency verification (pairing) has been completed.
When it has been connected for frequency verification, if the frequency verification indicator blinks
in slow pace, it indicates it is in the progress of channel searching, quick blinking means in the
progress of frequency verifying, if itis constant on, it represents the frequency verification has
been completed and the device is ready for use.
Other Instructions:
After completing the frequency verification and the product is set to normal use, when the audio
source stops playing, the power and pairing indicator will blink in slow pace; if the audio source
turns to normal playing, the indicator will be reset to constant on.
. After completing the frequency verification, if the device is enabled for re-operation after being
turned off, it is not necessary to perform the frequency verification and the device is ready for
direct use by turning it on.
When stop using, please turn off both the power switches of the transmitter and headphones to
avoid unnecessary power consumption.
. When the transmitter is connected at the same time to USB connection cable and ¢3.5mm plug
pin double head connection cable, the 4 3.5mm IN connection cable will be selected with priority
for audio input;the USB connection cable input will then be automatically transferred into charging
function.
When using on TV, DVD player, please use
RCA audio adaptor connection cable to connect to 4
3.5mm plug-pin double-head connection cable for connecting the transmitter to proceed with audio
input.
Troubleshooting
apopo
ve
»
Weak headphones volume or no sound at all
Adjusting headphones volume switch
Checking whether the audio source playing is stopped or the volume is too low
Moving the headphones near to the wireless transmitter
Performing the frequency verification between the headphones and transmitter once again
Headphones indicator (Green) is not on
Shutting off the headphones power and restart it
Replacing batteries (AAA 1.5V x 2 Alkaline Batteries)
Headphone connection can not be set up (Indicator blinks)
Moving the headphones near to the wireless transmitter
Making sure whether the connection of the wireless transmitter and the audio source player are
properly connected and whether the audio source is playing normally
Shutting off the headphones power and restart it
Transmitter indicator (Blue) is not on
Confirming that the wireless transmitter has been properly connected to PC or NB via the USB
transmission
When using ¢ 3.5mm plug pin double head connection cable to perform the audio source input,
the indicator is still not on
Using USB connection cable to perform the charging by connecting to PC or NB or plugging the
USB power adaptor in the AC socket for charging
Precautions
It may impact your hearing when wearing the headphones with high volume or for long-time usage
Do not use and store the device in high temperature, high humidity and dusty places and keep the
device at a place not reachable by children under three.
Do not drop off or hit with force to prevent from the damage of the internal circuit board
Do not place heavy object or apply pressure on the headphones, otherwise, it may be deformed in
shape after long-time storage.
Using soft cloth for wiping when it gets dirty, do not wipe with chemical organic solvent
Dirtiness or dust on all kinds of plugs will impact the transmission quality of the audio source,
please use soft cloth for clean wiping.
Do not use when it is stained by water, it could only be reused after it has been completely dried.
Aging may occur if the ear pad has been stored for long time or because of wearing.
Advertisement

Need help?
Do you have a question about the DT-201 and is the answer not in the manual?
Questions and answers