
Subscribe to Our Youtube Channel
Related Manuals for DAN NTP TECHNOLOGY DAD Thunder Core 256


Summary of Contents for DAN NTP TECHNOLOGY DAD Thunder Core 256
- Page 1 Core 256 Thunderbolt 3, DANTE, MADI and ADAT Digital Audio Interface Installation Guide...
- Page 2 Installation Guide Core 256 IMPORTANT SAFETY INSTRUCTIONS READ AND KEEP THESE INSTRUCTIONS WARNING – when using electric products, basic precautions should be followed, including the following: Read all of the safety and installations instructions and explanation of graphic symbols before using the product. 1.
- Page 3 Installation Guide Core 256 The product must be grounded. If it should malfunction or breakdown, grounding provides a path of least resistance for electric current to reduce the risk of electric shock. This product is equipped with a power supply cord having an equipment-grounding conductor and a grounding plug. The plug must be plugged into an appropriate outlet which is properly installed and grounded in accordance with all local codes and ordinances.
-
Page 4: Table Of Contents
Installation Guide Core 256 Contents GENERAL DESCRIPTION. BEFORE YOU START Mechanical installation and low fan noise Network configuration CONTROL SOFTWARE INSTALLATION Computer recommendation Program installation INSTALLATION OF DAD THUNDERBOLT 3 DRIVER FOR MACOS INSTALLATION OF DAD THUNDERBOLT 3 DRIVER ON WINDOWS PC OPERATION REAR PANEL CONNECTIONS. -
Page 5: General Description
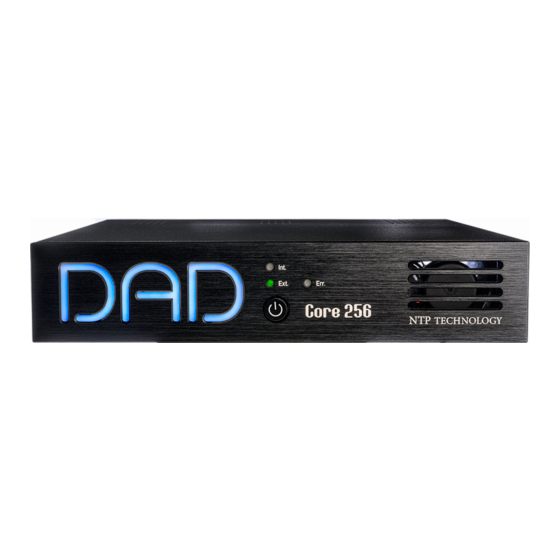
Installation Guide Core 256 General description. Congratulations, and thank you for choosing the Thunder|Core-enabled Core 256 Digital Audio Interface. Core 256 is an extremely capable multi-channel audio converter and digital audio interface, which is ideal in your sound studio or live music application as a versatile audio interface to your Digital Audio Workstation of computer-based effects processor. -
Page 6: Mechanical Installation And Low Fan Noise
Installation Guide Core 256 Mechanical installation and low fan noise Core 256 is fitted with one very quiet fan to ensure optimum operating temperature. Under normal operating conditions and correct installation, the fans are not audible in the studio environment. The fans are temperature- controlled, i.e. - Page 7 Installation Guide Core 256 Connect your Core 256 to DADman Core 256 can be controlled via Thunderbolt or Ethernet. At the first start-up, the the DADman window may be blank as no units are yet connected. In the top menu bar, select Tools/Device List and the window will show a list of the discovered units.
-
Page 8: Installation Of Dad Thunderbolt 3 Driver For Macos
Installation Guide Core 256 In DADman, configure each Core 256 in turn with a unique IP address and the preferred network mask e.g. 10.0.7.21 | 255.255.255.0. In this window you can also configure the IP audio network settings. When you are done you can connect more than one Core 256 to the network, and they will appear in the DADman Device List. -
Page 9: Installation Of Dad Thunderbolt 3 Driver On Windows Pc
Installation Guide Core 256 The installation sequence: 1. Copy the driver .pkg file to the computer desktop and double click to start the installation. 2. Follow the installation instructions. Click Next and then Install. 3. Enter Administrator password and click Install. 4. - Page 10 Installation Guide Core 256 Figure 5, ASIO driver configuration window. Note. The DAD ASIO control panel is accessible as a stand-alone configuration window or if your DAW audio application supports this, from inside the audio configuration dialogue. Doc no. AXCNTR-8001-A-4 Rev.
-
Page 11: Operation
Installation Guide Core 256 Operation Core 256 is controlled from a Mac or Windows computer via the Thunderbolt connection or the Ethernet port on the rear panel and configured by the DADman software running on the computer. On the front panel, you can monitor some of the primary settings. -
Page 12: Rear Panel Connections
Installation Guide Core 256 Rear panel connections. Below is the layout of the rear panel of the Core 256, Figure 7, Rear panel layout Rear panel layout 1. DC Power connector. 2. “Reconfig” button. Please refer to the section below for further details. 3. -
Page 13: Digital I/O And Network Connections
Installation Guide Core 256 Digital I/O and Network Connections Dual MADI SFP I/O mini-module The Dual SFP module can operate as a MADI interface or as DADlink. The Dual SFP module, can be installed with one or two “Small form- factor pluggable”... -
Page 14: Reconfig Button
Installation Guide Core 256 Sync connectors Coaxial BNC connector for Clock input synchronization, and Word Clock output The input clok format can be Word Clock or Video Black and Burst (VBB) ADAT Connectors Two TOSLINK Inputs and two outputs. Input and output connectors support ADAT. -
Page 15: Specifications
Installation Guide Core 256 and Green LED is network, the AX64 will default to IP address 10.0.7.20 / 255.255.0.0 after approx. 2 minutes. Green LED turns OFF “ he selection of either of the two recovery modes are fixed after selection. The AX64 will start with a basic boot software and IP configuration. -
Page 16: Electrical Specifications
Installation Guide Core 256 Electrical Specifications: Power consumption Digital section 15W Input voltage 12V DC, max 1.25A External DC power supply 65W 100 – 240 VAC Nominal, 47 - 63 Hz NTP P/N: AAA-0067 Safety compliance IEC 62368-1:2020+A11 2020 Mechanical specifications Chassis height 1 RU, 4.45 cm / 1.75”...
Need help?
Do you have a question about the NTP TECHNOLOGY DAD Thunder Core 256 and is the answer not in the manual?
Questions and answers