Table of Contents
Advertisement
Quick Links
65 II
F
UTILISATION - ENTRETIEN
E
USE - MAINTENANCE
D
BEDIENUNG - WARTUNG
I
USO - MANUTENZIONE
SP
UTILIZACION - MANUTENCION
P
UTILIZAÇÃO - MANUTENÇÃO
A partir du N° de série 13000
From serial Nb 13000
PIECES DE RECHANGE
SPARE PARTS
ERSATZTEILBESTELLUNG
PIEZZI DI RICAMBIO
PIEZAS DE REPUESTO
PARTES DE SUBSTITUIÇÃO
68724241
UPDATE 04/11/2005
Advertisement
Table of Contents

Related Manuals for Sullair 65 II

Summary of Contents for Sullair 65 II
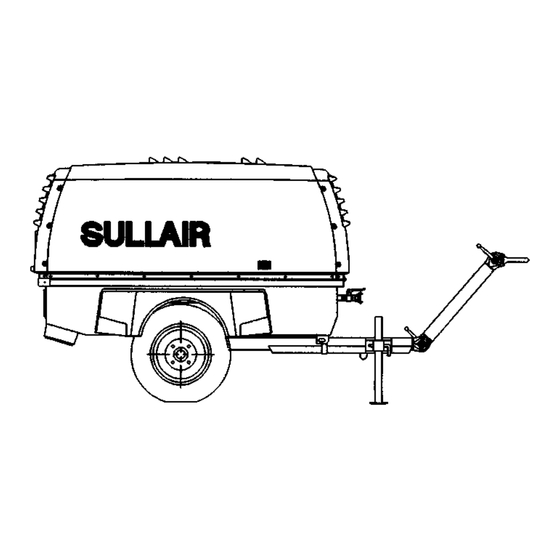
- Page 1 65 II UTILISATION - ENTRETIEN USE - MAINTENANCE BEDIENUNG - WARTUNG USO - MANUTENZIONE UTILIZACION - MANUTENCION UTILIZAÇÃO - MANUTENÇÃO A partir du N° de série 13000 From serial Nb 13000 PIECES DE RECHANGE SPARE PARTS ERSATZTEILBESTELLUNG PIEZZI DI RICAMBIO PIEZAS DE REPUESTO PARTES DE SUBSTITUIÇÃO...
-
Page 3: Table Of Contents
TABLE OF CONTENTS CHAPTER 1 - SAFETY GENERAL ...........................2 TOWING ..........................2 PRESSURE DANGERS......................3 FIRE AND EXPLOSION......................3 MOVING PARTS.........................3 HOT SURFACES, SHARP EDGES AND SHARP CORNERS ...........3 TOXIC AND IRRITATING SUBSTANCES................3 ELECTRICAL SHOCK ......................4 LIFTING ..........................4 1.10 ACCIDENTAL ENTRAPMENT....................4 1.11 JUMP STARTING .......................4 CHAPTER 2 - TECHNICAL DATA SPECIFICATIONS ......................5 LOCATION OF COMPONENTS ..................5... -
Page 4: Chapter 1 - Safety
SULLAIR manufactures all of its products so they can be operated safely. locked position with the wheel horizontal. -
Page 5: Pressure Dangers
1. SAFETY 7. If provided, lower the screw jack or stabilizer legs. Make sure the contact between (+) (eg: terminal (+) of the battery) and the earth, that contact surface has sufficient load bearing capacity to support the could provoke an electric arc with burns and fire risk. compressor weight. -
Page 6: Electrical Shock
1. SAFETY C. Locate the compressor or provide a remote inlet so that it is not likely suspended. to ingest exhaust fumes or other toxic, noxious or corrosive fumes or J. Set down the compressor on a level surface capable of supporting at substances. -
Page 7: Chapter 2 - Technical Data
17 - Fuel filter Sprung axle. 18 - Electro-stop. Articulated towbar with or without inertia braking. Compressor 65 II • Delivery rated pressure * (l/min/cfm)......3700 • Maximum pressure (bar/psi) ........• Working pressure (bar/psi)) ........• Minimum separator pressure (bar/psi) ....... -
Page 8: Dimensions
2. TECHNICAL DATA Non-braked version 2.3 DIMENSIONS 2.5 ENGINE AND COMPONENT IDENTIFICATION IMPORTANT Components such as the engine and rotary screw are provided with a Instruction stickers fixed on the machine should be respected. They Manufacturer’s identification plate. should be replaced if damaged. 2.4 COMPRESSOR IDENTIFICATION The compressor is designated with a serial number, which is stamped on the manufacturer’s plate located on the front of the chassis. -
Page 9: Chapter 3 - Description
3. DESCRIPTION 3.1 WORKING PRINCIPLE ROTARY SCREW COMPRESSOR ADMISSION COMPRESSION DELIVERY The spacing of the lobes in front of the intake The meshing of the rotary screws traps the in- The compressed air is progres-sively routed to port (A) creates a partial vacuum, enabling am- take air, which is progressively compressed by the exhaust port (R). -
Page 10: Regulating System
3. DESCRIPTION Max. speed end stop Idling end stop Compressed air/fluid mixture Compressed air 3.6 REGULATING SYSTEM C. Zero consumption: outlet valves (11) closed. The pressure in the separator (5) is maximum. Cylinder (16), supplied at 3.6.1 Starting this maximum pressure by the controller (10), closes the inlet valve (A). The pressure in the separator (5) is zero, the engine speed control cylin- Cylinder (9), which is also supplied, adjusts the engine to run at idling der (9) retains the engine speed control level in the full speed position. -
Page 11: Chapter 4 - Use
NOTE: For all engine procedures consult the engine manual. Contact the SULLAIR specialist prior to starting a compressor set which has not been used for a long period (more than six months) or has not Handling with lifting ring (photo 6) been specially prepared for long shut down periods. -
Page 12: Filling Fuel Tank
4. USE IMPORTANT • Be sure to tighten the radiator pressure cap (ref.2 photo 9) securely af- ter filling up. • The separator oil level: Keep the level at maximum (fig S). The maxi level is determined by the filling hole thus it cannot be over- filled. -
Page 13: Control Panel
- Switch off the ignition switch (5). NOTE: In case of long shut down (more than 6 months) contact your SULLAIR specialist to insure the “Long Period” shut down treatment to avoid star- 1 - Manometer ting difficulties later. -
Page 14: Chapter 5 - Maintenance
(see ch.4.5). tions must be carried out more frequently and certain precautions must be taken. Consult the engine maker’s manual and your local SULLAIR 5.3 MAINTENANCE 100 HOURS specialist. -
Page 15: Maintenance 500 Hours
• Lightly oil joint then install a new cartridge. 5.3.8 Compressor belts tension must be done 5.4.2 Change compressor air filter cartridge by a SULLAIR specialist (see ch.5.3.4) • Check belts tension. If necessary retension by loosening 5.4.3 Engine radiator the fixing screws (ref.1 photo 17) and acting on the tension screw... -
Page 16: Maintenance 1000 Hours (Or Yearly)
Temperate climate ......A.W.F. Oil conforms to the DIN 51506 VDL 46 or ISO DAH norm. First 50-100 hours In the case of extreme temperatures, consult your SULLAIR agent. • See engine and compressor instruction manual IMPORTANT: The 1000 hours frenquency maintenance is applicable for normal working conditions. -
Page 17: Chapter 6 - Electric Circuit
6. ELECTRIC CIRCUIT 6.1 SCHEMA fuse 60 A 2. The engine starts fuse 10 A The key switch (COM) returns to position 1 key switch - the load indicator light goes out load/contact indicator light - the hour meter (h) and hold-on solenoid (ES) are supplied by the sa- VPRE preheat indicator light fety relay (RS). -
Page 18: Chapter 7 - Troubleshooting
7. TROUBLESHOOTING SYMPTOM PROBABLE CAUSE REMEDY 1. Compressor will not 1. No fuel. Check fuel level and add fuel if necessary. start. 2. Plugged fuel filter. Replace the filter cartridge and its secondary filter. 3. Low battery voltage. a. Check electrolyte level and add water if necessary. Recharge or replace if necessary. b. -
Page 19: Chapter 8 - Recommendations For Spare Parts
8. RECOMMENDATIONS FOR SPARE PARTS Who should you contact ? Précautions You must contact our Agent,Trader or Subsidiary Company which repre- In order to obtain a maximum utilization of your compressor, we recom- sents us in your country. mend you always keep a lot, of the following spare parts: Only this network is able to provide you with original parts, namely top This list can be adapted to your particular circumstances.
Need help?
Do you have a question about the 65 II and is the answer not in the manual?
Questions and answers