Table of Contents
Advertisement
Quick Links
Advertisement
Table of Contents

Subscribe to Our Youtube Channel
Related Manuals for Visioneer LX 200


Summary of Contents for Visioneer LX 200
- Page 2 (postage prepaid, with proof of your purchase from the original reseller) during the 3-month period after the date of your original purchase of the product. Upon registration of the product with Visioneer at www.visioneer.com, the warranty is automatically extended for an additional 9 months for a total of 12 months .
- Page 3 ENGLISH CONGRATULATIONS Congratulations on the purchase of your new camera. Your camera has been carefully engineered and manufactured to give you dependable operation. Read this manual before operating the camera to become more familiar with it. This manual has been written and formatted with depth and detail so that you can easily follow the instructions to maximize the features of your camera.
-
Page 4: Table Of Contents
Important Information ...4 Precautions ...5 Camera Features ...6 System Requirements ...7 1. The Camera Overview of your Visioneer LX 200 ...8 Loading the Batteries ...9 Turning the Camera On and Off ...10 LCD Menu Screens ...11 LCD Status Messages...15 Turning the LCD On and Off ...16 Camera Ready LED Status ...16... - Page 5 3. Review Mode Enlargement ...34 Viewing Video Clips ...34 Main Menu ...35 Delete ...35 Thumbnail...37 4. Software Installation Installing the Camera Drivers and ArcSoft Applications ...38 5. Transferring Photos to the Computer Connecting the Camera to the Computer ...40 WDM/TWAIN Drivers (PC) ...41 ArcSoft PhotoImpression (PC) ...41 Mass Storage Mode (DSC)...43 Unplugging the camera from the computer ...44...
-
Page 6: Important Information
IMPORTANT INFORMATION FCC INFORMATION FCC WARNING: This equipment meets the limits for a Class B digital device, pursuant to Part 15 of FCC rules. Only the cable supplied with the camera should be used. Operation with other cables is likely to result in interference to radio and TV reception and could void the user’s authorization to operate this equipment. -
Page 7: Precautions
VCCI INFORMATION This is a Class B product, to be used in a domestic environment, based on the Technical Requirement of the Voluntary Control Council for Interference (VCCI) from Information Technology Equipment. If this is used near a radio or television receiver in a domestic environment, it may cause radio interference. -
Page 8: Camera Features
Camera Features • Stores approximately 8 Fine, 15 Normal or 27 Economy (1600 x 1200 pixels) mode photos with 7MB internal memory • Virtually unlimited storage using the removable MultiMediaCard (MMC) or Secure Digital (SD). (MMC/SD memory cards are sold separately). •... -
Page 9: System Requirements
System Requirements • Microsoft Windows 98/ME/2000 and XP • IBM PC/AT or compatible, 200 Mhz or higher • Minimum 32MB RAM (64MB recommended) • USB Port • 640 x 480 monitor, minimum 16 bit color (1024 x 768 24 bit color recommended) •... -
Page 10: The Camera
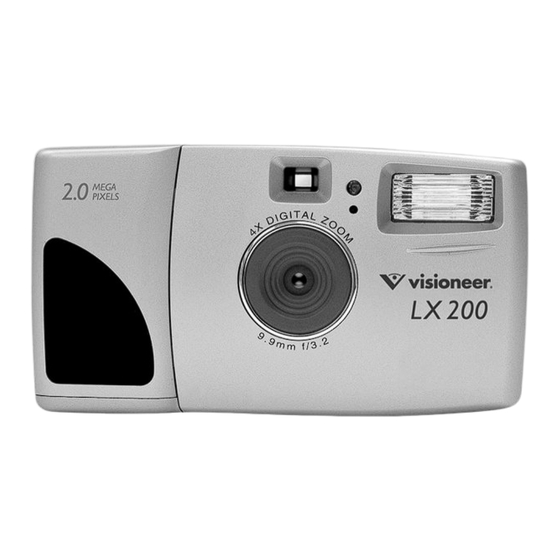
1. The Camera Overview of Your Visioneer LX 200 FRONT/TOP 8. Power Button 9. Camera Ready LED 10. LCD 11. Cable Connection Panel 12. Tripod Socket 13. Mode Switch 14. Navigation Button 15. Menu Button 16. OK Button 17. LCD On/Off Button 18. -
Page 11: Loading The Batteries
– sign. (fig.1.2) 5. Close the Battery & Memory Card Door. Note: Remove the batteries from the Visioneer LX 200 if the camera will not be used for an extended period of time to prevent corrosion or battery leaks. -
Page 12: Turning The Camera On And Off
Turning the Camera on and off When the camera is turned on, the camera ready LED on the back of the camera blinks and the LCD will display the default settings. Turning the Camera on and off: 1. Press the Power button to turn the camera on. (fig.1.3) 2. -
Page 13: Lcd Menu Screens
LCD Menu Screens MAIN MENU Mode Size Quality Flash IMAGE SIZE 1600 x 1200 1280 x 960 640 x 480 MENU IMAGE SIZE Main Menu MENU FLASH Auto Flash Flash Off MENU FLASH Main Menu MENU MODE Video Clip Self-timer Main Menu QUALITY Fine... - Page 14 LCD Menu Screens MAIN MENU – Scene Brightness – EXPOSURE VALUE + SCENE Of f Of f MENU Sunny Fluorescent MENU Tungsten Main Menu MENU – Brightness +...
- Page 15 LCD Menu Screens MAIN MENU Setup Exit SETUP Time-out Driver PlayLogo O f f SETUP Language Default Format Main Menu None NTSC Language English Français MENU Language Español Deutsch Italiano MENU SETUP This operation will delete all images...
- Page 16 LCD Menu Screens MAIN MENU Delete Thumbnail Brightness Exit DELETE Delete One Delete All Main Menu – Brightness + DELETE THIS FILE? DELETE ALL FILES?
-
Page 17: Lcd Status Messages
LCD Status Messages Messages on the LCD indicate if the memory is full or if there is a problem with the memory. 1. MEMORY CARD IS FULL: The memory card is full. 2. INTERNAL MEMORY IS FULL: The internal memory is full. 3. -
Page 18: Turning The Lcd On And Off
Turning the LCD On and Off By default, the LCD automatically turns on when the camera is powered on. Press turn the LCD on or off. Using the Display ON/OFF Button: 1. Press once to turn the LCD icons off. 2. -
Page 19: Camera Memory
Camera Memory The Visioneer LX 200 can store files in one of two ways using either the camera’s 7MB internal memory or the removable MMC/SD. Memory cards are sold separately and can be purchased from major electronic or computer retailers. - Page 20 Inserting the MMC/SD Inserting the MMC/SD: 1. Locate the Battery & Memory Card Door on the bottom of the camera. 2. Slide the button on the Battery & Memory Card Door towards the center of the camera and lift the door.
-
Page 21: Camera Mode
Camera Mode Taking Images: 1. Set the camera to Camera Mode by moving the Mode Switch to 2. Position the subject in the viewfinder OR the LCD. (fig.2.1) 3. Gently press the Shutter button (fig.2.2) and keep the camera still until the camera ready LED next to the viewfinder flashes. -
Page 22: Mode
MODE - VIDEO CLIPS MAIN MENU Mode Size Quality Flash Taking Video Clips: 1. When Video Clip is highlighted in the MODE menu, press 2. Press the Shutter button to begin recording a continuous video clip. (fig.2.4) 3. Press the Shutter button again to stop recording. -
Page 23: Self-Timer
MODE - SELF-TIMER MAIN MENU Mode Size Quality Flash Self-timer: 1. Highlight Self-timer in the MODE menu, then press . (fig.2.6) 2. Use the 3. Press OK to select. 4. Position the subject in the viewfinder or LCD. 5. Press the Shutter button. 6. -
Page 24: Size
SIZE MAIN MENU Mode Size Quality Flash 1. In the SIZE menu, press x 960 and 640 x 480 pixels. 2. Press OK to select the size and press MENU to return to picture taking mode. Image Quality Fine Normal Economy Note: The selected option will be marked by ( to toggle between 1600 x 1200, 1280... -
Page 25: Quality
QUALITY MAIN MENU Mode Size Quality Flash 1. In the QUALITY menu, press and Economy. 2. Press OK to select the quality mode and press MENU to return to picture taking mode. Image Size JPEG ratios Note: The selected option will be marked by ( to toggle between Fine, Normal Fine Normal... -
Page 26: Flash
FLASH MAIN MENU Mode Size Quality Flash 1. In the FLASH menu, press Flash ( ), and Flash Off ( 2. Press OK to select the flash mode and press MENU to return to picture taking mode. Flash Status Auto ( Flash ( Flash OFF ( Note: The selected option will be marked by (... - Page 27 EV - EXPOSURE VALUE MAIN MENU – Scene Brightness 1. In the EV menu, press 0, +0.5, +1.0, +1.5 and +2.0. 2. Press MENU to exit. ( + ) ( – ) – EXPOSURE VALUE + to toggle between –2.0, -1.5, -1.0, -0.5, Use this setting for scenes with low light conditions.
-
Page 28: Wb (White Balance)
WB (WHITE BALANCE) MAIN MENU – Scene Brightness 1. In the WB (WHITE BALANCE) menu, press AWB, Sunny, Fluorescent or Tungsten. 2. Press OK to select the white balance mode and press MENU to exit. White Balance Option Auto White Balance Sunny Fluorescent Tungsten... -
Page 29: Scene
PRESET SCENE SELECTION MAIN MENU – Scene Brightness 1. In the Scene menu, press Beach/Snow, Sunset, Night Landscape, Fireworks and Off. 2. Press OK to select the scene mode and press MENU to exit. Party/Indoor Beach/Snow Night Landscape Sunset Fireworks to choose between Party/Indoor, Use this mode in to capture the details of candlelit scenes or other indoor background light conditions. -
Page 30: Brightness
BRIGHTNESS MAIN MENU – Scene Brightness Use this option to change the LCD brightness. 1. In the BRIGHTNESS menu, press options. 2. Press MENU to exit. – Brightness + to toggle between the... -
Page 31: Setup
SETUP MAIN MENU Setup Exit Using the SETUP menu: 1. Use to toggle between the options. 2. When the option is highlighted, use 3. Press to select and scroll to the next option or press MENU to exit. Setup Option Selection Options Time-out 15, 30, 60, 90... - Page 32 TIME-OUT To extend battery life, the camera will automatically power off after 60 seconds of inactivity. Use this option to change the default setting. DRIVER Please refer to the Transferring Files to the Computer section on P. 38 for further information.
- Page 33 DEFAULT To set your camera to its default settings: 1. When the Default option is highlighted, press 2. The camera will reset to the factory defaults. 3. Press MENU to exit. Mode Size Quality White Balance Scene Brightness Time-out Driver Play Logo Language Note: The default version for TV mode will vary depending on the...
- Page 34 FORMAT Formatting deletes all files. Use this option to format the internal memory or the MMC/SD. To format the: • Internal memory – The MMC/SD card must not be in the camera. • MMC/SD – Insert the MMC/SD into the camera. 1.
-
Page 35: Digital Zoom
Digital Zoom The camera can use up to 4x Digital Zoom to take images. Using the Digital Zoom: 1. In Camera mode, press ( T ) to zoom into the subject. 2. Press ( W ) to zoom out and to return to normal mode. Size 1600 x 1200 1280 x 960... -
Page 36: Review Mode
REVIEW MODE In review mode, you can review your captured images and video clips through the LCD. Using REVIEW mode: 1. Slide the Mode Switch towards 2. Press to scroll through each file. Enlargement (JPG) When viewing images, you may use enlargement to zoom into the stored image. -
Page 37: Main Menu
MAIN MENU To use the MAIN MENU in Review Mode: 1. Press MENU to enter the MAIN MENU. 2. Use to toggle between the options. 3. When the option is highlighted press enter its submenu. 4. If you would like to exit any menu, press until Exit or Main Menu is highlighted to return to the previous menu. - Page 38 DELETE DELETE Delete One Delete All Main Menu To delete ALL files from the internal memory: 1. When Delete All is highlighted in the DELETE menu, press 2. The next screen will read "All Files?" Press or Yes. Press OK to select. 3.
-
Page 39: Thumbnail
THUMBNAIL MAIN MENU Delete Thumbnail Brightness Exit To view files in Thumbnail mode: 1. When Thumbnail is highlighted in the enter the Thumbnail mode. 2. Use to navigate between all of the stored files. 3. Press OK to view the selected file. BRIGHTNESS Please refer to the Brightness section on P. -
Page 40: Software Installation
4. Software Installation NOTE: Do not connect the camera to your computer before the camera drivers and software installation is completed. Installing the Camera Drivers and ArcSoft Applications: 1. Insert the CD-ROM included in your camera's packaging into your computer's CD-Rom drive. 2. - Page 41 [Continue Anyway] to continue installation. (This message will also appear for "Universal Serial Bus controllers", "Visioneer LX200 Mass Storage" and "Visioneer LX200 Video Capture". Click [Continue Anyway] to continue the installation.) 4. Follow the on-screen instructions to complete the installation.
-
Page 42: Transferring Files To The Computer
2. Connect your camera to the computer using the USB cable provided. 3. Plug the rectangular end of the USB cable that is included with the Visioneer LX 200 into your PC’s USB port. Please refer to your computer’s documentation for more information on the location of the USB port. -
Page 43: Wdm/Twain Drivers (Pc)
(fig.5.2) 7. Click on the [Camera/Scanner] button. (fig.5.2 a) 8. Click on the drop-down list under SELECT SOURCE and choose Visioneer LX200 DC Memory. (fig.5.2 b) SETUP Time-out Driver PlayLogo until Driver is highlighted. - Page 44 9. Click on the Camera/Scanner Icon. (fig.5.2 c) A second window will appear showing the contents (pictures) of your camera’s memory, and options on how to handle them. (fig.5.2 d) 10. Select the picture(s) you want to retrieve, by pressing the Ctrl key on your keyboard and clicking once on each thumbnail.
-
Page 45: Mass Storage Mode (Dsc)
NOTE: Windows 98 first edition users select only PC mode. Note for Windows users: If switching between PC and DSC mode, please unplug your camera from the computer first. Using the Mass Storage (DSC) This mode allows the camera to become an external hard disk drive (DSC) and you may view or download images and video clips stored in your camera’s internal memory or MMC/SD memory card onto your computer. -
Page 46: Unplugging The Camera From The Computer
2. If the camera is in PC Driver mode, select "Stop Visioneer LX 200 USB Driver V 0.1." If the camera is in DSC Driver mode, select "Stop Visioneer LX 200 USB Mass Storage Device." 3. Click [OK] in the "Safe to Remove Hardware" prompt. -
Page 47: Other Features
6. Other Features Windows Only Web Camera (PC Mode) You may also use the Visioneer LX 200 as a web camera and a video conferencing camera. It will work with many popular video conferencing software titles. Using the camera as a Web Camera: 1. -
Page 48: Tv Mode
TV Mode The camera allows you to view individual files and record clips on the television. To begin, check your television documentation to determine what video standard you should set your camera to either NTSC or PAL. MAIN MENU Setup Exit Changing the TV Mode setting: 1. - Page 49 Using TV Mode 1. Connect the camera to the TV. 2. Turn the camera on. 3. Slide the Mode Switch to 4. The TV will become a live viewfinder. Note: You may record your TV Mode session by using your VCR. Please refer to your VCR documentation to learn more about recording.
- Page 50 Time-out 1. In the TV MENU, press 2. Press to change the Time-out setting. Save 1. In the TV MENU, press 2. Press OK to Save your changed settings. Default 1. In the TV MENU, press 2. Press OK to set the camera to its default settings. to highlight Time-out.
-
Page 51: Camera Maintenance
7. Camera maintenance Cleaning the camera: Clean the outside of the camera by wiping it with a clean, soft and dry cloth. Cleaning the lens, viewfinder and LCD: 1. Blow gently on the lens and/or viewfinder to remove dust and dirt. 2. -
Page 52: Tips And Troubleshooting
8. Tips and Troubleshooting SYMPTOM POWER Cannot turn on the camera. VIEWING VIDEO CLIPS (.AVI FILES) ON A COMPUTER The following message appears on the computer screen when opening an AVI file: “Cannot play back the video stream: no suitable decompressor could be found.”... - Page 53 Tips and Troubleshooting SYMPTOM WEB CAMERA/PICTURES/VIDEO CLIPS Web camera video/picture/video clip has poor quality. TAKING PICTURES Flash picture taken is too light. Flash picture taken is too dark. Flash did not work Picture taken has poor quality. POSSIBLE CAUSE Poor lighting. Lens is dirty.
- Page 54 Tips and Troubleshooting SYMPTOM TAKING PICTURES/VIDEO CLIPS Daylight picture/video clip taken is too dark. Cannot take a picture/video clip. Image is blurred when looking through the viewfinder. Part of the picture/ video clip is missing POSSIBLE CAUSE The subject is in front of bright light.
- Page 55 Tips and Troubleshooting SYMPTOM TAKING PICTURES/VIDEO CLIPS Camera is not responding during image capture. WHITE BALANCE There is something wrong with the color of the captured image. The LCD monitor is not clear. The LCD is not displaying anything. DOWNLOADING PICTURES TO PC Camera is not responding during image downloading...
-
Page 56: Camera Specifications
9. Camera Specifications Lens Focusing Image Sensor Image Size Image Quality/Image Size Sensor Output Sensitivity Exposure EV compensation Digital Zoom Image Storage Preset Scene Selection Removable Storage 9.9 mm f/3.2 glass lens, 5 elements in 5 groups, (Equivalent to 48mm lens on 35mm format) Focus free 1.2m to infinity CMOS (1600 x 1200 active pixel), Pixel Pitch 4.2um x 4.2um, 8.4mm array Diagonal. - Page 57 Camera Specifications Output file format Optical Viewfinder Image Review On Screen Display (OSD)Menu on LCD Frame Counter Multi Language Support Self-timer Flash Unit JPEG compression, AVI Reversed Galilean type with 85% coverage and 0.45x magnification On 1.6" TFT LCD (resolution 312 x 230) with white LED back lighting and continuous enlargement capability up to 4X Display: Frame counter, Battery status User selectable:...
- Page 58 Camera Specifications Power Source Battery Life Power Management Dimensions Weight Connectivity Web Camera Video Mode System Connectivity PC Software Image Refresh Rate for Web Camera Video Resolution Accessories 3V 2x AA LR6 batteries Up to 120 Pictures (approx.) Auto-power-off after 15, 30, 60, 90 seconds or no auto time out (User Programmable) without activity 110 x 62 x 35.9mm 116.2g (without battery and MMC/SD card)
- Page 59 Reproduction, adaptation, or translation without prior written permission is prohibited, except as allowed under the copyright laws. The Visioneer brand name and logo are registered trademarks of Visioneer, Inc. PhotoImpressions is a trademark of ArcSoft, Inc. Adobe Acrobat is a trademark of Adobe Systems Inc. Microsoft is a U.S.
Need help?
Do you have a question about the LX 200 and is the answer not in the manual?
Questions and answers