Table of Contents
Advertisement
Quick Links
Advertisement
Table of Contents

Related Manuals for MICRO-AIR EasyTouch RV 356


Summary of Contents for MICRO-AIR EasyTouch RV 356
- Page 1 EasyTouch RV Reference Manual for Model...
-
Page 2: Table Of Contents
EasyTouch RV 356 Table of Contents EasyTouch RV 356 Models and Compatible Replacements ..............3 Installing the Thermostat ........................4 Came From Quick Start Guide? - Begin Here ......................4 Check for Additional Hardware – Software Setup for Later ................7 Initial Setup Instructions .......................... -
Page 3: Easytouch Rv 356 Models And Compatible Replacements
-OBSOLETE- ASY-356-X04 -OBSOLETE- Table 1 Table 2 and Table 3 list the known OEM model numbers that can be used with EasyTouch RV 356. The tables are not exhaustive so if your thermostat is not listed, please contact Micro-Air https://www.micro- air.com/SupportRequest... -
Page 4: Installing The Thermostat
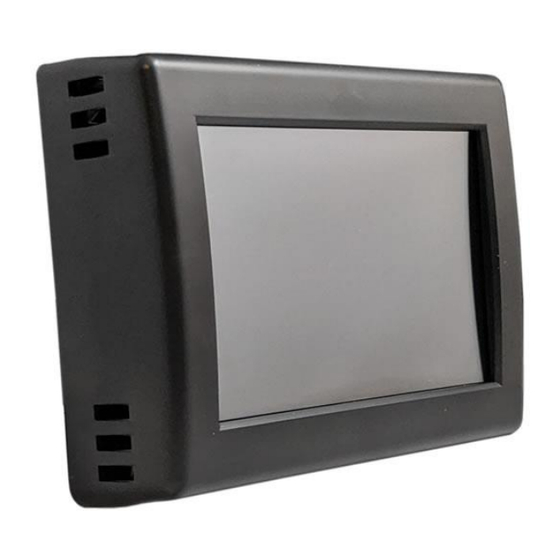
EasyTouch RV 356 Included in the Box EasyTouch RV model 356 is shipped with the following items: • • 1x EasyTouch RV 356 Thermostat 1x 9-Pin (3x3) adapter (Figure 2) • • 1x Quick-Start Guide 1x Mounting Bracket (Figure 3) •... - Page 5 EasyTouch RV 356 pictures of this wiring for reference. Be sure that you can see where the thermostat wires meet with the wall wires as they are typically different colors. You can also write in Table 4 later in the section to record what color wires meet.
- Page 6 EasyTouch RV 356 Table 4 – Wire Color Chart Original Factory harness Micro-Air thermostat wire Micro-Air harness color Function color (Provided to Connector color write in your color) Green/White Green/White Stripe Room Sensor Stripe Green/White Green/White Stripe Room Sensor Stripe Pin No.
-
Page 7: Check For Additional Hardware - Software Setup For Later
EasyTouch RV 356 Micro-Air provides a 9-pin harness (Figure 2) that will be used to interface between EasyTouch and the RV manufacturer’s wires. One side plugs into EasyTouch RV while the other wire-end side is used to make your new wire connections. You will have to source or reuse electrical connectors to make these connections. - Page 8 EasyTouch RV 356 Mounting the Thermostat Step 1: Locate the mounting bracket (Figure 3) horizontally across the hole with the smaller diameter of the mounting button against the wall. Step 4: Remove the mounting tab before mounting the thermostat on the wall.
-
Page 9: Initial Setup Instructions
Initial Setup Instructions Configure your Available Outputs EasyTouch RV 356 is meant to replace a few different OEM thermostats and so must be configured for your system prior to using it. Tap the Settings button on the main screen, then navigate to the Setup button and... -
Page 10: Operating The Thermostat
EasyTouch RV 356 Operating the Thermostat Main Screen This screen is where most time is spent using the thermostat. This screen allows you to set and monitor the desired operation of the thermostat and is shown in Figure 7. (1) Operational Mode This is the main operating state of the system. -
Page 11: Operational Modes
EasyTouch RV 356 (9) Info Screen This screen shows information about the thermostat’s operating state. Tap the button for this information. (10) Status Message Various messages may be shown here to indicate active operations. See the Status Messages section for potential messages and their meanings. - Page 12 EasyTouch RV 356 Furnace Only This mode only runs an auxiliary heating cycle to maintain the heating set- point in the space. Set the (1) Operational Mode button to Furnace Only or Aqua Only and the desired (2) Fan Speed, where behavior will then be based on Table 7.
-
Page 13: Auto Gas Changeover
EasyTouch RV 356 Auto Gas Changeover Note: See section Auto Gas Changeover Type in section Initial Setup Instructions to configure this feature. Auto Gas Changeover operation mirrors the OEM thermostat’s operation for additional stages of heat when the thermostat determines more are needed. The three escalating stages are shown in Table 8. All three stages may not be available based on your system, but EasyTouch will output the same logic. -
Page 14: Local Weather And Local Time
EasyTouch RV 356 Local Weather and Local Time Local weather is displayed on the main screen whenever Wi-Fi and internet is available, shown visibly in the Main Screen section. Tapping the button will reveal more detailed weather information of the last received weather data. -
Page 15: Settings Screens
Back to Main System Help This screen displays a QR code that can be scanned to provide information about thermostat operation and troubleshooting from the Micro-Air website. It also shows the current Help Button thermostat firmware revision and the thermostat serial number. - Page 16 EasyTouch RV 356 Home/Away This setting changes from a home memorized set of settings to an away memorized set of settings. It is like having two different thermostats, one while you are at the RV and one for when you are not. Each can be set with a completely different set of modes, schedules, set points and fan speeds to customize the operation with a single button press.
- Page 17 Tap the Switches button to see what configurations are available. See section Initial Setup Instructions for details on what must be configured, if any. Micro-Air cannot assist with manipulating and adding more appliances to your system.
-
Page 18: Schedule Screens
EasyTouch RV 356 Schedule Screens The schedule supports 7 day per week scheduling of events. Events can include changes to the set point or mode of operation for one or more zones. Each numbered row is an event that can be configured. -
Page 19: Create And Enable A Schedule
EasyTouch RV 356 Figure 9 shows the edit screen when an event is tapped as shown in (8) Scheduled Events of Figure 8 - Main Schedule Screen. The event time on the main schedule screen and Action Time in the edit schedule screen will show disabled until a time is set. -
Page 20: Smart-Device Application Features
Updates and follow the prompts. Note: Beta updates may be available from time to time, but these are for people working with Micro-Air in testing them. Some features may not work as expected. The current version firmware can be restored by checking for updates again. -
Page 21: Appendix A: Working Wirelessly
EasyTouch RV 356 Appendix A: Working Wirelessly This thermostat may be operated remotely using either Bluetooth or Wi-Fi. All connectivity is performed through the EasyTouch RV App on a smart device. The app is downloaded from the Google Play store or Apple App store. The first time the app is opened, it will ask to create an account. -
Page 22: Connecting To A New Wi-Fi Network
EasyTouch RV 356 Connecting to a New Wi-Fi Network You can connect to the thermostat from anywhere using the app when the thermostat is connected to an internet source. The internet source must be operating on a 2.4GHz network to connect to EasyTouch. -
Page 23: Appendix B: Troubleshooting
EasyTouch RV 356 Appendix B: Troubleshooting The most common problems during installation are not matching the wires correctly or properly mating the wires. The first step should always be to recheck the instructions and make sure the wires are joined and seated properly.
Need help?
Do you have a question about the EasyTouch RV 356 and is the answer not in the manual?
Questions and answers