Table of Contents
Advertisement
Available languages
Available languages
Quick Links
USA office: Fontana
AUS office: Truganina
GBR office: Ipswich
If you're having difficulty, our friendly
customer team is always here to help.
FRA office: Saint Vigor d'Ymonville
USA:cs.us@costway.com
AUS:cs.au@costway.com
GBR:cs.uk@costway.com
FRA:cs.f r @costway.com
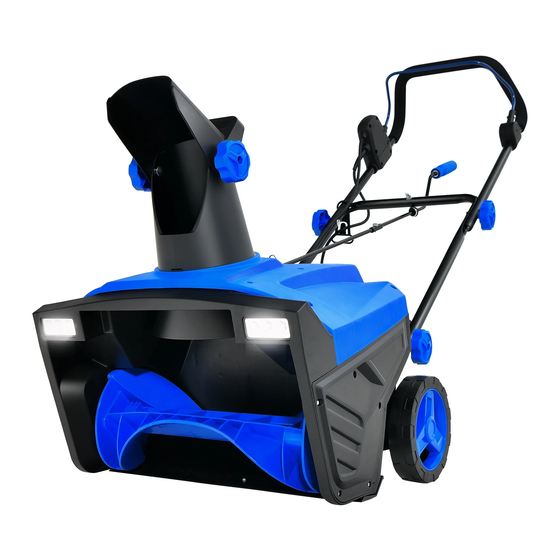
SNOW THROWER
SOUFFLEUSE À NEIGE
ET10041US-BL
THIS INSTRUCTION BOOKLET CONTAINS IMPORTANT SAFETY INFORMATION. PLEASE READ AND KEEP FOR FUTURE REFERENCE.
Advertisement
Table of Contents

Summary of Contents for IronMax ET10041US-BL
- Page 1 SNOW THROWER SOUFFLEUSE À NEIGE ET10041US-BL USA office: Fontana AUS office: Truganina GBR office: Ipswich FRA office: Saint Vigor d'Ymonville USA:cs.us@costway.com If you're having difficulty, our friendly AUS:cs.au@costway.com customer team is always here to help. GBR:cs.uk@costway.com THIS INSTRUCTION BOOKLET CONTAINS IMPORTANT SAFETY INFORMATION. PLEASE READ AND KEEP FOR FUTURE REFERENCE.
- Page 2 1. DESCRIPTION 1.1 PURPOSE Before You Start This machine is used to remove and clear away snow from pavements, gardens, driveways and other ground- level surfaces. Please read all instructions carefully. Retain instructions for future reference. 1.2 OVERVIEW Separate and count all parts and hardware. Read through each step carefully and follow the proper order.
-
Page 3: Intended Use
Save all warnings and instructions for future reference. The term “power 2. INTRODUCTION tool” in the warnings refers to your mains-operated (corded) power tool. Your product has been engineered and manufactured to high standards for dependability, ease of operation, and operator safety. When properly 3.1 TRAINING cared for, it will give you years of rugged, trouble-free performance. - Page 4 3.2 PREPARATION ● When cleaning, repairing, or inspecting, make certain the collector/impeller and all moving parts have stopped. ● Thoroughly inspect the area where the appliance is to be used and ● Disconnect the spark-plug wire, and keep the wire away from the plug remove all doormats, sleds, boards, wires, and other foreign objects.
-
Page 5: Symbols On The Product
3.4 MAINTENANCE 4. SYMBOLS ON THE PRODUCT ● Check shear bolts; engine-mounted bolt, etc., at frequent intervals for proper tightness to be sure the appliance is in safe working condition. Some of the following symbols may be used on this tool. Please study them and learn their meaning. -
Page 6: Risk Levels
6. RECYCLE Wear eye and ear protection. Separate collection. This product must not be Do not use a damaged power cord. disposed of with normal household waste. Should you find one day that your product needs replacement, or if it is no further use to you, do not dispose of it with household waste. -
Page 7: Unpack The Machine
7.1 UNPACK THE MACHINE 7.3 INSTALL THE UPPER HANDLE 1. Put the cord retainer between the upper handle (3) and middle handle WARNING (4). Make sure that you correctly assemble the machine before use. 2. Align the holes in the middle handle (4) and the upper handle (3). -
Page 8: Start The Machine
1. Fold the extension cable to form a tight loop near the retainer. 1. Connect the upper lever (15) and lower lever (16) with 1 screw supplied (17). 2. Push the loop through the bottom hole in the retainer. 2. Unscrew the nut (18) and washers (22). 3. -
Page 9: Stop The Machine
8.4 ADJUST THE DISCHARGE CHUTE WARNING Examine the work area. Remove all stones, sticks, wire, bones, and 90° 90° other debris that can ricochet because of the rotating impeller. 8.3 STOP THE MACHINE You can adjust the discharge chute 180° to change the snow direction. 1. -
Page 10: Operation Tips
9. MAINTENANCE WARNING Release the bail lever before you adjust the chute deflector. WARNING Disconnect the extension cord before maintenance. WARNING Do not push the deflector so far forward that a gap shows between the deflector and the chute. CAUTION Use only approved replacement parts. -
Page 11: Replace The Impeller
9.2 REPLACE THE SCRAPER 4. Put in the screw (21) and scraper and tighten them. WARNING Use only approved replacement scrapers. WARNING Wear heavy gloves or wind cloth around the scraper when you touch the scraper. 9.3 REPLACE THE IMPELLER 1. - Page 12 Splint 1. Remove the 10 screws and side wear pads that secure the right and 3. Unscrew the nut with flat washer and spring washer, remove the splint. left side covers. Do the same operation on the other side. belt Impeller axle Washer Bearing...
-
Page 13: Troubleshooting
5. Reinstall the new impeller, impeller axle, washer and bearing in order. 10. TROUBLESHOOTING 6. Reinstall the splint, nut with flat washer and spring washer. 7. Reinstall the washer, large pulley and washer. And screw the nut, Problem Possible cause Solution reinstall the belt. -
Page 14: Technical Data
11. TECHNICAL DATA 1. DESCRIPTION 1.1 BUT Rated Voltage / Current 120V/15A Cette machine est utilisée pour enlever et déblayer la neige des trottoirs, Working Width 20inch (500mm) jardins, allées et autres surfaces au niveau du sol. Working Depth 10inch (25mm) 1.2 APERÇU Wheel Diameter 7inch (172mm) -
Page 15: Utilisation Prévue
Conservez tous les avertissements et instructions pour référence future. 2. PRÉSENTATION Le terme « outil électrique » dans les avertissements fait référence à l'outil électrique (filaire) fonctionnant sur secteur. Votre produit a été conçu et fabriqué selon des normes élevées de fiabilité, de facilité... - Page 16 3.2 PRÉPARATION ● Lors du nettoyage, de la réparation ou de l'inspection, assurez-vous que le collecteur/l'impulseur et toutes les pièces mobiles sont arrêtés. ● Inspectez soigneusement la zone où l'appareil doit être utilisé et retirez ● Débranchez le fil de la bougie et éloignez-le de la bougie pour éviter tous les tapis, traîneaux, planches, fils et autres corps étrangers.
-
Page 17: Symboles Sur Le Produit
3.4 ENTRETIEN 4. SYMBOLES SUR LE PRODUIT ● Vérifiez les boulons de cisaillement ; boulon monté sur le moteur, etc., à intervalles fréquents pour assurer une bonne étanchéité afin de garantir Certains des symboles suivants peuvent être utilisés dans cet instrument. que l'appareil est en bon état de fonctionnement. - Page 18 6. RECYCLAGE Portez une protection pour les yeux et les oreilles. N'utilisez pas un cordon d'alimentation Tri des déchets. Ce produit ne doit pas être jeté avec les ordures ménagères normales. Si un jour endommagé. vous découvrez que votre produit doit être remplacé...
-
Page 19: Déballage De La Machine
7.1 DÉBALLAGE DE LA MACHINE 7.3 INSTALLER LA POIGNÉE SUPÉRIEURE 1. Insérez la came entre la poignée supérieure (3) et la poignée centrale AVERTISSEMENT (4). Assurez-vous d'avoir correctement assemblé la machine avant de 2. Alignez les trous de la poignée centrale (4) et de la l'utiliser. -
Page 20: Mise En Marche De La Machine
1. Connectez le levier supérieur (15) et le levier inférieur (16) avec 1 vis 1. Pliez la rallonge pour former une boucle serrée près du clip. fournie (17). 2. Poussez l'anneau à travers le trou inférieur du dispositif de retenue. 2. - Page 21 8.4 RÉGLAGE DE LA GOULOTTE D'ÉVACUATION AVERTISSEMENT Examinez la zone de travail. Retirez toutes les pierres, bâtons, fils, 90° 90° os et autres débris qui pourraient rebondir sur la turbine. 8.3 ARRÊTER LA MACHINE La goulotte d'éjection peut être ajustée à 180° pour changer la direction 1.
-
Page 22: Conseils D'utilisation
9. ENTRETIEN AVERTISSEMENT Relâchez le levier de commande avant de régler le déflecteur de goulotte. AVERTISSEMENT Avant d'effectuer l'entretien, débranchez la rallonge. AVERTISSEMENT Ne poussez pas le déflecteur jusqu'à ce qu'il y ait un espace entre ATTENTION le déflecteur et la goulotte. Utilisez uniquement des pièces de rechange approuvées. - Page 23 9.2 REMPLACER LE RACLOIR 4. Insérez la vis (21) et le racleur et serrez-les. AVERTISSEMENT Utilisez uniquement des grattoirs de rechange approuvés. AVERTISSEMENT Portez des gants épais ou un tissu coupe-vent autour du grattoir lorsque vous touchez le grattoir. 9.3 REMPLACER LA TURBINE 1.
- Page 24 Éclisse 1. Retirez les 10 vis et les patins d'usure latéraux qui fixent les capots 3. Dévissez l'écrou avec la rondelle plate et la rondelle élastique, retirez latéraux gauche et droit. l'attelle. Faites la même opération de l'autre côté. ceinture Arbre de roue Rondelle Palier...
-
Page 25: Entretien De La Machine
5. Réinstallez la nouvelle turbine, l'arbre de turbine, la rondelle et le 10. DÉPANNAGE roulement dans l'ordre. 6. Réinstallez la latte, l'écrou avec la rondelle plate et la rondelle Problème Cause possible Solution élastique. 7. Réinstallez la rondelle, la grande poulie et la rondelle. Vissez l'écrou et La poignée Les boulons ne sont Réglez la hauteur de la... -
Page 26: Données Techniques
11. DONNÉES TECHNIQUES Tension/Courant Nominal 120V/15A Return / Damage Claim Instructions Largeur de Travail 20 pouces (500 mm) DO NOT discard the box / original packaging. In case a return is required, the item must be returned in original box. Without this Profondeur de Travail 10 pouces (25 mm) your return will not be accepted.
Need help?
Do you have a question about the ET10041US-BL and is the answer not in the manual?
Questions and answers