Table of Contents
Advertisement
Available languages
Available languages
Quick Links
Advertisement
Chapters
Table of Contents

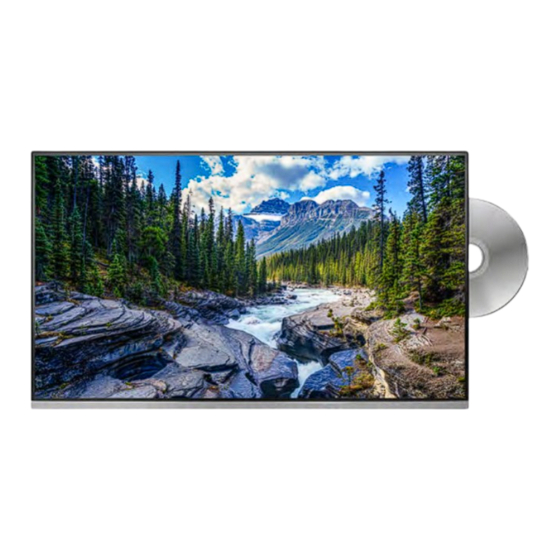
Summary of Contents for Megasat Royal Line Premium
- Page 1 Royal Line Premium (22 / 24 / 27 / 32 Zoll) Bedienungsanleitung...
-
Page 2: Table Of Contents
Inhaltsverzeichnis 1. Sicherheitshinweise ........................03 2. Lieferumfang ........................... 03 3. Standfußmontage (Optional) .................... 04 4. Bezeichnungen 4.1 Front- und Rückansicht ....................06 4.2 Anschlüsse ..........................07 4.3 Magic Fernbedienung ...................... 08 4.4 DVD-Fernbedienung ......................08 5. Erstinstallation ..........................10 6. Senderliste aktualisieren ...................... 13 7. -
Page 3: Sicherheitshinweise
1. Sicherheitshinweise Bitte lesen Sie die Bedienungsanleitung sorgfältig vor Inbetriebnahme des Gerätes. Bei falscher oder unsachgemäßer Handhabung erlischt der Gewährleistungsanspruch. Netzanschluss: Vor der Inbetriebnahme überprüfen Sie bitte die richtige Betriebs- spannung Ihres Stromanschlusses. Die Betriebsspannung des Gerätes beträgt AC 100~240 V, 50/60Hz, DC 10~30 Volt. Überlastung: Überlasten Sie nicht die Wandsteckdose, das Verlängerungskabel oder den Adapter. -
Page 4: Standfußmontage (Optional)
3. Standfußmontage (optional) So montieren Sie den Standfuß Hinweis: Bevor Sie die Standfüße montieren, überprüfen Sie bitte ob alle Teile voll- ständig und keine sichtbaren Schäden vorhanden sind. Wenn ein Teil fehlen sollte oder beschä digt ist, wenden Sie sich bitte an Ihren Fachhändler. Fernseher Standfuß... - Page 5 3. Standfußmontage (optional) 1. Legen Sie den Fernseher auf eine flache, weiche Unterlage (z. B. Decke, Schaumstoff ) um Schäden am Fernseher, bzw. Display zu vermeiden. 2. Stecken Sie den Standfuß wie abgebildet an den Fernseher. 3. Befestigen Sie den Standfuß mit den beiliegenden Schrauben. DEUTSCH...
-
Page 6: Bezeichnungen
4. Bezeichnungen 4.1 Front- und Rückansicht Frontansicht LED Leuchte Drücken Sie die Powertaste um den TV ein oder aus zu schalten. ROT = Standby / GRÜN = eingeschaltet Infrarotempfänger Empfänger für die Signale der Fernbedienung. Rückansicht Drücken Sie die Taste um die INPUT Signalquelle zu wählen (z. -
Page 7: Anschlüsse
4. Bezeichnungen 4.2 Anschlüsse Ansicht Unterseite DC IN Netzanschluss für 12/230 Volt Netzteil oder 12/24 Volt Bordspannung. RJ45 LAN-Anschluss für eine Internetverbindung USB 1 und 2 USB 2.0 Anschluss zur Medienwiedergabe oder zur Aufnahme, bzw. Timeshift-Funktion HDMI 1, 2 und 3 HDMI Eingang für externe Wiedergabegeräte OPTICAL Optischer Audio-Ausgang... -
Page 8: Magic Fernbedienung
4. Bezeichnungen 4.3 Magic Fernbedienung POWER Fernseher ein-/ausschalten (Standby) Externes Wiedergabegerät ein-/ausschalten ZIFFERNTASTEN Zur Eingabe von z. B. Programmnummern LIST Öffnet die Programmliste Taste „0“ Kurz drücken: Zahlentaste 0 Lang drücken: Schnellzugriff Kurz drücken: Bildschirmfernbedienung Lang drücken: Audiobeschreibung ein- / ausschalten VOL +/- Lautstärke erhöhen / verringern MUTE... -
Page 9: Dvd-Fernbedienung
4. Bezeichnungen 4.4 DVD Fernbedienung POWER (rot) DVD Modus ein-/ausschalten EJECT (grün) Wirft die DVD aus SETUP Einstellungen des DVD-Modus MENU Öffnet das Hauptmenü GOTO Funktionstaste ZIFFERNTASTEN Zur Eingabe von z. B. Programmnummern Start / Pause Stopp t t / uu Vorwärts spulen / Rückwärts spulen t t / uu Vorheriges Kapitel / Nächstes Kapitel... -
Page 10: Erstinstallation
5. Erstinstallation Verbinden Sie den Fernseher mit der Stromversorgung. Anschließend schaltet sich das Gerät automatisch ein und die Erstinstallation erscheint auf dem Bildschirm. Schritt 1 - Fernbedienung anlernen Richten Sie die Magic Fernbedienung auf den Fernseher und bestätigen Sie mit der OK-Taste. Schritt 2 - Installations-Methode Wählen Sie die Installations-Methode „TV“... - Page 11 5. Erstinstallation Schritt 5 - Allgemeine Geschäftsbedingungen Nach erfolgreicher Internetverbindung müssen die „Allgemeinen Geschäftsbedingungen“ be- stätigt werden. Klicken Sie hierzu auf „Weiter“. Wählen Sie aus der Liste die Punkte aus, die Sie bestätigen möchten. Alternativ klicken Sie am unteren Bildschirmrand auf „Alle auswählen“, anschließend auf „Mehr“...
- Page 12 5. Erstinstallation Schritt 9 - Sendereinstellung Wählen Sie die Übertragung des TV-Signals aus. Über DVB-T-Antenne, Kabel oder Satellit. Folgende Vorgehensweise beschreibt die Einstellung via Satellit. Diese ist ähnlich zum Antennen- oder Kabelempfang. Wählen Sie „Astra“, um nach deutschsprachigen Programmen via Satellit zu suchen. Alternativ wählen Sie „Sky-D“, um auch Programme des Anbieters Sky zu empfangen (Abo erforderlich).
-
Page 13: Senderliste Aktualisieren
(Weitere Infos, finden Sie in der Hilfe Funktion des Gerätes) Senderliste von USB zum TV übertragen: Auf unserer Homepage www.megasat.tv stellen wir Ihnen eine benutzerfreundli- che Senderliste zur Verfügung. Diese können Sie bequem downloaden und auf einen geeigneten USB-Stick kopieren. -
Page 14: Grundfunktionen Im Hauptmenü
7. Grundfunktionen im Hauptmenü 7.1 Smart-TV Startseite Drücken Sie auf der Fernbedienung die „Home-Taste“ , um in das Smart-Menü zu gelangen. Auf dieser Seite stehen Ihnen verschiede- ne Optionen bzw. Apps zur Verfügung. Startseite bearbeiten In diesem Menü können Sie die Apps auf der Startseite der Smart-TV-Oberfläche ganz Ihren Bedürfnissen anpassen und sortieren. -
Page 15: Einstellungen
7. Grundfunktionen im Hauptmenü 7.2 Einstellungen Drücken Sie auf der Fernbedienung die „Einstellungen-Taste“ , um in das Ein- stellungen-Menü zu gelangen. In diesem Menü können Sie die Grund- einstellungen des Fernsehers vornehmen. Bildmodus Passen Sie das Bild an und wählen Sie eine beliebige Bilddarstellung (Standard: Basic). Klangmodus Passen Sie den Ton an und wählen Sie eine beliebige Tonoption (z. -
Page 16: Dvd-Betrieb
7. Grundfunktionen im Hauptmenü 7.3 DVD-Betrieb Hinweis: Der DVD-Betrieb ist nur möglich, wenn eine geeignete Disc eingelegt wurde. Über die Powertaste der DVD FB können Sie zudem in den DVD-Modus wechseln. Das DVD-Laufwerk hat einen automatischen Einzug. Stecken Sie die DVD mit wenig kraft-aufwand in die Öffnung des Laufwerks. -
Page 17: Fehlerbehebung
8. Fehlerbehebung Lesen Sie bitte die folgenden Informationen, um die mögliche Ursache zu einem Prob- lem herauszufinden, bevor Sie sich an den Kundendienst wenden. TV lässt sich nicht einschalten • Überprüfen Sie, ob das Stromkabel korrekt an der Steckdose und dem Stromadapter angeschlossen ist. •... -
Page 18: Technische Daten
9. Technische Daten RL 22Premium RL 24Premium Display LED-Display (Pixelklasse 1) Bildschirmgröße 21,5 Zoll (54,6 cm) 23,8 Zoll (60,5 cm) Auflösung 1920 x 1080 Kontrastverhältnis 3000 : 1 Helligkeitswert 250 cd/m² Betrachtungswinkel 178° H / 178° V Tuner DVB-S / -S2 / -C / -T / -T2 DVB-T2-Standard H.265 / HEVC CI+-Schacht... - Page 19 9. Technische Daten RL 27Premium RL 32Premium Display LED-Display (Pixelklasse 1) Bildschirmgröße 27 Zoll (69,5 cm) 32 Zoll (81 cm) Auflösung 1920 x 1080 Kontrastverhältnis 4000 : 1 3000 : 1 Helligkeitswert 250 cd/m² Betrachtungswinkel 178° H / 178° V Tuner DVB-S / -S2 / -C / -T / -T2 DVB-T2-Standard...
- Page 20 Konformitätsinformation Hiermit erklärt die Firma Megasat Werke GmbH, dass sich folgendes Gerät in Übereinstimmung mit den grundlegenden Anforderungen und den übrigen einschlägigen Bestimmungen der Richtlinie 2014/30/EU und 2014/35/EU sowie der Funkgeräterichtlinie 2014/53/EU befindet: Megasat Royal Line 22Premium (Art.-Nr. 240133) Megasat Royal Line 24Premium (Art.-Nr. 240134) Megasat Royal Line 27Premium (Art.-Nr.
- Page 21 Notizen DEUTSCH...
- Page 22 Für die Registrierung besuchen Sie bitte unsere Homepage www.megasat.tv Das Formular finden Sie unter Support a Produktregistrierung Version 1.0 (September 2023) // Technische Änderungen, Druckfehler und Irrtümer vorbehalten. Megasat Werke GmbH | Brückenstraße 2a | D-97618 Niederlauer | www.megasat.tv | info@megasat.tv...
- Page 23 Royal Line Premium (22 / 24 / 27 / 32 inch) User manual...
- Page 24 Content 1. Safety instructions ........................03 2. Delivery ..............................03 3. Stand mounting (optional) ....................04 4. Designations 4.1 Front and rear view ......................06 4.2 Connections ..........................07 4.3 Magic remote control ....................... 08 4.4 DVD remote control ......................08 5.
-
Page 25: Safety Instructions
1. Safety instructions Please read the operating instructions carefully before commissioning the device. Incorrect or improper handling will void the warranty. Power supply: Before start please check the correct operation voltage of the power point. The operating voltage of this device is AC 100~240 V, 50/60Hz, DC 10~30 V. -
Page 26: Stand Mounting (Optional)
3. Stand mounting (optional) To mount the stand Note: Before assembling the feet, please check that all parts are complete and that there is no visible damage. If any part is missing or damaged, please contact your dealer. Television Stand Screws ENGLISH... - Page 27 3. Stand mounting (optional) 1. Place the TV on a flat, soft surface (e.g. blanket, foam) to prevent damage to the TV or display. 2. Attach the stand to the TV as shown. 3. Fasten the stand with the enclosed screws. ENGLISH...
-
Page 28: Designations
4. Designations 4.1 Front and rear view Front view LED light Press the power button to turn the TV on or off. RED = Standby / GREEN = eingeschaltet Infrared receiver Receiver for the signals of the remote control. Rear view Press the button to select the signal INPUT source (e.g. -
Page 29: Connections
4. Designations 4.2 Connections Bottom view DC IN Mains connection for 12/230 volt power supply or 12/24 volt on-board voltage. RJ45 LAN connection for an Internet connection USB 1 und 2 USB 2.0 connection for media playback or recording and timeshift function HDMI 1, 2 und 3 HDMI input for external playback devices OPTICAL... -
Page 30: Magic Remote Control
4. Designations 4.3 Magic remote control POWER Switch TV on/off (Standby) Switch external playback device on/off NUMBER KEYS For entering e.g. program numbers LIST Opens the program list KEY „0“ Press briefly: Number key 0 Long press: Quick access Press briefly: On-screen remote control Long press: Switch audio description on / off VOL +/- Increase / decrease volume... -
Page 31: Dvd Remote Control
4. Designations 4.4 DVD remote control POWER (red) Switch DVD mode on/off EJECT (green) Ejects the DVD SETUP DVD mode settings MENU Opens the main menu GOTO Function key NUMBER KEYS For entering e.g. program numbers Start / Pause Stopp t t / uu Wind forward / Wind backward t t / uu... -
Page 32: Initial Installation
5. Initial installation Connect the TV to the power supply. Then it will turn on automatically and the initial installation will appear on the screen. Step 1 - Teach remote control Point the Magic Remote at the TV and confirm with the OK button. - Page 33 5. Initial installation Step 5 - General terms and conditions After a successful Internet connection, the „General Terms and Conditions“ must be confir- med. To do this, click on „Next“. Select the items you want to confirm from the list. Alternatively, click „Select all“ at the bottom of the screen, then click „More“...
- Page 34 5. Initial installation Step 9 - Channel Setting Select the transmission of the TV signal. Via DVB-T antenna, cable or satellite. The following procedure describes the setting via satellite. This is similar to antenna or cable reception. Select „Astra“ to search for German-language programs via satellite.
-
Page 35: Update Channel List
Transfer channel list from USB to TV On our homepage www.megasat.tv we provide you with a user-friendly channel list. You can conveniently download this and copy it to a suitable USB stick. -
Page 36: Basic Functions In The Main Menu
7. Basic functions in the main menu 7.1 Smart-TV main menu Press the „Home button“ on the remo- te control, to enter the Smart menu. There are several options or apps availab- le on this page. Edit Home Page In this menu, you can customize and sort the apps on the Home screen of the Smart TV interface to suit your needs. -
Page 37: Settings
7. Basic functions in the main menu 7.2 Settings Press the „Settings button“ on the re- mote control, to enter the settings menu. In this menu you can make the basic settings of the TV. Image mode Adjust the picture and select any picture mode (default: Basic). Sound mode Adjust the sound and select any sound option (for example, Clear Voice). -
Page 38: Dvd Operation
7. Basic functions in the main menu 7.3 DVD operation Note: DVD mode is only possible if a suitable disc has been inserted. You can also switch to DVD mode via the power key of the DVD remote control. The DVD drive has an automatic feed. Insert the DVD into the opening of the drive with little effort. -
Page 39: Troubleshooting
8. Troubleshooting Please read the following information to find out the possible cause to a problem before contacting customer service. No power • Check if the power cord is fully plugged into the electrical outlet and the power adapter. • Check if the cable of the power adapter is properly connected to the TV unit. -
Page 40: Specifications
9. Specifications RL 22 Premium RL 24 Premium Display LED-Display (Pixel class 1) Screen size 21,5 Zoll (54,6 cm) 23,8 Zoll (60,5 cm) Resolution 1920 x 1080 Contrast ratio 3000 : 1 Brightness value 250 cd/m² Viewing angle 178° H / 178° V Tuner DVB-S / -S2 / -C / -T / -T2 DVB-T2 standard... - Page 41 9. Specifications RL 27 Premium RL 32 Premium Display LED-Display (Pixel class 1) Screen size 27 Zoll (69,5 cm) 32 Zoll (81 cm) Resolution 1920 x 1080 Contrast ratio 4000 : 1 3000 : 1 Brightness value 250 cd/m² Viewing angle 178°...
- Page 42 Conformity informations Hereby declare the company Megasat Werke GmbH that the following devices is in complian- ce with the essential requirements and other relevant provisions of Directive 2014/30/EU and 2014/35/EU and Radio Equipment Directive 2014/53/EU:: Megasat Royal Line 22Premium (Art.-No. 240133) Megasat Royal Line 24Premium (Art.-No.
- Page 43 Notes ENGLISH...
- Page 44 For registration please visit our homepage www.megasat.tv You can find the form in Support a Product registration Version 1.0 (September 2023) // Technical changes, misprints and errors reserved. Megasat Werke GmbH | Brückenstraße 2a | D-97618 Niederlauer | www.megasat.tv | info@megasat.tv...
- Page 45 Royal Line Premium (22 / 24 / 27 / 32 Zoll) Mode d‘emploi...
- Page 46 Table des matières 1. Consignes de sécurité ......................03 2. Contenu de la livraison ......................03 3. Montage sur pied (en option) ................... 04 4. Désignations 4.1 Vue avant et arrière ......................06 4.2 Connexions ..........................07 4.3 Magic Télécommande ...................... 08 4.4 DVD-Télécommande ......................
-
Page 47: Consignes De Sécurité
1. Consignes de sécurité Lisez attentivement les consignes de sécurité avant de mettre l’appareil en service. Veuil- lez noter qu’en cas d’utilisation non conforme, la garantie est annulée. Branchement sur le réseau électrique: Avant de mettre l’appareil en service, cont- rôlez la tension d’alimentation de votre branchement électronique. -
Page 48: Montage Sur Pied (En Option)
3. Montage sur pied (en option) Pour monter le pied Remarque: Avant de monter les pieds, vérifiez que toutes les pièces sont complè- tes et qu‘il n‘y a pas de dommages visibles. Si une pièce manque ou est endom- magée, veuillez contacter votre revendeur. Téléviseur Pied de support FRANÇAIS... - Page 49 3. Montage sur pied (en option) 1. Placez le téléviseur sur une surface plane et souple (par exemple une couverture, de la mousse) pour éviter d‘endommager le téléviseur ou l‘écran. 2. Fixez le socle au téléviseur comme illustré. 3. Fixez le pied à l‘aide des vis fournies. FRANÇAIS...
-
Page 50: Désignations
4. Désignations 4.1 Vue avant et arrière Vue de face Luminaire à LED Appuyez sur le bouton d‘alimentation pour allumer ou éteindre le téléviseur. ROUGE = en veille / VERT = allumé Récepteur infrarouge Récepteur pour les signaux de la télécommande. Vue arrière Appuyez sur le bouton pour INPUT... -
Page 51: Connexions
4. Désignations 4.2 Connexions Vue de la face inférieure DC IN Prise d‘alimentation pour bloc d‘alimentation 12/230 volts ou tension de bord de 12/24 volts. RJ45 Connexion LAN pour une connexion Internet USB 1 und 2 Connexion USB 2.0 pour la lecture de médias ou la fonction de enregistrement, ou fonction timeshift HDMI 1, 2 und 3 Entrée HDMI pour les appareils de lecture externes... - Page 52 4. Désignations 4.3 Télécommande Magic POWER Allumer/éteindre le téléviseur (veille) Activer/désactiver le lecteur externe CLAVIER CLAVIER Pour saisir des numéros de programme par exemple LIST Öffnet die Programmliste Bouton „0“ Appuyer brièvement sur la touche : Touche numérique 0 Appui long : accès rapide Appuyer brièvement sur la touche : Télécommande à...
- Page 53 4. Désignations 4.4 Télécommande DVD POWER (rouge) Activer/désactiver le mode DVD EJECT (vert) Éjecte le DVD SETUP Réglages du mode DVD MENU Ouvre le menu principal GOTO Touche de fonction TOUCHES CLAVIER Pour saisir des numéros de programme, par exemple Démarrage / Pause Arrêt t t / uu...
-
Page 54: Première Installation
5. Première installation Branchez le téléviseur sur le secteur. Ensuite, il se met automatiquement en marche et la première installation s‘affiche à l‘écran. Étape 1 - Apprentissage de la télécommande Dirigez la télécommande Magic vers le télévi- seur et confirmez en appuyant sur la touche OK. Étape 2 - Méthode d‘installation Sélectionnez la méthode d‘installation „TV“... - Page 55 5. Première installation Étape 5 - Conditions générales de vente Une fois la connexion Internet établie, les „Con- ditions générales“ doivent être confirmées. Pour ce faire, cliquez sur „Suivant“. Sélectionnez dans la liste les points que vous souhaitez confirmer. Vous pouvez également cliquer sur „Tout sélectionner“...
- Page 56 5. Première installation Étape 9 - Réglage de l‘émetteur Choisir la transmission du signal TV. Par antenne TNT, par câble ou par satellite. La procédure suivante décrit le réglage par satellite. Elle est similaire à la réception par antenne ou par câble. Sélectionnez „Astra“...
-
Page 57: Mettre À Jour La Liste Des Chaînes
Transférer la liste des chaînes de l‘USB au téléviseur Sur notre site www.megasat.tv, nous mettons à votre disposition une liste de chaînes facile à utiliser. Vous pouvez la télécharger facilement et la copier sur une clé USB appropriée. -
Page 58: Fonctions De Base Du Menu Principal
7. fonctions de base dans le menu principal 7.1 Smart-TV page d‘accueil Appuyez sur la touche „Home“ de la télécommande pour accéder au menu Smart. Sur cette page, vous avez accès à dif- férentes options ou apps. Modifier la page d‘accueil Dans ce menu, vous pouvez adapter et trier les applications de la page d‘accueil de l‘interface Smart TV en fonction de vos besoins. -
Page 59: Réglages
7. fonctions de base dans le menu principal 7.2 Réglages Appuyez sur la touche „Réglages“ la télécommande pour accéder au menu Réglages. Dans ce menu, vous pouvez effectuer les réglages de base du téléviseur. Mode d‘image Ajustez l‘image et choisissez n‘importe quel affichage d‘image (par défaut : Basic). Mode sonore Ajustez le son et sélectionnez n‘importe quelle option sonore (par exemple, Voix claire). -
Page 60: Fonctionnement Du Dvd
7. fonctions de base dans le menu principal 7.3 Fonctionnement du DVD Remarque: Le mode DVD n‘est possible que si un disque approprié a été inséré. La touche d‘alimentation du DVD FB permet en outre de passer en mode DVD. Le lecteur de DVD est équipé... -
Page 61: Dépannage
8. Dépannage Veuillez lire les informations suivantes pour trouver l’origine d’un problème avant de contacter le service après-vente. Vous ne pouvez pas allumer • Vérifiez si le cordon d’alimentation est correctement le téléviseur. relié à la prise de courant et à l’adaptateur. •... -
Page 62: Données Techniques
9. Données techniques RL 22 Premium RL 24 Premium Écran Écran LED (classe de pixels 1) Taille de l'écran 21,5 pouces (54,6 cm) 23,8 pouces (60,5 cm) Résolution 1920 x 1080 Rapport de contraste 3000 : 1 Valeur de la luminosité 250 cd/m²... - Page 63 9. Données techniques RL 27 Premium RL 32 Premium Écran Écran LED (classe de pixels 1) Taille de l'écran 27 pouces (69,5 cm) 32 pouces (81 cm) Résolution 1920 x 1080 Rapport de contraste 4000 : 1 3000 : 1 Valeur de la luminosité...
- Page 64 Information sur la conformité Par la présente, Megasat Werke GmbH déclare que les appareils suivants sont conformes aux exigences essentielles et aux autres dispositions pertinentes des Directives 2014/30/EU et 2014/35/EU et de la Directive sur les Equipements Radio 2014/53/EU: Megasat Royal Line 22Premium (N° d‘art. 240133) Megasat Royal Line 24Premium (N°...
- Page 65 FRANÇAIS...
- Page 68 ENREGISTREMENT DES PRODUITS L‘ e nregistrement de votre produit Megasat vous donne accès à nos notifications automatiques par e-mail. Si votre produit nécessite un nouveau firmware, vous en serez informé par e-mail. Pour l‘inscription, veuillez visiter notre page d‘accueil www.megasat.tv Vous trouverez le formulaire sous Support a enregistrement du produit Version 1.0 (Septembre 2023) // Technique des changements, erreurs d‘impression et d‘erreurs.
Need help?
Do you have a question about the Royal Line Premium and is the answer not in the manual?
Questions and answers