Table of Contents
Advertisement
Available languages
Available languages
Quick Links
Advertisement
Table of Contents

Related Manuals for Ghost QUICKCOLOR


Summary of Contents for Ghost QUICKCOLOR
- Page 1 QUICKCOLOR Projecteur sur batterie à LED 4 x 4W LED battery light 4 x 4W...
-
Page 2: Instructions De Sécurité
MODE D’EMPLOI – USER MANUAL Français 1- Instructions de sécurité Avant d’utiliser votre matériel, nous vous recommandons de lire WARNING l’ensemble des instructions de ce manuel. Conservez ce manuel pour une future consultation. Si vous revendez cet appareil, veillez à transmettre également ce manuel d’utilisation au nouvel acquéreur. ... -
Page 3: Présentation Du Produit
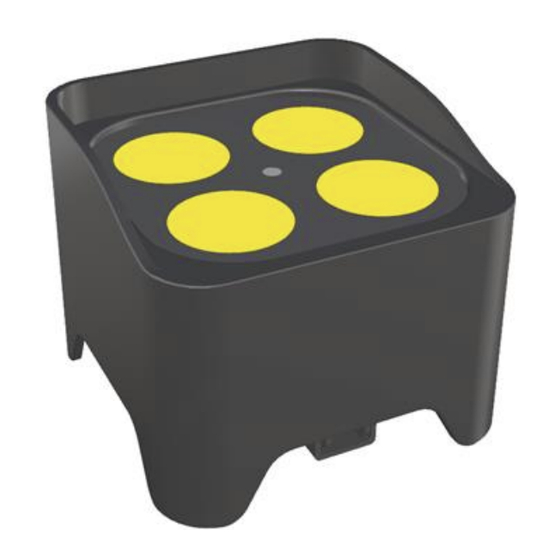
2- Présentation du produit 1. Ecran avec 4 boutons, voir ci-dessous 2. Bouton ON / OFF 3. Entrée alimentation via chargeur fournit 12.6V – 1.5A 4. Entrée / sortie DMX via adaptateur RJ45 – XLR 5. Support pour orienter le projecteur ... -
Page 4: Caractéristiques Techniques
3- Caractéristiques techniques 4 LED 4W 4-en-1 RGBW Modes de fonctionnement : Auto, Sound, DMX, télécommande Contrôlable en DMX 7 canaux Dimmer 0~100% très linéaire + effet stroboscope à vitesse variable. Tension d’alimentation : AC100-240V 50/60Hz (12.6V-1.5A AC/DC adapter) ... - Page 5 4. L'appareil chauffera pendant le chargement ; c'est normal. 5. Pour éviter d'endommager la batterie par une décharge profonde, rechargez une batterie complètement déchargée dès que possible. Ne stockez pas l'appareil avec la batterie complètement déchargée et rechargez régulièrement la batterie en cas de stockage prolongé.
- Page 6 Mode BLACK OUT C'est un interrupteur à distance, appuyez une fois sur <BLACK OUT>, cela ouvrira le modèle de télécommande IR, Mode automatique 1.Appuyez sur <AUTO> sur la télécommande, l'écran affiche "CP99", 2.Appuyez à nouveau sur <AUTO> pour basculer entre les programmes automatiques "CC99"...
- Page 7 Mode % Pas de fonction Mode manuel 1. Appuyez sur <MANUAL> sur la télécommande. 2. Appuyez sur <R>, <G>, <B>, <W>,<A> ou <UV> (rouge, vert, bleu, blanc, ambre, UV) pour choisir votre couleur. Appuyez 1 fois pour 20 % de luminosité ; Appuyez 2 fois pour une luminosité...
- Page 8 0255 000-255 Master dimmer, 0-100% r255 000 - 255 Dimmer rouge, de 0 à 100% G255 000 - 255 Dimmer vert, de 0 à 100% b255 000 - 255 Dimmer bleu, de 0 à 100% u255 000 - 255 Dimmer blanc, de 0 à 100% F255 010-255 Strobe , vitesse, de lent à...
- Page 9 7 - Modes de fonctionnement 4 modes de fonctionnement disponibles : 1. Mode automatique avec fonction Maître/esclave, effets préprogrammés 2. Mode DMX – Contrôlé par un contrôleur DMX 3. Mode Sound : détection de la musique 4. Télécommande (voir plus haut) 8 - Mode DMX Appuyez sur la touche «...
-
Page 10: Dépannage
Si vous utilisez un contrôleur équipé d’une sortie DMX en XLR 5 points, vous devez vous procurer un adaptateur XLR 5 points/3 points. Sur le dernier appareil de la chaine DMX, il est conseillé d’utiliser un « bouchon DMX ». -
Page 11: Entretien
Entretien Un nettoyage extérieur de l’appareil doit être fait régulièrement. Les lentilles doivent être nettoyées pour une luminosité optimum. Si l’appareil est installé dans un environnement poussiéreux ou avec de la fumée cet entretien régulier est très important. Il est possible qu’un nettoyage des optiques par l’intérieur soit également nécessaire. -
Page 12: Product Presentation
carried. The appliance must be screwed to the hook and tightened properly to prevent it from falling due to vibrations produced by the machine during operation. The hook must be secured with a safety sling. Make sure that the structure (or attachment point) can support at least 10X the weight of the equipment being attached. -
Page 13: Technical Specifications
3 - Technical specifications 4 LED 4W 4-in-1 RGBW Operating modes : Auto, Sound, DMX, remote control 7-channel DMX control Highly linear 0~100% dimmer + variable-speed strobe effect. Supply voltage: AC100-240V 50/60Hz (12.6V-1.5A AC/DC adapter) ... - Page 14 5. To avoid damaging the battery through deep discharge, recharge a fully discharged battery as soon as possible. Do not store the device with a completely discharged battery and recharge the battery regularly if it is going to be stored for a long time. Load safety instructions:...
- Page 15 BLACK OUT mode This is a remote switch, press <BLACK OUT> once, this will open the IR remote control model, Automatic mode 1 Press <AUTO> on the remote control, the screen will display "CP99", 2 Press <AUTO> again to switch between the "CC99" automatic programmes. Press <+>...
- Page 16 Manual mode 1. Press <MANUAL> on the remote control. 2. Press <R>, <G>, <B>, <W>,<A> or <UV> (red, green, blue, white, amber, UV) to choose your colour. Press 1 time for 20% brightness; Press 2 times for 40% brightness; Press 3 times for 60% brightness;...
- Page 17 0255 000-255 Master dimmer, 0-100 r255 000 - 255 Red dimmer, from 0 to 100%. G255 000 - 255 Green dimmer, from 0 to 100%. b255 000 - 255 Blue dimmer, from 0 to 100%. u255 000 - 255 White dimmer, from 0 to 100%. F255 010-255 Strobe , speed, from slow to fast...
- Page 18 7 - Operating modes 4 operating modes available: 1. Automatic mode with master/slave function, pre-programmed effects 2. DMX mode - Controlled by a DMX controller 3. Sound mode: music detection 4. Remote control (see above) 8 - DMX mode Press the "MENU" button, then select function "A001". Use the "UP"...
-
Page 19: Troubleshooting
purchase an XLR 5-pin/3-pin adaptor. On the last device in the DMX chain, it is advisable to use a "DMX plug". (a 120 Ohm 1/4W resistor between pin 2 (DMX-) and pin 3 (DMX+) placed in a male DMX connector). - Page 20 Unplug the luminaire before carrying out any work! Use a clean cloth with very little glass cleaner. Always dry the cleaned parts thoroughly. Importé par / Imported by Ghost – MSC 9, Rue C. Flammarion 91630 Avrainville / FRANCE infos@msc-distribution.com...
Need help?
Do you have a question about the QUICKCOLOR and is the answer not in the manual?
Questions and answers