Table of Contents
Advertisement
Quick Links
Advertisement
Table of Contents

Related Manuals for NZXT CANVAS 27F 165


Summary of Contents for NZXT CANVAS 27F 165
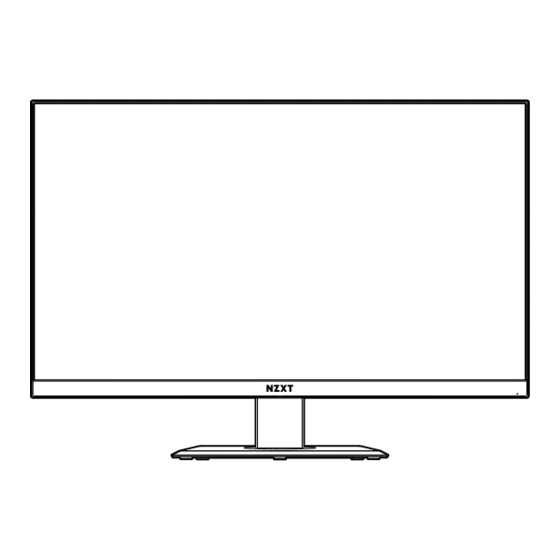
- Page 1 CANVAS 27F 165 2 7" F H D 1 6 5 H Z G A M I N G M ON ITOR...
-
Page 2: Table Of Contents
TA BL E OF CO NT E NTS V E R S I O N 2 , 2 0 2 3 / 0 8 / 0 8 PR EF AC E ..............SAFE T Y I NSTR U C T I ON S . - Page 3 MON IT OR S T A ND I N S T A L L AT I O N ....... . AD JUS T ING TH E M O N I T O R O R I E NT AT I ON .
- Page 4 ......... . NZXT GLO BA L WA RRA N T Y P OL I CY .
-
Page 5: Pr Ef Ac E
PRÉFACE VORWORT A. Copyright NZXT, Inc. All Rights Reserved. © This manual including all illustrations and screen captures, is protected under international copyright laws, with all rights reserved. Neither this manual, nor any of the material contained herein, may be reproduced without written consent of the author. - Page 6 PRÉFACE VORWORT A. Copyright NZXT, Inc. Todos los derechos reservados © Este manual, incluidas todas las ilustraciones y capturas de pantalla, está protegido por las leyes de derechos de autor internacionales y tiene todos los derechos reservados. No está permitido reproducir este manual ni el material que contiene sin el consentimiento previo por escrito del autor.
- Page 7 PRÉFACE VORWORT A. Copyright NZXT, Inc. Tous droits réservés. © Ce manuel, ainsi que toutes les illustrations et les captures d'écran qu’il contient, sont protégés par les législations internationales régissant les droits d'auteur, avec tous droits réservés. Ni ce manuel, ni aucun des éléments qu'il contient, ne peuvent être reproduits sans le consentement écrit de l'auteur.
- Page 8 PRÉFACE VORWORT A. Copyright NZXT, Inc. Alle Rechte vorbehalten. © Dieses Handbuch, einschließlich aller Abbildungen und Screenshots, ist durch internationale Urheberrechtsgesetze geschützt und alle Rechte sind vorbehalten. Weder dieses Handbuch noch das darin enthaltene Material darf ohne schriftliche Genehmigung des Autors vervielfältigt werden.
-
Page 9: Saf E Ty Inst R Ucti O N S
SAF E TY INST R UCTI O N S INSTRUCCIONES DE SEGURIDAD CONSIGNES DE SÉCURITÉ SICHERHEITSHINWEISE Read through the following Safety Precautions before using the monitor • Make sure that the power voltage is within its safety range and has been adjusted properly to the value of 100~240V before connecting the de- vice to the power outlet. - Page 10 SAF E TY INST R UCTI O N S INSTRUCCIONES DE SEGURIDAD CONSIGNES DE SÉCURITÉ SICHERHEITSHINWEISE Veuillez lire les consignes de sécurité suivantes avant d'utiliser le moniteur : • Assurez-vous que la tension d’alimentation est comprise dans la plage de sécurité et a été correctement ajustée sur la valeur de 100~240 V avant de brancher l’appareil à...
-
Page 11: Stabi Li Ty H Aza Rd I N St R Uct I O N S
STABI LI TY H AZA RD I N ST R UCT I O N S INSTRUCCIONES SOBRE PELIGROS DE ESTABILIDAD INSTRUCTIONS RELATIVES AU RISQUE DE STABILITÉ HINWEISE ZUR STABILITÄTSGEFAHR The product may fall, causing serious personal injury or death. To prevent injury, this product must be securely attached to the floor/ wall in accordance with the installation instructions. -
Page 12: G Et T Ing St Ar Te D
G ET T I NG START E D PRIMEROS PASOS DÉMARRAGE ERSTE SCHRITTE CAUTION It is recommended to wear a grounding strap attached to a grounded device to avoid damage from static electricity. PRECAUCIÓN Es recomendable llevar una pulsera antiestática conectada a un dispositivo puesto a tierra para evitar daños provocados por la electricidad estática. -
Page 13: Pack Ag E Con Te N T S
PAC K AG E C O NTE NTS CONTENIDO DEL PAQUETE CONTENU DE L’EMBALLAGE PACKUNGSINHALT Power Cable Monitor Panel Monitor Stand Power Adapter Stand Base DisplayPort Cable Screws M4L5 A . Panel del monitor A . Dalle du moniteur A . Monitor B . -
Page 14: Mon It Or O Ve R Vi Ew
M O N I TO R OVE RV I EW COMPONENTES DEL MONITOR VUE D’ENSEMBLE DU MONITEUR MONITOR – ÜBERSICHT 100x100 VESA Slot Ranura para VESA 100x100 Connecteur 100x100 VESA 100x100 VESA Aufnahme Rear I/O E/S traseras Bouton E/S arrière I/O Anschlüsse auf der Rückseite 5-WAY Joystick / Power Joystick de 5 vías / encendido... -
Page 15: Mon It Or R Ea R I O P O Rt S
M O N I TO R R E AR IO PO RTS PUERTOS E/S TRASEROS DEL MONITOR PORTS E/S ARRIÈRE DU MONITEUR I/O-PORTS AN DER RÜCKSEITE DES MONITORS DisplayPort HDMI Headphone Jack Power Jack 1 . DisplayPort 1 . DisplayPort 1 . -
Page 16: M O N I To R Stan D In Sta Ll Ati O N
M O N I TO R STAN D IN STA LL ATI O N INSTALACIÓN DEL SOPORTE DEL MONITOR INSTALLATION DU SUPPORT DU MONITEUR INSTALLATION DES MONITORSTANDFUßES IMPORTANT Place the monitor on a soft, protected surface to avoid scratching the display panel. II. - Page 17 STE P 3 Align and fit the top of the stand to the slot in the rear of the monitor panel (A) Alinea y ajusta la parte superior del soporte en la ranura de la parte trasera del monitor (A) Alignez et ajustez la partie supérieure du support avec l’encoche à...
- Page 18 STE P 4 Push down to latch the quick-release mount and lock stand into place. You should hear a clicking sound once it is locked in place. Presiona hacia abajo para enganchar el soporte de desenganche rápido y afianzar el soporte en su sitio. Cuando encaje, oirás un clic. Appuyez vers le bas pour enclencher le support à...
- Page 19 STE P 5 Carefully lift up the monitor with two hands. Do not use one hand to hold the unit. Con cuidado, levanta el monitor con las dos manos. No sujetes la unidad con una sola mano. Soulevez délicatement le moniteur à deux mains. Ne tenez pas l’unité à une seule main. Heben Sie den Monitor vorsichtig mit beiden Händen an.
-
Page 20: Ad Jus T Ing Th E M O N I T O R O R I E Nt At I On
A D J U STI NG T HE MO N I TO R O R I EN TAT I O N CÓMO AJUSTAR LA ORIENTACIÓN DEL MONITOR AJUSTEMENT DE L’ORIENTATION DU MONITEUR EINSTELLEN DER MONITORAUSRICHTUNG To maximize viewing comfort, this monitor includes tilt and swivel adjustments. Para maximizar el confort de visualización, este monitor incluye ajustes de inclinación y giro. -
Page 21: Vesa M Ou Nt I N S T A L L At I O N
V ESA MOU NT INSTA LL ATIO N INSTALACIÓN EN SOPORTE VESA INSTALLATION DU SUPPORT VESA INSTALLIEREN DER VESA-HALTERUNG Use the M4L16 screws to mount the monitor panel to the VESA mount. Utilice los tornillos M4L16 para montar el panel del monitor en el soporte VESA. Utilisez les vis M4L16 pour fixer le panneau du moniteur sur le support VESA. -
Page 22: 5- W A Y Jo Yst I C K Co N T R Ol I N St R Uct I On S
5 - WAY JOYSTI C K C O N TR O L I N ST R U CT I ON S INSTRUCCIONES PARA EL CONTROL DEL JOYSTICK DE 5 VÍAS INSTRUCTIONS DE CONTRÔLE DU JOYSTICK 5 DIRECTIONS STEUERANWEISUNGEN 5-WEGE-JOYSTICK The monitor comes with a 5-way joystick for power and multi-directional control that navigates the monitor OSD (On-Screen Display) Menu. El monitor viene con un joystick de 5 vías para el control del encendido/apagado y multidireccional que navega por el menú... -
Page 23: Os D Me Nu Intr O Du Ct I O N
OS D ME NU INTR O DU CT I O N INTRODUCCIÓN AL MENÚ EN PANTALLA PRÉSENTATION DU MENU OSD EINLEITUNG OSD-MENÜ Picture 1st Level Menu 2nd Level Menu 3rd Level Menu Description Standard Racing Picture Mode Cinema Professional Night Input HDR Source Brightness 0-100%... - Page 24 OS D ME NU INTR O DU CT I O N INTRODUCCIÓN AL MENÚ EN PANTALLA PRÉSENTATION DU MENU OSD EINLEITUNG OSD-MENÜ OSD Settings 1st Level Menu 2nd Level Menu 3rd Level Menu Description • Default Language is English. Chinese (Traditional) / English / •...
- Page 25 OS D ME NU INTR O DU CT I O N INTRODUCCIÓN AL MENÚ EN PANTALLA PRÉSENTATION DU MENU OSD EINLEITUNG OSD-MENÜ Imagen Menú de 1. nivel Menú de 2. nivel Menú de 3. nivel Descripción Estándar Carreras Modo de imagen Cine Profesional Nocturno...
- Page 26 OS D ME NU INTR O DU CT I O N INTRODUCCIÓN AL MENÚ EN PANTALLA PRÉSENTATION DU MENU OSD EINLEITUNG OSD-MENÜ Ajustes del menú en pantalla Menú de 1. nivel Menú de 2. nivel Menú de 3. nivel Descripción •...
- Page 27 OS D ME NU INTR O DU CT I O N INTRODUCCIÓN AL MENÚ EN PANTALLA PRÉSENTATION DU MENU OSD EINLEITUNG OSD-MENÜ Image Menu de 1er niveau Menu de 2e niveau Menu de 3e niveau Description Standard TIR À LA PREMIÈRE PERSONNE STRATÉGIE EN TEMPS RÉEL JEU DE RÔLE Course...
- Page 28 OS D ME NU INTR O DU CT I O N INTRODUCCIÓN AL MENÚ EN PANTALLA PRÉSENTATION DU MENU OSD EINLEITUNG OSD-MENÜ Paramètres de l’affichage à l’écran Menu de 1er niveau Menu de 2e niveau Menu de 3e niveau Description •...
- Page 29 OS D ME NU INTR O DU CT I O N INTRODUCCIÓN AL MENÚ EN PANTALLA PRÉSENTATION DU MENU OSD EINLEITUNG OSD-MENÜ Bild Menü 1. Ebene Menü 2. Ebene Menü 3. Ebene Beschreibung Standard Racing Bildmodus Cinema Professional Nacht Eingabe-HDR-Quelle Helligkeit 0-100% Die Helligkeit kann in jedem Modus eingestellt werden...
- Page 30 OS D ME NU INTR O DU CT I O N INTRODUCCIÓN AL MENÚ EN PANTALLA PRÉSENTATION DU MENU OSD EINLEITUNG OSD-MENÜ OSD-Einstellungen Menü 1. Ebene Menü 2. Ebene Menü 3. Ebene Beschreibung • Die Standardsprache ist Englisch. • Benutzer können die Taste nach oben oder unten Chinesisch (traditionell) / Englisch / verwenden, um eine andere Sprache auszuwählen.
-
Page 31: Spe C Ifi Ca T Io N S
S P EC I FI CAT IO NS ESPECIFICACIONES DEL PRODUCTO SPÉCIFICATIONS DU PRODUIT PRODUKTSPEZIFIKATIONEN Model NZXT Canvas 27F Gaming Monitor Panel Size 27” Aspect Ratio 16:9 Flat / Curved Flat Max. Resolution FHD 1920x1080 LCM Brightness (Typ.) 300 cd/m²... - Page 32 S P EC I FI CAT IO NS ESPECIFICACIONES DEL PRODUCTO SPÉCIFICATIONS DU PRODUIT PRODUKTSPEZIFIKATIONEN Modelo Monitor de gaming NZXT Canvas 27F Tamaño del panel 27” Relación de aspecto 16:9 Plano / curvo Plano Resolución máx. FHD 1920x1080 Brillo LCM (típ.) 300 cd/m²...
- Page 33 S P EC I FI CAT IO NS ESPECIFICACIONES DEL PRODUCTO SPÉCIFICATIONS DU PRODUIT PRODUKTSPEZIFIKATIONEN Modèle Moniteur Gaming NZXT Canvas 27F Taille de la dalle 27” Format d’image 16:9 Plat / Incurvé Plat Résolution Max. FHD 1 920x1 080 Luminosité LCM (type) 300 cd/m²...
- Page 34 S P EC I FI CAT IO NS ESPECIFICACIONES DEL PRODUCTO SPÉCIFICATIONS DU PRODUIT PRODUKTSPEZIFIKATIONEN Modell NZXT Canvas 27F Gaming-Monitor Anzeigegröße 27” Seitenverhältnis 16:9 Flach / Gewölbt Flach Max. Auflösung FHD 1920x1080 LCM-Helligkeit (typ.) 300 cd/m² Rahmentyp Rahmenlos Aktiver Anzeigebereich (H*V) 597.6 (H) x 332.15 (V)
-
Page 35: T R Ou Bl Es H Ootin G ( Faq )
T R OU BL ES H OOTIN G ( FAQ ) RESOLUCIÓN DE PROBLEMAS (PREGUNTAS FRECUENTES) DÉPANNAGE (FAQ) FEHLERBEHEBUNG (FAQ) Problem Possible Solution • Check if the adapter or power cord is correctly and firmly connected or out. Power LED is not ON •... - Page 36 T R OU BL ES H OOTIN G ( FAQ ) RESOLUCIÓN DE PROBLEMAS (PREGUNTAS FRECUENTES) DÉPANNAGE (FAQ) FEHLERBEHEBUNG (FAQ) Problema Posible solución • Comprueba si el adaptador o el cable de alimentación están bien conectados o si se han salido. El led de alimentación no se enciende.
- Page 37 T R OU BL ES H OOTIN G ( FAQ ) RESOLUCIÓN DE PROBLEMAS (PREGUNTAS FRECUENTES) DÉPANNAGE (FAQ) FEHLERBEHEBUNG (FAQ) Problème Solution potentielle • Vérifiez si l’adaptateur ou le cordon d’alimentation est correctement et fermement connecté ou débranché. Le témoin LED d’alimentation est éteint •...
- Page 38 T R OU BL ES H OOTIN G ( FAQ ) RESOLUCIÓN DE PROBLEMAS (PREGUNTAS FRECUENTES) DÉPANNAGE (FAQ) FEHLERBEHEBUNG (FAQ) Problem Mögliche Lösung • Prüfen Sie, ob der Adapter oder das Netzkabel richtig und fest angeschlossen oder abgezogen ist. Power-LED leuchtet nicht •...
-
Page 39: S U Pp Orte D Ti Min G L I St
S U PP ORTE D TI MIN G L I ST LISTA DE TEMPORIZACIÓN COMPATIBLE LISTE D’AFFICHAGES PRIS EN CHARGE UNTERSTÜTZTE TIMING-LISTE Standard Resolution HDMI DisplayPort ✓ ✓ 640x480@60Hz ✓ ✓ 640x480@67Hz ✓ ✓ 640x480@72Hz ✓ ✓ 640x480@75Hz ✓ ✓ 720x480@60Hz Dos-Mode ✓... - Page 40 S U PP ORTE D TI MIN G L I ST LISTA DE TEMPORIZACIÓN COMPATIBLE LISTE D’AFFICHAGES PRIS EN CHARGE UNTERSTÜTZTE TIMING-LISTE Estándar Resolución HDMI DisplayPort ✓ ✓ 640 x 480 a 60 Hz ✓ ✓ 640 x 480 a 67 Hz ✓...
- Page 41 S U PP ORTE D TI MIN G L I ST LISTA DE TEMPORIZACIÓN COMPATIBLE LISTE D’AFFICHAGES PRIS EN CHARGE UNTERSTÜTZTE TIMING-LISTE Standard Résolution HDMI DisplayPort ✓ ✓ 640 x 480 @ 60 Hz ✓ ✓ 640 x 480 @ 67 Hz ✓...
- Page 42 S U PP ORTE D TI MIN G L I ST LISTA DE TEMPORIZACIÓN COMPATIBLE LISTE D’AFFICHAGES PRIS EN CHARGE UNTERSTÜTZTE TIMING-LISTE Standard Auflösung HDMI DisplayPort ✓ ✓ 640x480 bei 60 Hz ✓ ✓ 640x480 bei 67 Hz ✓ ✓ 640x480 bei 72 Hz ✓...
-
Page 43: Nzxt Global Warranty Policy
NZXT's sole obligation and liability under this warranty is limited to the repair or replacement of a defective product with either a new or refurbished product with a similar function that is equal or greater in value at our option. NZXT shall not, in any event, be liable for any incidental or consequential damage, including but not limited to damages resulting from interruption of service and loss of data, business, or for liability in tort relating to this product or resulting from its use or possession. - Page 44 Within the first 60 days after purchase, please return your product (or for power supplies installed within our enclosures, just the failed power supply) to your dealer or reseller for a replacement. If the product is still within warranty and you can no longer return it to your dealer, please contact NZXT Customer Support (see above) for assistance and instructions.
- Page 45 Within the first two years after purchase, please return your product (or for power supplies installed within our enclosures, just the failed power supply) to your dealer or reseller for a replacement. If the product is still within warranty and you can no longer return it to your dealer, please contact NZXT Customer Support (see above) for assistance and instructions.
-
Page 46: Regulatory Statement
REACH (Registration, Evaluation, Authorization and Restriction of Chemicals, EC 1907/2006) is the European Union’s (EU) chemical substanc- es regulatory framework. REACH requires NZXT Inc. to provide customers with sufficient information on Substances of Very High Concern (SVHC) contained in products in concentration above 0.1% weight by weight (w/w) to allow safe use of the product. - Page 47 NZXT will comply with the product take back requirements at the end of life of NZXT-branded products that are sold into the EU.
-
Page 48: Support And Service
Please include a detailed explanation of your problem and your proof of purchase. For comments and suggestions, you can e-mail our design team, designer@nzxt.com. Lastly we would like to thank you for your support by purchasing this product. For more information about NZXT, please visit us online. NZXT Website: NZXT.com SOPO RT E Y S E RV I C I O Si tiene preguntas o problemas con el producto NZXT que usted compró, no dure en ponerse en contacto con service@nzxt.com y suministrar una... - Page 49 NZXT, Inc. | 15736 E. Valley Blvd, City of Industry, CA 91744, USA NZXT Europe GmbH | Ammerthalstrasse 32 Kirchheim bei Muenchen 85551, Germany NZXT UK Ltd. | First Floor 5 Fleet Place London EC4M 7RD, GB United Kingdom +1 (800) 228-9395 / service@nzxt.com / nzxt.com...
Need help?
Do you have a question about the CANVAS 27F 165 and is the answer not in the manual?
Questions and answers