Advertisement
®
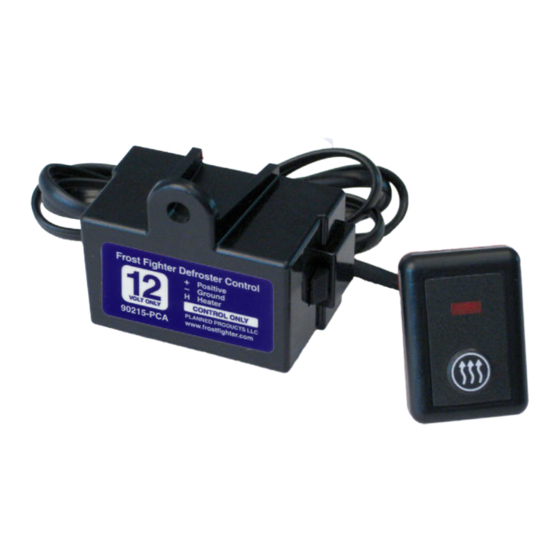
Frost Fighter
ThermaSync Defroster Controls
ThermaSync
Defroster controls with smarts
Defroster Control Instructions
ThermaSync® Defroster Controls are the perfect companion to Clear
View II and other defrosters.
All four ThermaSync models feature a remote defroster switch with
red indicator light and automatic shut off timing
2712/2724 ThermaSync Controls, R Series
The 2700 R series controls provide simple automatic ten minute
timing in 12 and 24 volts.
2812/2824 ThermaSync Controls, M Series
The 2800 M series of defroster controls feature adjustable automatic
shut off timing, power modulation and can be connected in a network
to control multiple defrosters with a single switch.
All controls and defrosters are available in 12 and 24 volts.
2728 ThermaSync Installation Pack
The
2728 Installation Pack makes it easy to get install ThermaSync
defroster controls and incudes a color coded wire harness, fuse
holder, fuse and other installation components.
© 2012 Planned Products LLC All rights Reserved
Frost Fighter and ThermaSync are Registered Trademarks of Planned Products LLC
®
®
ThermaSync Instructions
www.frostfighter.com
.
2700 R Series
Blue
2712
ThermaSync, 12 Volt
Orange
2724
ThermaSync, 24 Volt
2800 M Series
Green
2812
ThermaSync, 12 Volt
Red
2824
ThermaSync, 24 Volt
Advertisement
Table of Contents

Summary of Contents for Frost Fighter ThermaSync 2700 R Series
- Page 1 2728 Installation Pack makes it easy to get install ThermaSync defroster controls and incudes a color coded wire harness, fuse holder, fuse and other installation components. © 2012 Planned Products LLC All rights Reserved Frost Fighter and ThermaSync are Registered Trademarks of Planned Products LLC...
-
Page 2: Clear View
Clear View II Electrical and wiring www.frostfighter.com Important! The vehicle must be running to operate the defroster. Wiring Harness Clear View defrosters come complete with the wire harness and connectors needed to install the defroster. All wires are labeled and color coded for easy identification. Match the "W" number on the wire with the description below. Terminals Connection End 1... - Page 3 STEP 1 Wire ThermaSync Control Start the installation by wiring the control module. The module has three terminals each with an identifying letter stamped in the plastic base. The legend for these letters is shown in the wiring diagram. Connectors are color coded and of different sizes.
-
Page 4: Installing The Fuse
Tap Vehicles Power STEP 3 Tapping into the vehicle’s power is a critical step in the installation process. There are several ways to go about Tap into power taping into vehicle power. The two most popular are: wire controlled by ignition. - Page 5 Run Wire to Defroster STEP 5 Run wire W-1 (the long one), already attached to the Grounding control module back to the rear window defroster. Take A grounding strap may be needed, connecting the ground on the molding to a ground an the chassis itself in order a moment to consider on which side and where it will attach to the defroster.
-
Page 6: Troubleshooting
MADE AND PRINTED IN USA In addition to timing the control’s power modulation is set by internal Frost Fighter and ThermaSync are Registered Trademarks of Planned Products LLC. All rights reserved. jumpers. DO NOT CHANGE THESE JUMPERS. The defroster and control are matched. Changing...
Need help?
Do you have a question about the ThermaSync 2700 R Series and is the answer not in the manual?
Questions and answers