Table of Contents
Advertisement
Quick Links
Advertisement
Table of Contents

Summary of Contents for Bowers & Wilkins CLASSE CT/SSP-800
- Page 1 CT/SSP-800 SERVICE MANUAL V1.0 CT_SSP-800 Service Manual V1.0.docx Page 1 of 25...
-
Page 2: Table Of Contents
Table of Contents Introduction ..............................3 The preferred method of servicing Delta Series products is as follows: ..........3 This method of servicing offers: ......................3 Service Assistance ..........................3 Important Notes on Servicing ......................3 Ordering Replacement Parts ....................... 4 Returning parts for credit ........................ -
Page 3: Introduction
Introduction Please read this manual carefully before commencing servicing! Only qualified and authorized personnel should attempt to service this product. The lightning flash with arrowhead symbol, within an equilateral triangle, is intended to alert the user to the presence of un-insulated dangerous voltage within the product‟s enclosure that may be of sufficient magnitude to constitute a risk of electric shock to persons. -
Page 4: Ordering Replacement Parts
Ordering Replacement Parts Complete and email the form CLASSÉ PARTS REQUEST to cservice@classeaudio.com. Please be sure to include all required information as there may be a delay in processing incomplete requests. Returning parts for credit Email cservice@classeaudio.com with your part number and Classe order number in order to get a return authorization number. -
Page 5: Understanding The Front Led Status
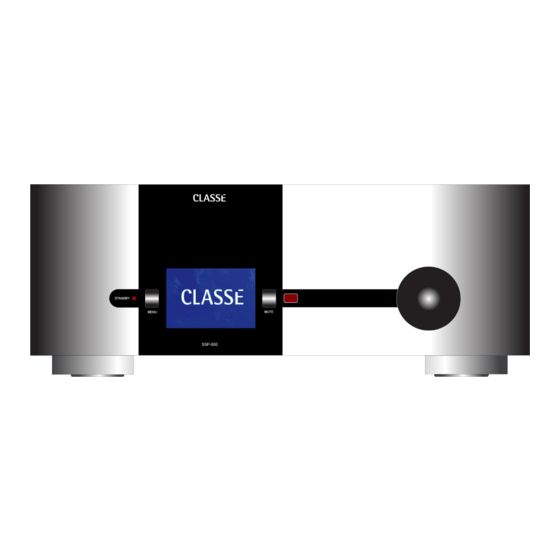
Understanding the front LED status Red = Standby Blue = On Blinking Blue Over voltage AC limits attained. A message will be displayed on the front screen and unit will shut down. Under voltage AC limits attained. No change in operation of the unit. Protection modes and indicators The SSP-800/CT-SSP Surround Sound Processor contains protection features that prevent the processor from operating at dangerously high or low voltages. -
Page 6: Common Repair Scenarios
Common Repair Scenarios Along with using this Service Manual for troubleshooting purposes, it is essential to consult our Service Notices. A complete set of notices will be available concerning current and past faults found on the CT/SSP-800. These are descriptive of the fault along with troubleshooting techniques and solutions. The following cases are described using keywords for the fault. - Page 7 Keywords: On screen error codes X.0.0.0.0. Numerical Error codes such as 2.0.0.0.0 can be displayed when an initialization error has occurred. These errors may arise when taking the CT/SSP-800 out of standby or when powering up. The first number of the error code describes in which stage the error occurred.
-
Page 9: Does Not Initialize (Standby Led Flashing Continuously)
Does not initialize (Standby LED flashing continuously) A CT/SSP-800 that does not initialize completely will continually flash its blue LED on the front panel. The significance of this is that the internal micro-controllers cannot execute the firmware properly. Probable causes for this are as follows; 1- Corrupted Firmware 2- Bad digital power supplies 3- Sensor board communication errors... -
Page 10: Firmware Download Procedure
Firmware Download procedure Firmwares are found at the following link: http://www.classeaudio.com/downloads/Downloads.htm?Path=/OPERATING_SOFTWARE USB Driver: http://www.silabs.com/Support%20Documents/Software/CP210x_VCP_Windows.zip Microsoft Redistributable software: http://www.microsoft.com/en-us/download/details.aspx?id=5638 1. Follow the link above for the correct Firmware 2. Select the file for the model you want to update. 3. The *.pkg file is the operating software for the Classé component. Download the *.pkg file and save to a location on your hard drive. -
Page 11: Saving And Archiving User Settings
6. Find the “PORTS (COM & LPT)” section in the list, and expand it (if not already expanded) by clicking on the small “+” sign to the left. 7. Find the “CP210x USB to UART Bridge Controller (COMx)” and make note of the Com number. Saving and archiving user settings Retrieving and archiving your custom settings from the SSP800 (or any Delta product). - Page 12 Step 7: Press Next. The Downloader will now retrieve you custom settings and save them to your PC hard disk. Depending on the version of the downloader program the file will be in one of two places. If the Downloader is version 1.1 or lower the file can be found in the root directory of hard disk.
-
Page 13: Pcb List
PCB List Description SSP-800 PCB Number CT-SSP PCB Number Video PCB HDMI 1.4 R6706 R6706 Video PCB HDMI 1.3 ????? ????? Communication PCB R6705 R6705 Digital & Analog audio PCB R6704 R6704 Mother Board PCB R6703 R6703 SMPS / Switching Power Supply 51097930-00 51097930-00 DSP PCB... -
Page 14: Circuitry Guide
Circuitry guide R6703 – Main Board CPLD U101 provides for DAE/SRC/UART communications Provides front panel interface and connectors LVDS interfaces DACs Rail sensing for power fail muting circuitry Volume control devices Voltage regulation from for +12/-12 volts, +9/-9 volts, +5 volts, 3.3 volts, 1.8 volts CPLD U1401 for digital audio routing Linear transformer regulation for +12/-12 volts, +5 volts R6706 –... -
Page 17: Appendix A: Ac Line Voltage Ranges
Appendix A: AC line voltage ranges The CT/SSP-800 is set at the factory (internally) for 100V, 120V, 230V, or 240V AC mains operation, as appropriate for the country in which they are sold. The CT/SSP-800 include protection circuitry that will prevent the units from operating at dangerously high or low voltages. -
Page 18: Appendix B: Voltage Change
Appendix B: Voltage change Unplug the unit before opening. 2. Remove 10 top cover screws. 3. Locate P203, P204 and P206 headers inside the unit on PCB R6705RXX. P203 and P204 P206 CT_SSP-800 Service Manual V1.0.docx Page 18 of 25... - Page 19 For 100 Volts: P203 put (1) jumper between P204 put (2) jumpers P206 put (1) jumper pin 5 and 6 between pin 1-2 and Pin 5-6 between pin 1-2 For 120 Volts: P203 put (1) jumper P204 put (2) jumpers P206 put (1) jumper between pin 9 and 10...
- Page 20 Voltage calibration check: Power up the unit with the appropriate mains voltage. Press MENU / STATUS / SENSORS. “MENU” “status” “sensors” “displayed voltage” Verify that the displayed voltage corresponds to the input Vac, if not adjust trimpot RV201 until the status screen shows the correct voltage. RV201 Trimpot CT_SSP-800 Service Manual V1.0.docx Page 20 of 25...
-
Page 21: Appendix D: Usb & Rs232 Interface Configurations
Appendix D: USB & RS232 interface configurations USB configuration 1. Connect the B end of the USB cable to the rear of the unit. 2. Connect the A end of the USB cable to your PC. Note: Ensure that your PC is booted up, and has an internet connection available as you may need to install Drivers from Microsoft Update. -
Page 22: Appendix F: Ir
Appendix F: IR IR Input Use the IR input when the front panel IR window does not have a clear line-of-sight with the remote control, for instance, when the SSP is installed in a cabinet or closet. Attach this input to an infrared repeater system to route signals from the remote control to the SSP via a mono mini-jack (3.5mm phono). -
Page 23: Appendix H: Typical Specifications
Appendix H: Typical Specifications Frequency response 20Hz - 200kHz < 0.1dB, stereo analog bypass 20Hz - 20kHz < 0.2dB, all other sources (THD+noise) Distortion 0.001%, digital source/bypassed analog source .002%, processed analog source (single-ended) Maximum input level 2Vrms (DSP), 6Vrms (bypass) (balanced) Maximum input level 4Vrms (DSP), 12Vrms (bypass) -
Page 24: Appendix I: Power Supply Test Points
Appendix I: Power Supply test points Plug AC line and turn ON the main switch from back of the unit and ensure that you hear the clicking sound of relay within 2 second. Verify supply voltage on mother board R6703R04 at test point TP1502 =+12Vdc, TP202=+5Vdc, TP204=+3.3Vdc, positive side of capacitor C1546=+12Vdc, negative side of capacitor C1545=- 12Vdc, TP1505=+5Vdc and TP301=+3.3Vdc with respect to analog ground TP1513. -
Page 25: Amendment Record
Parts/PCB’s Classé Part Number Description 51518034-01 Video PCB HDMI 1.4 51095793-01 Video PCB HDMI 1.3 R6705-04-03S Communication PCB R6704-03-00S Digital & Analog audio PCB R6703-04-02S Mother Board PCB 51097930-00 SMPS / Switching Power Supply 51377860-00 DSP PCB R453X IR PCB R452X-05-01X Front Panel PCB for SSP-800 &...
Need help?
Do you have a question about the CLASSE CT/SSP-800 and is the answer not in the manual?
Questions and answers
Como saco el CT. SSP800 del modo de proteccion