Table of Contents
Advertisement
Quick Links
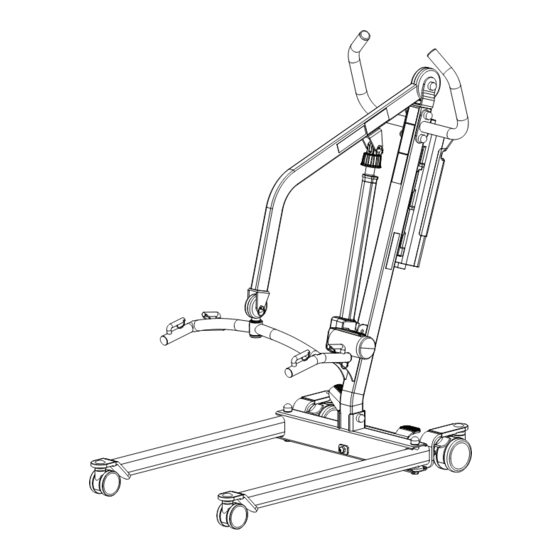
F U L L B O D Y P A T I E N T L I F T
M o d e l : D M - P L
Ensure the product has been assembled according to the instructions in
this manual. All operators should read and understand the instructions for
safe and proper operation of the patient lift.
0 / D M - P L
0 H
*DM-PL350 MODEL SHOWN
Dansons
Medical
Advertisement
Table of Contents

Related Manuals for Dansons Group DM-PL350

Summary of Contents for Dansons Group DM-PL350
- Page 1 M o d e l : D M - P L 0 / D M - P L *DM-PL350 MODEL SHOWN Ensure the product has been assembled according to the instructions in this manual. All operators should read and understand the instructions for...
- Page 2 This page was intentionally left blank.
- Page 3 DM-PL350 MAX LOAD: 350LB MASS OF LIFT:77LB(35KG) 678-735-4488 S/N: DM-PL350YYMM1XXX...
-
Page 4: Product Description
Product Description provides added comfort for the patient Intended Use intend patients who are completely immobile or totally dependent on th lift for transfers. intended to be used for transfers of the patient in and out of bed, wheelchair, to and from commode, or any other type of surface. -
Page 6: Safety Instructions
Safety Instructions... - Page 7 WARNING! • • • • • • • • • • • • • • • •...
-
Page 8: Features And Overview
• Easy tools are provided to assist with initial set up. To ensure maximum safety, product should not be put into use until all connections are tightened using standard tools. Easy Tools Screwdriver *DM-PL350 MODEL SHOWN 30.40 lb 8.20 lb **Base Boom Emergency lowering (13.8 kg) - Page 9 DM-PL350 DM-PL350H mm (in) mm (in) 1753.8 (69.0) 1756.3 (69.1) 1198.5 (47.2) 985.5 (38.8) 555.3 (21.9) 770.8 (30.3) 479.4 (18.9) 515.2 (20.3) 547.2 (21.5) 547.2 (21.5) 860.3 (33.9) 860.3 (33.9) 792.5 (31.2) 792.5 (31.2) 513.9 (20.2) 513.9 (20.2) 376.9 (14.8) 376.9 (14.8)
- Page 10 Battery Status by LCD Duty Cycle 10% Duty cycle (Max 2 minute ON, 18 minute OFF) Dimensions & Specifications 4-Points Spreader Bar DM-PL350 DM-PL350H 4" Rear Plastic Caster with Brake 3" Dual Front Plastic Caster Power Control Unit Detachable Handle 2 pt.
-
Page 11: Installation
Installation Step 1: Remove the base out of the box, and locate the following Step 2: Step 3:... - Page 12 Step 4: the plastic cover and plastic washer to the boom at the mounting hole insert the boom to the mast, and secure it using Step 5a (FOR PL350 ONLY) WARNING!!! There are two mounting holes on the mast bracket, make sure to mount the actuator to the LOWER HOLE.
- Page 13 Step 5b: (FOR PL350H ONLY) Secure the lower end of the hydraulic pump to the mast bracket using a pin and retaining ring as shown, and WARNING!!! There are two mounting holes on the mast bracket, make sure to mount the hydraulic pump to the UPPER HOLE.
- Page 14 Step 1...
- Page 15 Operating Instructions Double check all assemblies for tightness and read operating instructions carefully prior to use. For optimum performance the lift should be transported and stored in following condition range: • • • For optimum performance the lift should be operated in following condition range: •...
- Page 16 Patient Lift Hydraulic Pump Unit Operating Instruction Pump Piston Handle Pump Serial Number To raise the boom: -Turn the release knob clockwise until it stops. -Use the handle bar to pump the piston Release To lower the boom: Knob The release knob controls the speed of the piston as it’s lowering.
- Page 17 Control Box Overview Emergency Stop Button Cable Organizer Battery Indicator Down Button AC In Charger Not Used Actuator Hand Control WARNING!
- Page 18 Release Pressed in Battery Indicator Display Signs Charging: AC Charging Cord Battery Indicator Signs - Charging...
- Page 19 Operating Lift: Using Hand Control LED Indicator Lifting * Green = In Use * Blank = Standby Lowering Operating Lift: Using Control Box The red button must be in released position to operate lift. situation. Lowering...
- Page 20 Warning! - Connection Warning! - Low Battery Warning! - Overloaded...
- Page 21 Sling Type Material Sizes Mesh M, L Universal Polyester M, L, XXL Mesh S, M, L Universal with Head Support Polyester S, M, L, XXL Universal Disposable Nonwoven, Disposable M, L Universal Disposable with Head Support Nonwoven, Disposable S, M, L, XXL Sani Polyester S, M, L, XXL...
- Page 22 Sling Hook-Up Guide 4 Point S-Bar Hook up A Point 1 Hook up B Point 2 Insert D through C Hook up D Point 3 Hook up C Point 4 4 Strap Sling Hook up A & C Point 1 Hook up B &...
- Page 23 Transfer From Bed to Wheelchair • ser should be in the center of the bed. • Position user onto his/her side by rolling user towards you. • Roll the sling in half. The handle on the back section should face •...
-
Page 24: Maintenance And Inspection
Maintenance & Inspection Maintenance & Inspection Boom and Spreader Bar Mast Base and Foot Pedal Actuator and Control Box Sling Lift Cleaning... - Page 25 Cleaning and Disinfecting Cleaning of the lift Cleaning of the sling Deterioration of sling Disinfecting of the lift and sling...
-
Page 26: Troubleshooting Guide
Troubleshooting Guide I need to re-charge my batteries often or they fail to hold a charge when I charge them. The actuator will either go up or down but not both There is a grinding sound inside the actuator when lifting The actuator stops and starts while lifting or lowering My lift will not operate even though it shows the batteries are charged If there is a problem you could not solve, please contact Dansons Medical for further assistance. - Page 27 Emergency Lowering Mechanism Contact us immediately if standard troubleshooting techniques do not correct the failure. Do not attempt to lift until all failure and safety issues have been resolved. In case of lift failure, please follow the procedures below to safely lower the user. The Emergency Lowering Device is located at the top of the actuator shaft.
-
Page 28: Warranty Policy
WARRANTY POLICY to be free of defects in workmanship and product performance. This warranty is extended only to the original purchaser/user and is therefore non transferable. Any warranty claims must be submitted through an authorized dealer or distributor that sold the original product with proper proof of sale and serial number supplied. Prior reserve the right to replace parts and or accessories in lieu of sending complete new patient lifts. - Page 29 Notes...
- Page 30 Notes...
- Page 31 Notes...
- Page 32 Dansons Medical 678-735-4488 DANSONSMEDICAL.COM...
Need help?
Do you have a question about the DM-PL350 and is the answer not in the manual?
Questions and answers