
Summary of Contents for Blaze BLZ-ICEMKR-50GR
- Page 1 Automatic Outdoor Ice Maker User Manual Model: BLZ-ICEMKR-50GR Be sure ice maker is standing upright 24 hours prior to plug-in.
-
Page 2: Table Of Contents
TABLE OF CONTENTS Page ICE MAKER SAFETY ..................2 IMPORTANT SAFEGUARDS ................ 3 - 5 TECHNICAL INFORMATION ................5 COMPONENT LOCATIONS ................6 ICE MAKER INSTALLATION ............... 7 - 13 Unpacking ....................7 Location requirements ................7 - 9 Electrical requirements ................9 Leveling the ice maker ................ -
Page 3: Ice Maker Safety
ICE MAKER SAFETY Your safety and the safety of others are very important. We have provided many important safety messages in this manual and on your appliance. Always read and obey all safety messages. This is the Safety Alert Symbol. This symbol alerts you to potential hazards that can injure or kill you and others. -
Page 4: Important Safeguards
CALIFORNIA PROPOSITION 65 WARNING WARNING: This product can expose you to chemicals including Chromium (hexavalent compounds), which are known to the State of California to cause cancer and birth defects or other reproductive harm. For more information go to: www.P65Warnings.ca.gov Before the ice maker is used, it must be properly positioned and installed as described in this manual, so read the manual carefully. - Page 5 50°F (10°C) and below 100°F (38°C). This unit MUST be installed in an area protected from the elements, such as wind, rain, water spray or drips. The ice maker is designed to be installed in an outdoor kitchen, but must not be placed directly adjacent to a grill or other source of high heat.
-
Page 6: Technical Information
Extension Cord Because of potential safety hazards under certain conditions, it is required that you do not use an extension cord with this ice maker. TECHNICAL INFORMATION Model: BLZ-ICEMKR-50GR Electrical power: 115VAC ~ 60Hz Power consumption: 12.2 kWh/100 lbs of ice Ice-making /-harvest rated current: 3.0A/3.6A... -
Page 7: Component Locations
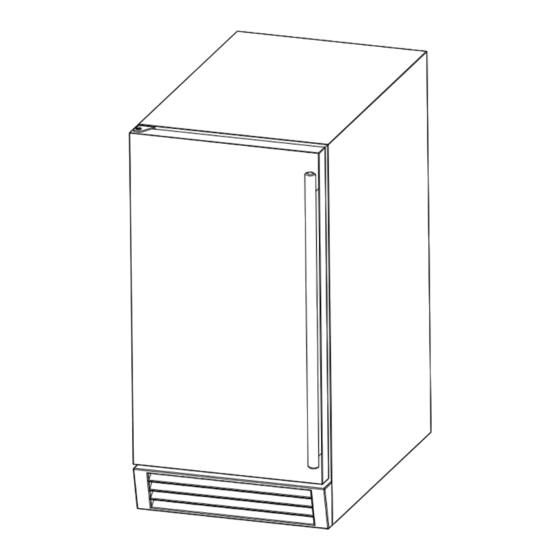
COMPONENT LOCATIONS Water distribution tube Door Evaporator (ice mold) Water trough Float Ice storage bin Caster Control panel Front louver panel Ice scoop Power cord Water inlet Drain outlet Water supply hose Drain hose... -
Page 8: Ice Maker Installation
ICE MAKER INSTALLATION Unpacking Excessive Weight Hazard Use two or more people to move and install ice maker. Failure to do so can result in back or other injury. Remove packaging materials. IMPORTANT: Do not remove any permanent instruction labels or the data label on your ice maker. - Page 9 This ice maker should be properly installed by qualified personnel. To ensure proper ventilation for your ice maker, the front of the unit must be completely unobstructed. When installing the ice maker under a counter, follow the recommended spacing dimensions shown.
-
Page 10: Electrical Requirements
IMPORTANT: Do not kink or pinch the power supply cord between the icemaker and wall or cabinet. Electrical requirements Electrical Shock Hazard Plug into a grounded 3-prong outlet. Never remove the ground prong from the plug. Never use an adapter. Never use an extension cord. -
Page 11: Leveling The Ice Maker
Leveling the ice maker It is important for the ice maker to be leveled in order to work properly. Otherwise water will not flow properly through the evaporator (ice mold). The ice production will be less than normal, and may be noisy. -
Page 12: Water Supply
3. Remove the door hinge 2 and place it on the opposite top side. Separate the axis from the hinge 2 and set it aside. 4. Swap the door handle. 5. Keep the handle apart from the hinge side. Align the door on the bottom hinge 1 and replace axis on the hinge 2. -
Page 13: Drain
2. Find a ½-in. to ¾-in. vertical cold water pipe near the installation location. The distance should be less than 6 feet. The water supply hose provided with the ice maker is about 6 feet long. 3. A shut-off valve must be installed to the main water supply. If the water pipe has a plain piece of copper tubing, attach a ¼”... -
Page 14: Installation Types
IMPORTANT: This ice maker is not a freezer. Insufficient drainage will cause a high rate of melting in the ice storage bin. Installation Types This ice maker has been designed for Mobile (free-standing) installation. However, it can also be Enclosed (as under a cabinet) or Built-in (sealed to the floor). In all cases, there must be adequate air space around the unit for ventilation. -
Page 15: Operation
OPERATION Final Check List before Operation 1. Have all packing materials and tape been removed from the interior and exterior of the ice maker? 2. Did you clean the ice storage bin? 3. Have the installation instructions been followed, including connecting the machine to water and electricity? 4. -
Page 16: How The Machine Makes Ice
to the ice storage bin. 4. When the ice storage bin is full, the sheet of cubes will not fall completely and will hold the bin-full probe open. The machine stops making ice automatically. 5. The unit will start making ice again after the ice cubes are removed. Then the bin-full probe swings back to operating position. -
Page 17: Normal Sounds
in the trough freezes continuously in the evaporator. Evaporator Water inlet Water pump Hot gas valve Compressor Condenser Fan motor Normal sounds Your new ice maker may make sounds that are not familiar to you. Most of the new sounds are normal. Hard surfaces like the floor and walls can make the sounds louder than they actually are. -
Page 18: Cleaning And Maintenance
bin. 5. Pull off the drainage tube of the water trough to drain off all water. 6. Leave the door open to allow for circulation and to prevent mold and mildew. 7. Leave water supply line and power cord disconnected until ready to reuse. IMPORTANT: ... -
Page 19: Exterior Cleaning
Before proceeding with cleaning and maintenance operations, make sure the power line of the unit is disconnected and the water line is shut off. Exterior cleaning The door and cabinet may be cleaned with a mild detergent and warm water solution such as 1 oz. -
Page 20: Condenser Cleaning
DO NOT use solvent-based cleaning agents or abrasives on the interior. These cleaners may transmit taste to the ice cubes and damage or discolor the interior. Condenser cleaning A dirty or clogged condenser prevents proper airflow, reduces ice making capacity, and causes higher than recommended operating temperatures that may lead to component failure. -
Page 21: Ice-Making System Cleaning
1. Shut off the water supply. 2. Disconnect the water hose from the distribution tube. 3. Gently take out the distribution tube. 4. With a brush, clean the tube with a dilute solution of warm water and a mild detergent such as dishwashing liquid. After removing the dirt and lint from the surface, rinse the tube with clean water. -
Page 22: Control Panel
the ice making system thoroughly. NOTE: Ice Maker Cleaner Solution in the water bin during the rinse is not needed. The ice machine cleaner contains acids. DO NOT use or mix with any other solvent-based cleaner products. Use rubber gloves to protect hands. Carefully read the material safety instructions on the container of the ice machine cleaner. -
Page 23: Ice Size Adjustment Guide
for 3 minutes, then the unit will restart and return to the ice making mode. Ice (Green) LED Ice making indicator light When this is lit, the unit is working in the ice making mode controlled by a temperature probe on the evaporator. When the green LED flashes, the unit is working in the ice making mode controlled by a fixed timer. -
Page 24: Major Functions
When the machine is in the cleaning stage or ice full stage, the ice size adjustment mode cannot be accessed. MAJOR FUNCTIONS 1. The operating procedure is completely automatic. 2. When the ice storage bin is full of ice cubes, the machine stops making ice automatically. - Page 25 but bin does not fill The air flow to the ice maker Check the installation. up with ice. may be obstructed. The ambient temperature and water temperature are high, or Check the installation. unit is near some heat source. Some water falls to the floor Normal condensation on the door or some when you open the door to water together with ice.
-
Page 26: Limited Warranty
LIMITED WARRANTY Manufacturer warrants to the original purchaser at the original site of delivery with proof of purchase of each Refrigerator that when subject to normal residential use, it is free from defects in workmanship and material for the periods specified below.This warranty excludes refrigerators used in rental or commercial applications.It does not cover labor or labor related charges.
Need help?
Do you have a question about the BLZ-ICEMKR-50GR and is the answer not in the manual?
Questions and answers