
Related Manuals for Jessier JSC-D22058-UL

Summary of Contents for Jessier JSC-D22058-UL
- Page 1 Jessier CERAMIC HOB Instruction Manual/ Installation Manual MODEL: JSC-D22058-UL 20230225A2...
-
Page 2: Installation
Safety Warnings 回 Your safety is important to us. P|ease read this information before using your cooktop. Installation Electrical Shock Hazard 丘 | Disconnect the app|iance from the mains e|ectricity supp|y before carrying out any work or maintenance on it. 巨... -
Page 3: Operation And Maintenance
己 an isolating switch providing full disconnection from the power 已 sup p ly. Failure to install the appliance correctly could invalidate any warranty or liability claims. Operation and maintenance Electrical Shock Hazard 丘 | D o not cook on a broken or cracked cooktop. If the cooktop surface should break or crack, switch the appliance off immediately at the mains power supply (wall switch) and contact a qualified technician. - Page 4 Cut Hazard 回 The razor-sharp b|ade of a cooktop scraper is exposed when the safety cover is retracted.Use with extreme care and al w ays store safely and out of reach of children. 巨 尸 ailure to use caution could result in injury or cuts. Important safety instructions 回...
- Page 5 Do not use scourers or any other harsh a brasive cIeaning agents to 回 clean your cooktop, as these can scratch the Induction glass. ”the supp|y cord is damaged, it mustbe repIacedby the manufactur 己 er, its service agent or similarly qualified persons in order to avoid a hazard.
-
Page 6: Product Overview
. |卒 三 ::三 三}:三 三产 二 己 steam cleaner is not to be used. 已 'The appliance is not intended tobe operatedby means ofan exter nal timer or separate remote-control system. Introduction 回 °n the purchase of your new lnduction Hob. We recommend that you spend some time to read this Instruction/ Installation Manual in order to fully under... -
Page 7: Product Information
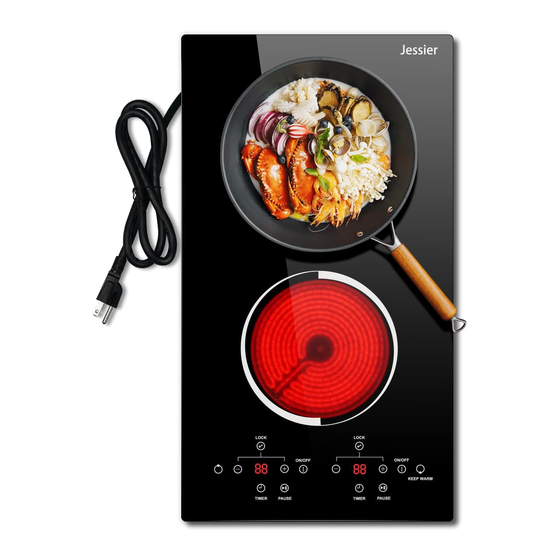
Control Panel Product Information The microcomputer ceramic cooker hob can meet different kinds of cuisine demands because of resistance wire heating, micro-computerized control and multi-power selection, really the optimal choice for modern families. The ceramic cooker hob centers on customers and adopts personalized design. -
Page 8: Using Your Ceramic Hob
Make sure that the base of your pan is smooth, sits flat against the glass, and is the same size as the cooking zone. Always centre your pan on the cooking zone. 亡 Always lift pans off the ceramic hob - do not slide, or they may scratch the glass. -
Page 9: When You Have Finished Cooking
5. Small stove There are only 3 heat preservation gears in the heating zone. When the heating zone is selected, it will display “0”, the second gear will display “L”, and the third gear will display “H1” *If you don’t choose a heat setting within 1 minute,the ceramic hob will automatically switch off.You will need to start again at step 1. -
Page 10: Over Temperature Protection
To unlock the controls 1. Make sure the heating zone is turned on. 2. Pressing the "-"key and "+"key at the same time for a while. 3. You can now start using the heating zone. When the heating zone in the lock mode, all the controls are disable except the ON/OFF and Pause ,you can always turn the ceramic hob off with the ON/OFF control in an emergency, but you shall unlock the hob first in the next operation. -
Page 11: Using The Timer
Using the Timer • You can set the timer for up to 99 minutes. If the setting time exceeds 99 minutes, the timer will automatically return to 0 minute. 1.Touch the timer control , the timer indicator show “30” 2. Set the time by touching the + or - to select the timer. Hint: Touch the “-“... - Page 12 Beware of hot surfaces "H" will show which cooking zone is hot to touch. It will disappear when the surface has cooled down to a safe temperature. It can also be used as an energy saving function if you want to heat further pans, use the hotplate that is still hot.
- Page 13 Jessier-service@outlook.com supplier: Jessier-service@outlook.com ...
-
Page 14: Searing Steak
key to delicious soups and tender stews because the flavours develop without overcooking the food. You should also cook egg-based and flourthickened sauces below boiling point. > Some tasks, including cooking rice by the absorption method, may require a setting higher than the lowest setting to ensure the food is cooked properly in the time recommended. -
Page 15: Heat Settings
Heat Settings Heat setting Suitability • delicate warming for small amounts of food • melting chocolate, butter, and foods that burn quickly 1 - 2 • gentle simmering • slow warming • reheating • rapid simmering • cooking rice • pancakes •... -
Page 16: Hints And Tips
Boilovers, melts, Remove these immediately with • Remove stains left by melts a fish slice, palette knife or hot sugary spills razor blade scraper suitable for sugary food or spillovers as ceramic glass cooktops, but soon the glass beware of hot cooking zone as possible. -
Page 17: Technical Specification
Possible causes Problem What to do Rough-edged cookware. The glass is being Use cookware with flat and scratched. smooth bases. See'Choosing the right cookware'. Unsuitable, abrasive scourer or See'Care and cleaning'. cleaning products being used. This may be caused by the Some pans make This is normal for cookware and construction of your cookware... -
Page 19: Before Locating The Fixing Brackets
Before locating the fixing brackets The unit should be placed on a stable, smooth surface (use the packag ing). Do not apply force onto the controls protruding from the hob. Adjusting the bracket position 1.Fix the hob on the work surface by screw 4 brackets on the bottom of hob(see picture) after installation screw bracket... -
Page 20: Connecting The Hob To The Mains Power Supply
Cautions 1. Th r amic cook r hob must b stall by qualifi r so l or icia s. W prof s sio als at your s r vic . Pl r co r atio by yours l f. 2. Th r amic cook r hob shall ot b... -
Page 21: Power Line
Power line 1. If the cable is damaged or needs replacing, this should be done by an after-sales technician using the proper tools, so as to avoid any accidents. 2. If the appliance is being connected directly to the mains supply, an omnipolar circuit breaker must be installed with a minimum gap of 3mm between the contacts. - Page 22 冗 This appliance is labeled in compliance with European _ directive 2012/19/EU for Waste Electrical and Electronic Equipment (WEEE). By ensuring that this appliance is disposed of correctly, you will help prevent any possible damage to the environment and to human health, which might otherwise be caused if it were disposed of in the wrong way.
Need help?
Do you have a question about the JSC-D22058-UL and is the answer not in the manual?
Questions and answers