Table of Contents
Advertisement
Quick Links
Advertisement
Table of Contents

Summary of Contents for NovaStar ET4000
- Page 1 ET4000 Media Server User Manual...
-
Page 2: Preface
Preface Statement You are welcome to use the product of Xi’an NovaStar Tech Co., Ltd. (hereinafter referred to as NovaStar). This document is intended to help you understand and use the product. For accuracy and reliability, NovaStar may make improvements and/or changes to this document at any time and without notice. - Page 3 Updated the media file format descriptions. V1.0.2 2021-05-14 Updated the product accessories. Updated the appearance and descriptions of the power module on the rear panel. V1.0.1 2021-05-12 Updated the descriptions of the graphics card. V1.0.0 2021-04-22 First release www.novastar.tech...
-
Page 4: Table Of Contents
ET4000 Media Server User Manual Contents Preface ................................. i 1 Overview ..............................1 Introduction ............................1 Features ............................1 Appearance ............................2 Optional Items ........................... 3 2 Applications ............................. 6 3 ET4000 Settings ............................7 Set Main Display ..........................7 Change Resolutions .......................... - Page 5 ET4000 Media Server User Manual 5.4.9 Set Webpage Tabs ......................... 55 5.4.10 Set Sound Channel Mapping ....................55 5.4.11 Set Scheduled Programs ...................... 56 Save Projects ..........................59 Package Projects ..........................59 6 Link ................................ 60 Link Settings ............................ 60 Update to Backup ..........................
-
Page 6: Overview
Overview Introduction The ET4000 is a brand new media server developed by NovaStar, which is specifically designed for multimedia exhibition halls, banquet halls, stage performances and other creative fixed installation scenarios. The ET4000 provides an excellent pixel-to-pixel display with ultra-high definition, diversified mosaic creativity and outstanding media arrangements for professional stage performances. -
Page 7: Appearance
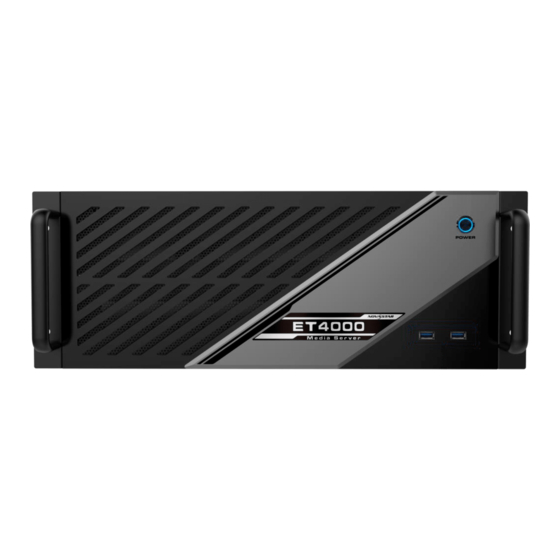
ET4000 Media Server User Manual Appearance Front Panel Area Description Power button Power on or power off the device. USB ports 2x USB3.0 Connect to a mouse and keyboard. Insert a USB drive for importing media files. Rear Panel Note The rear panel picture shows the basic configuration without any graphics cards installed. -
Page 8: Optional Items
Windows 10 IoT Enterprise LTSC Playback and control Kompass FX3 and its dongle software Optional Items The following table lists the optional items that you need to purchase from NovaStar separately. Graphics Card and Sync Specifications Card Graphics card MPG2200 4x DP 1.2... - Page 9 ET4000 Media Server User Manual Graphics Card and Sync Specifications Card − The loading capacity can be up to 8192×4320@60Hz. Single connector width: 480–8192 pixels Single connector height: 300–8192 pixels Playback of 1 layer of 8K×4K@30fps SDR video (hardware-decoding) ...
- Page 10 ET4000 Media Server User Manual Graphics Card and Sync Specifications Card Graphics card HPGA5000 4x DP 1.2 Single connector resolution: Up to 4096×2160@60Hz Four connector mosaic output: − The mosaic width or height can be up to 16384 pixels.
-
Page 11: Applications
ET4000 Media Server User Manual Applications www.novastar.tech... -
Page 12: Et4000 Settings
ET4000 Media Server User Manual ET4000 Settings Set Main Display Right click on your desktop and select Display settings. Figure 3-1 Display settings Select a display to set it as the main display. Figure 3-2 Multiple displays-1 Note When multiple displays are connected, you can click Identify to show the number at the bottom left corner on each display. -
Page 13: Change Resolutions
ET4000 Media Server User Manual For the Multiple displays item, select Extend these displays. Figure 3-3 Multiple displays-2 On the window that appears, select Keep changes. Figure 3-4 Confirmation Check the box next to Make this my main display. Change Resolutions 3.2.1 Set Standard Resolutions... - Page 14 ET4000 Media Server User Manual Figure 3-5 Display settings Select a display to set it as the main display. Figure 3-6 Multiple displays-1 Note When multiple displays are connected, you can click Identify to show the number at the bottom left corner on each display.
-
Page 15: Set Custom Resolutions
ET4000 Media Server User Manual For the Display resolution item, select the desired output resolution. Figure 3-7 Multiple displays-2 On the window that appears, select Keep changes. Figure 3-8 Confirmation Repeat Step 2 to Step 4 to complete the resolution settings for other displays. - Page 16 ET4000 Media Server User Manual Figure 3-9 NVIDIA control panel On the NVIDIA Control Panel interface, go to Display > Change resolution. Figure 3-10 Change resolutions Select the desired display. Click Customize to show the customize window. www.novastar.tech...
- Page 17 ET4000 Media Server User Manual Figure 3-11 Custom resolution-1 Click Create Custom Resolution. Read the disclaimer information carefully and click Accept to show the Create Custom Resolution window. Select the desired display. www.novastar.tech...
- Page 18 ET4000 Media Server User Manual Figure 3-12 Custom resolution-2 Set the horizontal pixels, vertical lines, refresh rate and scan type. Click Test and then click Yes on the window that appears. Figure 3-13 Confirmation www.novastar.tech...
- Page 19 ET4000 Media Server User Manual Figure 3-14 Custom resolution-3 Click OK to complete the custom resolution settings. After a custom resolution is created successfully, it will appear in the custom area as shown in the figure below. Figure 3-15 Custom resolution-4...
-
Page 20: Edid Management
ET4000 Media Server User Manual EDID Management After the display resolution settings, you need to manage the EDID for precise identification of display properties and to avoid the on-site screen display disorder. Load EDID The procedure of how to load the EDID is as follows. - Page 21 ET4000 Media Server User Manual Click EDID (Monitor) next to a desired output connector of the current graphics card to show the EDID management window. Figure 3-18 EDID (Monitor) Figure 3-19 Manage EDID Click Export EDID and then name the exported EDID file in the window that appears.
- Page 22 ET4000 Media Server User Manual Select the Load tab to show the EDID loading window. Click Browse and then select the EDID file exported in Step 4. In the Select Connector to force EDID area, select the desired connector. Figure 3-20 Load EDID Click Load EDID.
- Page 23 ET4000 Media Server User Manual Figure 3-22 EDID loaded successfully Unload EDID The procedure of how to unload the EDID is as follows. On the NVIDIA Control Panel interface, go to Workstation > View system topology. Click EDID (File) to show the EDID management window.
- Page 24 ET4000 Media Server User Manual Figure 3-23 EDID (File) Select the Unload tab and then select the desired connectors. Figure 3-24 Unload EDID www.novastar.tech...
-
Page 25: Output Mosaic
ET4000 Media Server User Manual Click Unload EDID. After the EDID is unloaded successfully, click OK on the dialog box that appears. Figure 3-25 EDID unloaded successfully Go back to Workstation > View system topology to check the EDID status. If the EDID (File) changes to EDID (Monitor), the EDID is unloaded successfully. - Page 26 ET4000 Media Server User Manual Figure 3-27 Set up mosaic Click Create new configuration to show the mosaic settings window. Figure 3-28 Mosaic settings www.novastar.tech...
- Page 27 ET4000 Media Server User Manual Select the screen number from the drop-down list of Number of displays. Select the screen mosaic layout from the drop-down list of Topology (rows x columns). Select the screen orientation from the drop-down list of Orientation of displays.
- Page 28 ET4000 Media Server User Manual Figure 3-30 Arrange displays Arrange the displays according to the screen arrangement and structure by dragging the available displays to the corresponding topology areas. www.novastar.tech...
- Page 29 ET4000 Media Server User Manual Figure 3-31 Arrange displays Click Apply and then click Yes on the confirmation window. Click Next to proceed. www.novastar.tech...
- Page 30 ET4000 Media Server User Manual Figure 3-32 Adjust overlap and bezel correction You can perform overlapping adjustment or bezel correction to the vertical or horizontal edges of the display as needed. Select whether to use the same settings for all the vertical or horizontal edges of the display in the Select how overlap/bezel correction is applied area.
-
Page 31: Software Operations
ET4000 Media Server User Manual Figure 3-33 Mosaic completed Software Operations Software Licensing After the ET4000 is started, Kompass FX3 supports two authorization modes: temporary authorization and permanent authorization. When Kompass FX3 is temporarily authorized, the remaining days of temporary authorization is displayed at the top right. -
Page 32: User Interface Introduction
ET4000 Media Server User Manual Figure 4-1 Dongle removed When the dongle is inserted and recognized normally, the above window and the Kompass FX3 text on the output will disappear automatically. User Interface Introduction After the software is started, the main user interface is shown in Figure 4-2. - Page 33 ET4000 Media Server User Manual Area Item Description Link Link Settings: Set the primary/backup devices and master/slave devices. Update to Backup: Manually update the data on the primary device to the backup device. Update to Slave: Manually update the data on the master device to the salve device.
- Page 34 ET4000 Media Server User Manual Area Item Description Rotate: Set the angle by which the layer rotates clockwise. : Bring the selected layer forward. : Send the selected layer backward. : Bring the selected layer to front.
-
Page 35: Project
ET4000 Media Server User Manual Area Item Description timer in the Playback area is based on this layer. − : After the playback of the media in the current layer is completed, the layer stops the playback and displays the last frame of the playback image. -
Page 36: Add Outputs
ET4000 Media Server User Manual Figure 5-1 Edit output 5.2.1 Add Outputs Add and bind outputs automatically After startup, Kompass FX3 will automatically detect the graphics card connectors and then complete the adding and binding of those detected connectors. All the connectors are displayed in the output list on the left. -
Page 37: Configure Regular Screens
ET4000 Media Server User Manual 5.2.2 Configure Regular Screens Click to open the Edit Output window. Organize the output connectors on the right via drag and drop operations to suit the loaded screen. Figure 5-3 Connector layout Click OK to complete the editing. - Page 38 ET4000 Media Server User Manual Select a partition layout in the output list area. Figure 5-5 Output partitioning : 1x sub-output : 2x sub-outputs in horizontal position : 3x sub-outputs in horizontal position : 4x sub-outputs in horizontal position ...
- Page 39 ET4000 Media Server User Manual : Disable the output. : Delete the output. Click to change the output name, connector binding relation and resolution. Click and drag the sub-outputs on the right to reorganize them. Figure 5-6 Sub-outputs reorganizing You can change the size and position of the sub-output at the bottom.
-
Page 40: Manage Media
ET4000 Media Server User Manual Figure 5-8 Sub-output and image mapping Manage Media You can add the desired media files to the current media library. Kompass FX3 supports pictures, videos, PowerPoint files, audio media files, NDI, websites, streaming media and sources from data acquisition cards. -
Page 41: Add Local Files
ET4000 Media Server User Manual 5.3.1.1 Add Local Files Click at the bottom left corner of the Media Library area, or right click the area to select Add Local File. Select the target media files and click Open. Kompass FX3 will import the selected files to the media library automatically. - Page 42 ET4000 Media Server User Manual Adjust the text font and style. You can set the following text attributes. : Make the text bold or not. : Italicize the text or not. : Underline the text or not.
-
Page 43: Add Sources From Acquisition Devices
ET4000 Media Server User Manual Set the text display mode in the display area. If Adaptive is selected, the text fills the display area; if Adaptive is deselected, the text is shown in its set size. Note: If the area width or area height is smaller than the text width or height, the text will be cropped. -
Page 44: Add Ndi Input Sources
ET4000 Media Server User Manual Figure 5-12 Add acquisition equipment On the displayed window, enter the capture device name next to Name. Select a data acquisition card name next to Device Name. The system will automatically read the collected resolution and frame rate. -
Page 45: Add Website Input Sources
ET4000 Media Server User Manual x: The horizontal offset from the sent area to the selected screen’s left edge y: The horizontal offset from the sent area to the selected screen’s top edge w: The horizontal width of the sent area ... - Page 46 ET4000 Media Server User Manual Operating Procedure Right click the blank area of Media Library and select Add Website. Figure 5-15 Add website Enter the desired website name next to Resource Name. Enter the tab name in the left text box next to Website URL.
-
Page 47: Add Streaming Media
ET4000 Media Server User Manual Window Mode: There is no output image preview in the stage editing area in Kompass FX3. The output image is displayed on the corresponding screen and can be controlled using the mouse. Click × at the top right corner of the website to close the website and complete adding the website. -
Page 48: Add Control Commands
ET4000 Media Server User Manual Figure 5-18 Add media collection In the All Media area, select the media files you want to add to the media collection Click in the middle to add the selected files to Collection Media. You can click and drag the media to adjust its order in the collection media. - Page 49 ET4000 Media Server User Manual Figure 5-19 Output control Click at the bottom-left corner or right click the blank area and select Add to open the Edit Control Command window. Figure 5-20 Add control commands Enter the control command name next to Name.
-
Page 50: Manage Media Files
ET4000 Media Server User Manual 5.3.2 Manage Media Files Renaming Right click the media file or folder and select Rename. Enter a new name in the text box that appears. Click the media file or folder and press the F2 key. Enter a new name in the text box that appears. - Page 51 ET4000 Media Server User Manual Figure 5-21 Edit programs Adjust the layer size, position, rotation and priority. Figure 5-22 Adjust layers Position adjustment: Drag and move the layer to adjust the layer position quickly, or fill in the values for the following parameters to precisely adjust the layer position.
- Page 52 ET4000 Media Server User Manual In the stage editing area, select the target media. Press the CTRL key and click the mouse to select multiple media. Right click to open the context menu and select Create Group. − For the media in the same group, the same icon appears on the top left of each layer as shown below.
-
Page 53: Set Program Properties
ET4000 Media Server User Manual 5.4.2 Set Program Properties Right click a program to open the context menu as shown in the following, and you can set the program properties as needed. Figure 5-25 Set program properties Rename: Give the program a new name for better management. - Page 54 ET4000 Media Server User Manual − If you set KV program after you add the layers to an empty program, the layers will not follow the layer style and properties in the KV program. Main Media: Set which layer is used as the main media. The playback timing and program switching are all based on the main media.
-
Page 55: Play Programs
ET4000 Media Server User Manual Figure 5-26 Timecode settings 5.4.3 Play Programs After you have completed the program editing, play the programs through either of the following two methods. Click next to the program name in the Program Management area. -
Page 56: Set Layer Opacity
ET4000 Media Server User Manual − Black Screen: After the playback of the current media ends, the output displays a black screen. − Loop Playback: The current media will be played circularly after the playback ends. − Stop Playing: The playback will be stopped after the playback ends. When the media file type is audio, this option is available. - Page 57 ET4000 Media Server User Manual Figure 5-29 Layer image quality Basic Color Settings Color parameters Parameter Description Adjust the brightness or darkness of the image. Brightness The value ranges from 0 to 100 and defaults to 50. Adjust the difference in brightness between light and dark areas of the image.
-
Page 58: Crop Layers
ET4000 Media Server User Manual Color Temperature: Adjust the cold or warm tendency of the image. The value range is [-3000, 10000] and the default value is 0. Move the slide block leftward, the color will be colder; move the slide block rightward, the color will be warmer. -
Page 59: Set Layer Effects
ET4000 Media Server User Manual The cropping takes effect in real time and the cropping result is shown as follows. Figure 5-32 Cropping 5.4.8 Set Layer Effects Layer effect settings include blurring, keying, mask and inverting colors. Click the playing media in the Program Management area or in the Output area to select the media. -
Page 60: Set Webpage Tabs
ET4000 Media Server User Manual Color Keying Color keying is used to key out a solid-color background and replace it with transparency. Click and select the color area to be removed. Pick the desired color. After the color is selected, the picked color, the color Hex and RGB values are displayed next to , or you can also set the Hex and RGB values to specify the color. -
Page 61: Set Scheduled Programs
ET4000 Media Server User Manual Figure 5-34 Sound channel mapping Select the desired sound card from the drop-down list. The default option is the sound card used by Kompass FX3. Please refer to 7.5 Audio Settings for specific sound channel mapping settings. - Page 62 ET4000 Media Server User Manual Figure 5-36 Playback tasks Set the start date and end date of the task in the Effective area. Click next to the effective time to add a new playback task. Figure 5-37 Set scheduled programs Select the desired programs in the Program List area on the left.
- Page 63 ET4000 Media Server User Manual Figure 5-38 Set playback tasks Select the program playback mode next to Mode. The options include Time and Times. Time: The programs will be played by their own durations circularly. Times: The programs will be played according to the set playback times.
-
Page 64: Save Projects
ET4000 Media Server User Manual Current Frame: FTB: After the program playback ends or the playback time reaches the end time, the output image displays the frame when the program stops. Repeat Step 4 to Step 10 to add more plans under the current task. -
Page 65: Link
ET4000 Media Server User Manual Used: The media files that have been imported to the media library and added into the programs All: All the media files that have been imported to the media library Click Package. Link... - Page 66 ET4000 Media Server User Manual Figure 6-2 Link settings Add a backup device. In the Device List area, select the IP address of the device that you want to add as a backup device. Click and drag the selected IP address to the device on the right side as shown in the following figure.
-
Page 67: Update To Backup
ET4000 Media Server User Manual − Power On: Power on the backup or slave device remotely. − Power Off: Power off the backup or slave device remotely. − Restart: Restart the Kompass FX3 software on the backup or slave device. -
Page 68: Disconnect
ET4000 Media Server User Manual Disconnect In the Kompass FX3 of the backup or slave device, go to Link > Disconnect to break the connection between the primary and backup devices or the connection between the master and slave devices. -
Page 69: Output Settings
ET4000 Media Server User Manual Cache Path: Select the save location for the media files downloaded from the primary device. − Click Browse to select the desired folder. − Click Open to open the folder where the files are saved. -
Page 70: Multiple Displays
FX3 conveniently. For details on the commands and command writing rules of remote controlling and controlling via a control device, please see Control Protocol of NovaStar Playback and Control Software. Go to Settings > External Control to open the External Control window. -
Page 71: Control Via Serial Port
ET4000 Media Server User Manual Occupied: Re-enter a port number and click Listen again to check. Not occupied: The UDP control settings are completed. Control via TCP/IP Protocol Select TCP/IP to enable TCP/IP control. In the text box next to Port, enter the TCP/IP port number of Kompass FX3. - Page 72 ET4000 Media Server User Manual Figure 7-5 Connections for App control Connection Requirements The media server, H series device and Pad device with VICP installed must be on the same network segment. Media Server Configuration Obtain the IP address of the media server.
-
Page 73: Audio Settings
ET4000 Media Server User Manual IPv4 address indicates the IP address of the media server. Configure the listening port of the media server. 1. Run Kompass FX3 and then go to Settings > External Control to open the external control settings window. -
Page 74: Help
ET4000 Media Server User Manual Figure 7-9 Audio settings Three mappings are displayed by default. You can click New at the top right to add a new mapping. The drop-down list shows all the sound card devices of the device. - Page 75 ET4000 Media Server User Manual Figure 8-1 Transcoding assistant Click Add at the bottom to open the local folder where you can select the desired file. You can also add multiple files by pressing the Ctrl key and selecting the files simultaneously.
-
Page 76: Play Log
ET4000 Media Server User Manual − Remove: The transcoded video display pure images without any audio. Repeat Step 4 Step 5 to set the transcoding parameters for other video files. Click Transcode and the system will automatically start the transcoding process. -
Page 77: User Manual
ET4000 Media Server User Manual User Manual On the menu bar, go to Help > User Manual, or press the F1 key on the keyboard to open the user manual. About On the menu bar, go to Help > About to view the software information. -
Page 78: Specifications
ET4000 Media Server User Manual Specifications Power 100–240V~ 10–5A 47–63Hz Electrical connector Specifications Power 500 W consumption Temperature 0° C to 40° C Operating Environment Humidity 0% RH to 80% RH, non-condensing –10° C to +60° C Temperature Storage Environment...
Need help?
Do you have a question about the ET4000 and is the answer not in the manual?
Questions and answers