Table of Contents
Advertisement
Quick Links
Advertisement
Table of Contents

Related Manuals for SOPHION BIOSCIENCE QPatch Compact


Summary of Contents for SOPHION BIOSCIENCE QPatch Compact
- Page 1 QPatch Compact User Manual GUIDE37128-2 1 / 53...
-
Page 2: Table Of Contents
Troubleshooting ......................35 6.1 Issues during instrument startup ....................35 Problem: QPatch Compact does not power up and the touch screen monitor remains black? ........35 Problem: The login screen does not appear after the instrument is turned on? ............35 Problem: I cannot log into the instrument? ......................35... - Page 3 6.2 Issues during instrument use....................36 Problem: Liquid accumulates inside the manifold – removal of manifold ..............36 6.3 Issues when running an experiment on the instrument..............37 Problem: The instrument rejects the QPlate after attempting to read the barcode.............37 Problem: The priming of the QPlate fails ......................37 Problem: The priming of some QPlate sites fails ....................37 Problem: The positioning of cells fails too often....................38 Problem: The success rate is consistently lower than expected ................38...
-
Page 4: Introduction To Qpatch Compact
The system contains a database for data storage and software for setting up, executing, and analyzing patch clamp experiments. As an integral part of the QPatch Compact system, this manual must be easily accessible to users. This user manual is also accessible from the QPatch Compact screening station software (SSS). -
Page 5: Qplate 8/8X
Once you start using a QPlate 8, it can be used for one week. When not actually in use, partially used QPlates 8 should be kept in a desiccator. System architecture QPatch Compact consists of: • The instrument which handles the QPlate, cells, compounds, and performs the actual experiments. -
Page 6: Pipetting Light Guidance
This also applies to all information on experiment settings and execution. Users must login, and the system records which users performed which actions in the system. QPatch Compact is delivered with a pre-configured and pre-installed database which is ready to operate with the instrument. -
Page 7: Compound Addition For Ligand-Gated Experiments
Please consult our video tutorials “How to prepare cells for QPatch Compact” and “How to start your experiment on QPatch Compact” available on our self-learning QPC support site. 1.6.7 Compound addition for ligand-gated experiments... -
Page 8: Sophion Analyzer Software
Sophion Analyzer software The Sophion Analyzer software is used for designing and planning experiments and for analyzing recorded data. It is used to design voltage protocols and whole cell protocols (pressure protocols) as well as documenting the cell type and ion channel studied. These protocols cannot be modified during the recording experiment. -
Page 9: Startup And Shutdown Procedures
(visible on circulator display). Then turn on QPatch Compact by pressing the power button on the left side of the instrument, a white ring will illuminate as long as it is turned on. The touch screen will activate and QPC will start initializing. -
Page 10: Temperature Control
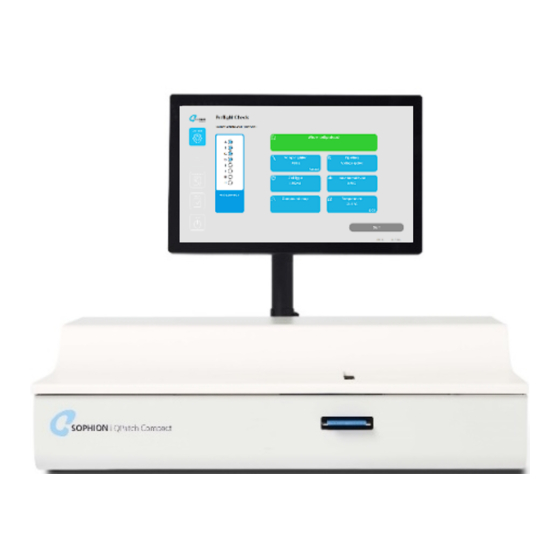
Once logged in, the Pre-flight screen will appear and the QPlate icon appears indicating to insert the QPlate. The light guidance next to the manifold will indicate the direction in which to insert the QPlate. Figure 3 QPatch Compact preflight screen 2.1.3 Temperature control Press the temperature control icon in the lower right corner to enter the temperature control settings. -
Page 11: Conducting An Experiment
1. Set up the protocols Define a whole-cell protocol and the relevant voltage protocols using Sophion Analyzer software. Please refer to the QPatch Compact Assay Setup Guide to learn how to set up protocols. 2. Prepare the QPlate Acclimatize the QPlate (while it is still in the vacuum-packed plastic pocket) at room temperature for at least 1 hour before use. -
Page 12: Terminating A Running Protocol
• Depress the plunger completely – go past the first stop to the second stop • Immerse the tip in the liquid. Slowly release the plunger to full extension • Dispense by pressing to the first stop • When using the included motorized pipettes, make sure the pipette is set to “reverse pipetting”... -
Page 13: Operating The System
Operating the system Cells The success rate for experiments on QPatch Compact highly depends on the cell quality. QPatch Compact is optimized for using immortalized cell lines sub-cultured as adherent cell lines. The optimal harvesting procedure for obtaining viable and single cells in suspension should be determined for each cell line. -
Page 14: Login Screen
(Figure 5). Figure 5 QPatch Compact logon screen Touch the username field and an on-screen keyboard will pop up in which you can enter your username. -
Page 15: Left-Side Menu Bar
4.5.3 Left-side menu bar In the instrument software a left-side menu is always visible when logged in. The menu allows easy navigation between the functions. Table 1 Software button explanations Click the button to enter preflight mode. In this window you can initiate and set up your experiments. Not applicable Click the button to open maintenance mode. -
Page 16: Operation
Operation By pressing the “Operation icon” the Preflight Check window will appear. This is where each patch clamp run is set up. 4.1.1 Preflight Check screen The Preflight Check screen opens after login or when selecting the ‘operation’ button, located at the top of the left-side menu bar. -
Page 17: Maintenance Menu
4.1.2 Maintenance menu While in Preflight Check and before setting up a run, the user can enter the maintenance menu by clicking the Maintenance icon on the left-hand side of the menu bar (Figure 7). Figure 7 Maintenance menu Here’s access to the Settings menu, the Temperature control and the Manifold menu. IN the setting menu, user can preset default settings before a run and the Temperature control menu and Manifold menu are mainly for performance tests and troubleshooting purposes. -
Page 18: Settings Menu
4.1.3 Settings menu The settings menu allows the user to preset 3 user defined settings, see Figure 8. These settings are not accessible during a run and must be preset before the run starts to be applied. 1) The minimum dispense delay for liquid addition 2) Whether the Repeat protocol setting when applying voltage protocols should be on or off by default 3) Activation of the audio cue (single beep) at dock &... - Page 19 The sites are highlighted accordingly by white light on the QPatch Compact next to the manifold (see Figure 9). Figure 9 Preflight check – select the recording sites you want to record in your experiment...
-
Page 20: Setting Up The Compound Map
4.1.4 Setting up the compound map The compound map is set up by entering the compound map overview as seen below: Figure 10 Compound map Any serial dilution of the compound is set up by entering the name, the compound stock concentration, the number of dilution steps per compound and the dilution factor between each step. - Page 21 The serial dilution is subsequently indicated by a gradient of that color as indicated below. Press OK to return to the Preflight Check screen (Figure 12). Additional compounds and concentrations are easily added to the compound map while the experiment is running. Figure 12 Serial dilutions generated in the compound map overview After pressing “Start”...
-
Page 22: Priming The Qplate
Once the hardware check has completed, follow the on-screen instructions. 4.1.5 Priming the QPlate At this point the instrument will ask the user to dispense intracellular (IC) liquid into the wells chosen. These sites are also highlighted by blue light at the manifold level. Figure 14 The instrument prompts the user to dispense intracellular (IC) liquid into the well. - Page 23 Once the IC liquid has been added the instrument will start priming the wells as shown below: Figure 15 Priming the wells with intracellular liquid Next, the user will be prompted to dispense the extracellular (EC) liquid into the wells. The corresponding sites are indicated by blue light next to the manifold.
- Page 24 (Figure 17). Figure 17 At this stage QPatch Compact will prompt the user to add the cells to the wells The on-screen countdown will initiate for each of the sites, one by one and count down to 0.
-
Page 25: Live View Panel
Note! Make sure to insert the pipette tip all the way through the manifold until you reach firm resistance and the collar of the pipette tips rests on the manifold shoulder. This indicates that the correct height for pipetting is reached. 4.1.6 Live view panel When starting experiments from the preflight screen, a live view panel (Figure 19) will appear. - Page 26 Figure 20 Several parameters are modifiable for pre-defined voltage protocols. The protocol is applicable to either 1 site or all active sites. 4.1.7.1 Voltage protocol favorites The user can optionally choose specific voltage protocols and highlight these as favorites by highlighting the protocol and clicking the “Add favorite”...
- Page 27 Next the compounds are added by pressing the grey “Compound” icon on the Live View panel. Choose the desired compound from the previously defined compound map. The compound map includes saline, a reference, and a vehicle. Upon choosing the compound, the user can either select this compound to that specific site (Site X only) or select it to all active sites (All...
-
Page 28: Job Finished
The Live View panel shows the real-time progress of the experiment (Figure 23). Figure 23 The Live View shows the real-time progress of the experiment Here the lower panel displays various plots, which can be chosen from the list on the right-hand side, in accordance with the user’s preferences: R-Series;... -
Page 29: Results Screen
4.1.9 Results screen Once the run has finished, completed run results can be viewed from the Results screen. The following experiment information is displayed: ID; NAME; Experiments started/completed; Execution time; Created by; Cell type; Ion channel (Figure 25). Figure 25 Completed Results screen 4.1.10 Log out screen The following information is displayed on the Log out screen: screening station name;... - Page 30 Figure 26 Log out screen Click “Logout” to change user or to log out from the system. GUIDE37128-2 30 / 53...
-
Page 31: Instrument Cleaning And Maintenance
Instrument cleaning and maintenance Daily cleaning The following daily cleaning should be carried out at the end of each day: 1. Remove the used QPlate. If all sites are used, then dispose of the QPlate according to guidelines for disposal of hazardous substances. 2. - Page 32 Connect this piece to the lower inlet (feed inlet) on the thermoelectric circulator close to an open reservoir or the open glass bottle included in the draining kit. Ensure it is snapped firmly into place. The lower chamber will now drain water into the open glass bottle, see Figure 28. Figure 28 Draining the lower circulator chamber To drain the upper chamber, connect the drain tubing to the upper connector (return) close to a reservoir or the open glass bottle included.
-
Page 33: How To Drain The Qpatch Compact For Water Before Shipping
How to drain the QPatch Compact for water before shipping In order to ship the QPatch Compact safely, the instrument must be drained for water following the below procedure: Locate the short connector tubing from the draining kit and connect it to the upper inlet (feed) on QPatch Compact, see Figure 30. -
Page 34: Decontamination Before Shipping To Sophion Bioscience
Turn on the vacuum pump and observe as the water is drained from the QPC into the bottle, see Figure 32. Turn off the vacuum and disconnect the draining bottle. The QPatch Compact is now drained for water. -
Page 35: Troubleshooting
If the below troubleshooting guide doesn’t resolve the issue at hand, please send an email to qpcsupport@sophion.com describing the issue in question. If you do need assistance from Sophion Bioscience support, please be prepared to share log and debug messages since forwarding these will speed up our troubleshooting process. Issues during instrument startup Problem: QPatch Compact does not power up and the touch screen monitor remains black? Check if the cooling fans start turning on the back of the instrument. -
Page 36: Issues During Instrument Use
Issues during instrument use Problem: Liquid accumulates inside the manifold – removal of manifold 1. Ensure the manifold is in home position – consult section 6.4.3. Turn off the QPC. Press down the two metal bars (marked red) to loosen the two guiding pins. -
Page 37: Issues When Running An Experiment On The Instrument
Inspect the QPlate where the priming has failed. Check if liquid droplets are present in other ▪ locations than in the pipetting wells and waste reservoir. If droplets are misplaced, please contact Sophion Bioscience A/S to get support. ▪ Chip resistance should normally be within 1–3 MOhm on single hole plates and within 100kOhm ▪... -
Page 38: Problem: The Positioning Of Cells Fails Too Often
Take a sample from the cell vial. Ensure that the standard operating procedures (SOPs) for cell culturing and harvesting have been followed. See our “Guide for preparation of cells and solutions” available on our QPatch Compact techsupport site. For further technical support please contact us at qpcsupport@sophion.com. -
Page 39: Manifold Menu
To move the manifold to home position, activate this function. Once moved to home position, the user can start replacing the manifold eg. 6.4.4 Move to transport position To prepare the QPatch Compact for safe transport follow these steps: • Insert the red transport QPlate (the red plastic plate without wells or printed circuit board on the back) into the QPlate slot, see Figure 35. -
Page 40: Recover From A Jammed/Stuck Manifold
6.4.5 Recover from a jammed/stuck manifold In case of unforeseen mechanical events, the manifold may be jammed into a position where it will not release itself during normal operation. Follow this guide to recover the manifold via the built-in recovery function. 6.4.5.1 Start up and attempt homing 1. - Page 41 6.4.5.2 Run manifold recovery function 1. Enter Maintenance menu Figure 36 Manifold menu Enter the Manifold menu Figure 37 Manifold menu Click “recover from jam” button Press the “Recover from jam” button in the “Manifold” menu to start the recovery process. A countdown timer next to the button will show the remaining time for the process.
- Page 42 The recovery function will attempt moving the manifold back and forth between the intra- and extracellular positions via a forced move. The instrument may make a low-pitched humming during the process. This is normal. The humming should stop during the process or at the latest a few seconds after the countdown has ended.
-
Page 43: Conducting A Pressure Test
6.5 Conducting a pressure test In order to make sure the QPatch Compact instrument is working as expected, e.g. after shipping or service, it is possible to execute a pressure test to ensure that pressure connections to the QPlate are leak tight within specifications. -
Page 44: Conducting An Artificial Reference Qplate (Arq) Experiment
C:\QPatchII\tools folder. Conducting an artificial reference QPlate (ARQ) experiment In order to make sure the QPatch Compact instrument is working as expected, e.g. after shipping, service, or for general troubleshooting of instrument functionality, it is possible to execute standard non-biological assays such as the one below. -
Page 45: Priming A Qplate 8/8X
Press ”End all experiments”. Priming a QPlate 8/8X In order to make sure the QPatch Compact instrument is working as expected, e.g. after shipping, service, or for general troubleshooting of instrument functionality, it is possible to execute standard non-biological assays such as the one below. - Page 46 • Depress the plunger completely – go past the first stop to the second stop • Immerse the tip in the liquid. Slowly release the plunger to full extension • Dispense by pressing to the first stop • If you use a motorized pipette, select “reverse pipetting” The instructions will take you through priming of a QPlate.
-
Page 47: System Requirements & Specifications
This is to ensure that a disconnection can be made in case of emergency. 7.3 Environmental conditions QPatch Compact is designed for indoor use, primarily for operation in commercial and university laboratories. The hardware of the instrument will operate safely in the ambient temperature range +15°C to +30°C. -
Page 48: Database
The Analyzer software is installed on the instrument and can access the database in a standalone setup without external connection. The QPatch Compact can be connected to a network enabling the Sophion Analyzer software to run on other computers and access the database on the instrument. - Page 49 The capacitance compensation is good if the voltage step (V max – V min) and total capacitance ) are located below the curve depicted in Figure 40. total Figure 40 Relationship between and V – V total cmd max cmd min Digital filters are •...
-
Page 50: Legal Statement
Sophion, QPatch and QPlate are registered trademarks governed by Sophion Bioscience A/S in one or more countries. All other trademarks are the property of their respective owners. Compliance The QPatch Compact instrument complies with the directive and standards as described in the QPatch Compact Safety Guide. Disclaimer Sophion Bioscience A/S, Sophion Bioscience KK and Sophion Bioscience Inc. -
Page 51: Terms And Abbreviations
Table 3 Terms and abbreviations Term or abbreviation Explanation In QPatch Compact the experimental set-up is called an assay. It defines the set of parameters Assay used. For example, the set-up includes parameters for voltage control, sampling, resistance and capacitance and information on the types of cells and ion channels. - Page 52 Screening station The QPatch Compact instrument. Sophion Analyzer The administration, planning and analysis software package for QPatch Compact. software A measurement configuration in which it is possible to measure the response from ion channels Whole-cell configuration expressed in the entire cell membrane in the open configuration.
-
Page 53: Declaration Of Conformity
10. Declaration of conformity (appendix II) GUIDE37128-2 53 / 53...
Need help?
Do you have a question about the QPatch Compact and is the answer not in the manual?
Questions and answers