
Summary of Contents for PROAQUA PRO-WELL-1E
- Page 1 INSTALLATION GUIDE WHOLE-HOUSE WELL WATER FILTRATION | PRO-WELL-1E PURE WATER. NOTHING ELSE.
- Page 2 TWO (2) FREE YEARS of additional system coverage The PRO-WELL-1E includes a two-year warranty. Register your product within 60 days from time of purchase to add an additional two years of protection covered under our PRO+AQUA warranty. 1. Locate the serial number on the system.
-
Page 3: Table Of Contents
PURE WATER. NOTHING ELSE. CONTENTS SECTION PAGE INSPECTION & PREPARATION ............4 PRODUCT DIMENSIONS ..............7 PRE INSTALLATION ................8 BYPASS SETUP ..................9 VALVE INSTALLATION ................10 SYSTEM INSTALLATION ..............12 VALVE PROGRAMING ................14 ADVANCED SETTINGS ............... 18 FEATURES & DISPLAY ..............22 INSTALLATION DIAGRAM .............. -
Page 4: Inspection & Preparation
Inspection & Preparation PRO+AQUA filtration systems are designed in California, USA and are made from high quality, commercial grade filters and components. IMPORTANT! Before installing - Please read the entire manual and become familiar with instructions and parts needed before proceeding with the installation. Record the date of purchase in your manual for future reference: Date of purchase: System Inspection Before Starting... - Page 5 Inspection & Preparation Required Tool List for System Installation IMPORTANT! • Channel locks • Teflon tape Additional tools may be required if modification to home plumbing is required. • Adjustable wrenches • Razor knife • Screwdriver IMPORTANT! The following condition for feed water supply must be met or warranty will be void and manufacturer assumes no responsibility for damage to system or property.
- Page 6 Inspection & Preparation Installation Safety Guide • Handle with care when moving the water filtration system. Do not turn upside down, drop, drag, or set on areas with sharp protrusions. • The system works on standard 120v power plug only. Do not use any other transformer except the one that is included with the system.
-
Page 7: Product Dimensions
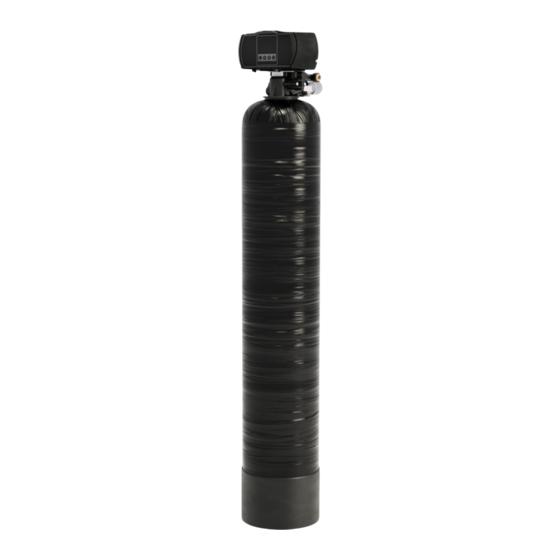
Product Dimensions PRO-WELL-1E A. Total height: 55” B. Tank width: 9” C. Tank height: 48” D. Tank base: 9.5” www.proaquawater.com... -
Page 8: Pre Installation
Pre Installation IMPORTANT! Locate and test the main water supply valve to the home before installing the system. If the main water supply valve fails to shut off the water completely during the test, we recommend contacting a licensed plumber to fix the valve before starting the installation. WARNING! If the system is installed on a metal (conductive) plumbing system, i.e.. -
Page 9: Bypass Setup
Bypass Setup Bypass Assembly & Installation Depending on your installation, we have provided various connection options in 1” and 3/4”. Installation using 1” NPT fittings Installation using 1” or 3/4” quick connect adapters Apply teflon to the fittings (included) and install to Apply teflon to the quick connect fittings (included) and the bypass valve using an adjustable wrench. -
Page 10: Valve Installation
Valve Installation Lubricate both O-rings on Install the upper basket the bottom of the control on the bottom of the SMALL valve (inner and outer). valve by lining up the O-RING tabs, pressing in, then TABS LARGE turning the basket O-RING counterclockwise to lock it in place. - Page 11 Valve Installation Hand-tighten the valve then snug it further by lightly tapping it with the palm of your hand. DO NOT over-tighten or use tools to tighten the valve or damage could occur. www.proaquawater.com...
-
Page 12: System Installation
System Installation IMPORTANT! DO NOT SOLDER WHILE SYSTEM IS CONNECTED. Any solder joints being soldered near the valve must be done before connecting any piping to the valve. Failure to do this could cause unrepairable damage to the valve. Connecting the System This system includes both 1”... - Page 13 System Installation A: Place the unit in the bypass position. B: Slowly turn on the main water supply to the system. C: Locate and the nearest faucet to the system and remove the faucet screen or any fittings on the faucet spout. D: Turn on the cold water for 10 minutes to flush air, loose media, and foreign material resulting from the plumbing work.
-
Page 14: Valve Programing
Valve Programing Overview: Display Overview A. Time of day B. Status C. Time remaining D. Backwash mode timer The back light on the screen will go off automatically after one minute if no buttons are pressed. To light it up again press any button on the touch pad. - Page 15 Valve Programing System Startup A: Plug the power transformer into an approved power source. Connect the power cord to the valve. When power is supplied to the control, the screen will display the time of day, time remaining and the mode. B: Press and hold the CYCLE button for 5-6 seconds.
- Page 16 Valve Programing Setting Time of Day Default setting 12:00 (24 hours) A: Press SETTINGS button and UP button simultaneously to enter into programing mode. Press the SETTINGS button to accept and continue. FLASHING FLASHING B: Press UP or DOWN buttons to change hours.
- Page 17 Valve Programing Congratulations! Your system is ready for use. Please document the system installation date and maintain the system at its recommended interval. In the following pages, you will find the Advanced Settings section. Continue to this section only if you require a special application or customization.
-
Page 18: Advanced Settings
Advanced Settings NOTE: The following settings have been pre-set from the factory and are only meant for special application that requires customized settings. Continue only if you require customization of the following settings. Setting the Valve Mode Default setting is “Timer”. Press the SETTINGS button to enter sub menu. - Page 19 Advanced Settings Backwash Time and Hours Override (Change only if needed.) FLASHING Timer Mode (DEFAULT) Default: 2:00 AM every 072 hours. Hours Override range: 3, 4, 6, 8, 12 hours, then every 24 hours (24, 48, 76,…) See below to adjust. FLASHING Press SETTINGS button to enter sub menu.
- Page 20 Advanced Settings Setting the Backwash Time FLASHING Press SETTINGS button to enter sub menu. Default setting is 015. See below to adjust. FLASHING Set the Time A: Press UP or DOWN buttons to change backwash time (Minutes). Range: 0 - 999 FLASHING B: Press the SETTINGS button to accept and continue to next digit.
- Page 21 Advanced Settings Setting the Brine Time (SKIP – this setting is not used) FLASHING A: To skip, press the UP button to change to SET-7. B: Press the SETTINGS button to accept and continue. FLASHING Setting the Rapid Rinse Time Default setting is 010 Minutes.
-
Page 22: Features & Display
Features & Display Memory During Power Failure All program settings are stored in permanent memory. Current valve position, cycle step elapsed, and time of day are stored during the power failure. Resetting the current time is necessary when powering up. If the valve stopped at a backwash stage during power failure, the valve will return to the prior position when it powers up. - Page 23 Features & Display Restore Factory Settings A: Unplug the power. B: Press and hold the CYCLE button while plugging in the power. C: Release the CYCLE button. The system is now restored. Manual Queued Backwash A: When the valve is in service position press the CYCLE button to activate the queued backwash.
- Page 24 Features & Display Manual Immediate Backwash Immediate Backwash When the valve is in service position, press and hold the CYCLE button for 5-6 seconds. An immediate backwash will be initiated. Examples: “BW” flashing (ready to backwash). The piston is moving to position. The piston is in “BW”...
- Page 25 Features & Display Examples (continued): The piston is in “RR” position and the timer starts to count down. Press the CYCLE button to force- skip to next cycle. The “BF” cycle will skip back to “SR” (service) position. Stop Backwash When backwashing, press the UP and DOWN buttons simultaneously to stop.
-
Page 26: Installation Diagram
Installation Diagram GROUND JUMPER WIRE OPTIONAL WATER BYPASS BALL VALVE TO HOME More info GALVANIZED / BRASS PIPE More info OPTIONAL UV FILTER OPTIONAL WATER SOFTENER WELL WATER FILTER PRO-S-80E PRO-WELL-1E Have questions? Call 1-800-980-3335... - Page 27 Installation Diagram More info BALL VALVES GALVANIZED / BRASS PIPE WELL WATER PRESSURE TANK STAGE 3 STAGE 2 STAGE 1 HOUSING HOUSING HOUSING OPTIONAL 3-STAGE WELL WATER FILTER PRO-100-E FROM WELL WATER SOURCE FROM CITY WATER SOURCE www.proaquawater.com...
-
Page 28: Additional Info
To prevent possible water damage, housings should be replaced every 4 years (5 years for clear housing). System Maintenance The PRO-WELL-1E systems require little maintenance. The digital valve automatically flushes the system every few days, there is no input needed from the user. The media may be replaced after it has been exhausted when you notice the same water issues return. - Page 29 More than filtration – it’s peace of mind. PRO+AQUA: Redefining Water Filtration. Unmatched Performance. Uncompromising Quality. Explore more at www.proaquawater.com!
-
Page 30: System Troubleshooting
System Troubleshooting Problem Cause Correction 1) The control A) Transformer damaged A) Replace the transformer fails to Backwash B) Electronic controller or sensor B) Replace or repair automatically damaged 2) Backwash at A) Timer improperly set, due to A) Reset timer wrong time power failure 3) loss of capacity... -
Page 31: Limited Product Warranty
Limited Product Warranty PRO+AQUA warrants that your new Well Water Filtration System is built of quality material and workmanship. When properly installed and maintained, it will give years of trouble free service. PRO+AQUA will replace any part on the valve or electronics which fails or the media within (2) two years (4 years with extended warranty) from date of manufacture, as indicated by the serial number, provided the failure is due to a defect in material or workmanship. - Page 32 PURE WATER. NOTHING ELSE. For assistance, please feel free to reach out to us Mon - Fri 9am - 5pm PT (800) 980-3335 or via email at hi@proaquawater.com www.proaquawater.com Version 2.0 092923 © PRO+AQUA. All rights reserved.
Need help?
Do you have a question about the PRO-WELL-1E and is the answer not in the manual?
Questions and answers