
Summary of Contents for Creality Nebula
- Page 1 V2.0 Creality Nebula Smart Kit Instruction Manual SHENZHEN CREALITY 3D TECHNOLOGY CO., LTD.
-
Page 3: Fcc Caution
FCC Caution: Any Changes or modifications not expressly approved by the party responsible for compliance could void the user's authority to operate the equipment. This device complies with part 15 of the FCC Rules. Operation is subjectto the following two conditions: (1) This device may not cause harmful irnterference, and (2) this device must accept any interference received, including interference that may cause undesired operation. -
Page 4: Precautions For Use
(used), abide by professional ethics, pay attention to safety obligations, and strictly prohibit the use of our products or equipment for any illegal purposes. Creality will not be responsible for any violators' legal liability under any circustance. Firmware upgrade 1. -
Page 5: Product Description
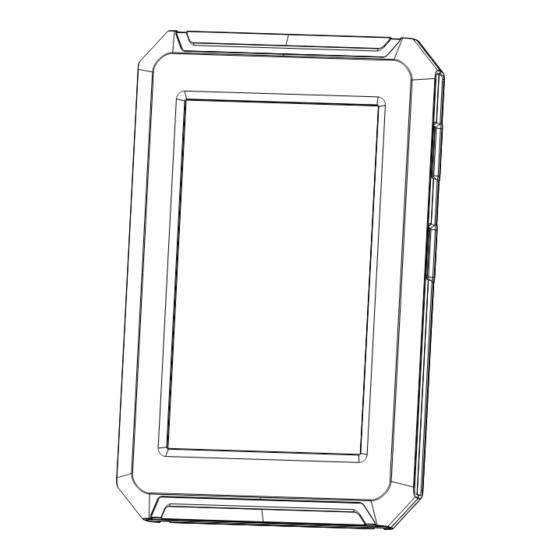
1. Product description Product name: Creality Nebula PadN Model: NC01 Product model: N-Pad 01 Highest Resolution: 1920*1080 Main control chip: dual-core 1.2GHz Field of View: H: 95° D:112° Storage memory: Night Vision: Supports automatic switching Screen type: Manual Focus: Supports MF, knob adjustment Screen size: 4.3inch... - Page 6 Printer cable interface 3.Product view and interface description G-Sensor cable Nebula Pad Independent Power Connector (5V): When the Nebula pad lacks power supply while connected to peripherals like cameras, it requires a sepa- rate power supply. USB 1 Connect 5V...
-
Page 7: Installation Steps
2.Place the screen bracket on the side of the profile on the right, and tighten it with 3 M5X10 screws and T-nuts; 3.Align the Nebula pad with the bracket and slide down to lock it tightly 4.Connect the display cable. - Page 8 5. Boot guide and device interface introduction 5.1 Boot guide...
- Page 10 Notice: The current UI is for reference only. As the firmware is constantly being upgraded, please refer to the latest firmware UI on the official website.
- Page 11 5.2 Printer self-test...
- Page 14 Warm reminder: If there is an abnormality during the self-inspection, you can first refer to the FAQ to find the cause of the fault; or scan the QR code to report the fault, and then solve the fault through after-sales service Notice:...
- Page 15 5.3 Device interface introduction Heated bed temperature Nozzle temperature Notice: The current UI is for refer- ence only. As the firmware is constantly being upgraded, p l e a s e r e f e r t o t h e l a t e s t fi...
- Page 16 Preparation Function settings such as axis movement/temperature/feed and retreat, model fan cooling, etc. can be set through the preparation interface.
- Page 17 Long press the model to select multiple Print file preview and copy to the USB drive. *Can copy up to 3 models Local and USB drive model files can be managed on the print file preview interface...
- Page 18 Notice: The current UI is for refer- ence only. As the firmware is constantly being upgraded, please refer to the latest firmware UI on the official website. The remaining time Print page Print time Model fan on/off Click on the model file to view the file details * Tick Print Calibration to improve print quality.
- Page 19 Setting Function settings such as Nebula pad system, network, and camera can be set through the Setting.
- Page 20 Notice: T h e c u r r e n t U I i s f o r r e f e r e n c e o n l y . A s t h e firmware is constantly being upgraded, please refer to the l a t e s t fi...
-
Page 21: Remote Control
6. Remote control 6.1Device interface in Creality Print slicing software Ender 3 Pro Ender 3 Pro Add device: a. Scan to add → select device... - Page 22 Click "Settings" → "Network", select the connected network to view the IP address Add device: b. Manually enter the IP address to add the device...
- Page 23 Ender 3 Pro 文件:立方体_Ender 3 Pro···76h29m.gcode Device list...
- Page 24 文件:立方体_Ender 3 Pro_0.4_CR-ABS_1.75_76h29m.gcode 立方体_Ender 3 Pro_0.4_···1.75_76h29m.gcode Device print information details Notice The current UI is for reference only. As the firmware is constantly being upgraded, please refer to the latest firmware UI on the official website.
- Page 25 6.2Creality cloud APP control After binding the Creality cloud account on the Creality Nebula Pad, you can remotely control it through the app...
- Page 27 MADE IN CHINA Join the Facebook Community https://www.facebook.com/groups/sonicpad +86 755 3396 5666 cs@creality.com...
Need help?
Do you have a question about the Nebula and is the answer not in the manual?
Questions and answers