Table of Contents
Advertisement
Quick Links
A subdivision of The DAAN Groups
USER MANUAL
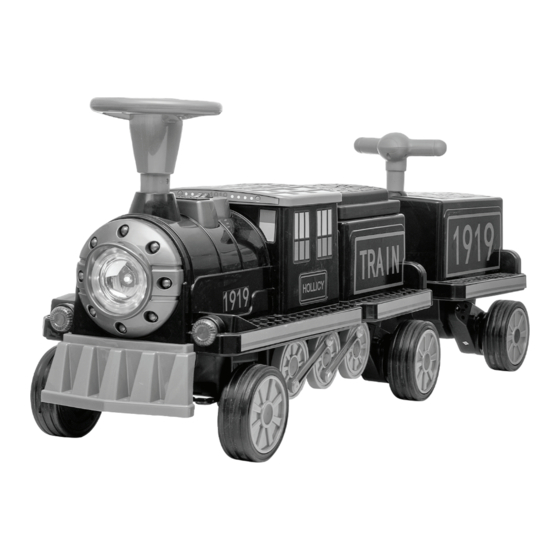
MODEL: DG-81919
LOCOMOTIVE TRAIN
CONTACT US
Before returning your product, please contact us first! Voltz
Toys Customer Service can assist you with any replacement
parts, damages, or defective issues reported. You can contact
us directly at www.voltztoys.ca.
Email: help@voltztoys.ca
Phone number: 1-888-338-6589
Head Office: Unit 7-3600A Laird Rd, Mississauga, ON, L5L
6A6
COMPLIANCE STANDARDS:
SOR/2011-17
SOR/2018-138
SOR/2016-195
SOR/2016-302
SOR/2018-83
SOR/2016-188
SOR/2014-254
EN71
ASTM F963-17
CPSIA
ENGLISH
Advertisement
Table of Contents

Summary of Contents for DAAN Groups VOLTZ TOYS DG-81919
- Page 1 Toys Customer Service can assist you with any replacement parts, damages, or defective issues reported. You can contact us directly at www.voltztoys.ca. A subdivision of The DAAN Groups Email: help@voltztoys.ca Phone number: 1-888-338-6589 Head Office: Unit 7-3600A Laird Rd, Mississauga, ON, L5L...
- Page 2 Please read the manual before using the product. The manual and carton contain important information. Please keep the manual for later references. Failure to follow the instructions in the manual may result in damages, acci- dents, or defective issues with the product. To improve the product and quality, we may alter the structure, appearance, packing method, assembly method, and product function without any no- tice.
-
Page 3: Parts List
PARTS LIST... -
Page 4: Product Specifications
PRODUCT SPECIFICATIONS Car Model DG-81919 Battery 12V7AH Suitable age 37-95 months Weight Limit 60 kg Product Size (90+49.7) x 38 x 54.5 cm Speed 3-5 km / hour Charging time 8-12 hours Charger AC 110-240V (input) DC 12V-1000mA (output) Fuse Auto-reset fuse ASSEMBLY PREPARATION •... -
Page 5: Trailer Storage
PARENT-CHILD FUNCTION The back seat of the engine could be flipped. Lower position (most seat in the slot) will be used for kids and higher position (minimal seat in the slot) will be used for parents. See diagram for details. TRAILER STORAGE The seat cover could be open and the space could be used for storage. - Page 6 QUICK RELEASE DIAGOSE PLATE Unscrew the screws on the side of the red seat plate, remove the plate, it is convenient for internal electrical maintenance. 0. ASSEMBLY PREPARATION Parts required: N/A The iron part is locked at the bottom of the car, unscrew and remove it be- fore installation.
-
Page 7: Front Wheel Assembly
1. FRONT WHEEL ASSEMBLY Parts required: #3, #11, #12 Start the installation with the engine in up-side-down position. Slide the front wheel (no gear teeth) on to front axle, followed by wash. Secure the connection with cotter pin, then place and secure the wheel cover. Repeat for the other side. - Page 8 3. SUPPORT FRAME ASSEMBLY Parts required: #11, #13 Place the support legs at the designated position, fix the connection with 4 x 4*12 large flat head screws each leg.
-
Page 9: Steering Wheel Assembly
4. STEERING WHEEL ASSEMBLY Parts required: #2, #11 Connect the power cable from the steering wheel to engine body. Slide as much cable as possible through the opening. Slide the steering wheel through the steering column, align the steering wheel bolt opening with steering column opening. -
Page 10: Battery Connection
5. BATTERY CONNECTION Parts required: N/A Unscrew the screws from the back of the red seat plate, unlock the latch and remove the seat plate. Insert the safe fuse in the cabinet to designated spot as shown in the diagram. Place the seat plate back and secure it with 2x screws (removed previously). -
Page 11: Trailer Assembly
ATTENTION: The following trailer is the optional specification, please as- semble as the type you purchased. 6. TRAILER ASSEMBLY Parts required: #4, #5, #11, #12 Starting installation in up-side-down position. Slide the axle through the designated opening. Then slide the motors through the axle, connect ca- bles, then place it all the way in. - Page 12 7. TRAILER SUPPORT FRAME ASSEMBLY Parts required: #11, #13 Place the support legs at the designated position, fix the connection with 4 x 4*12 large flat head screws each leg.
- Page 13 8. TRAILER AND LOCOMOTIVE CONNECTION Parts required: #8, #11 Install the trailer connection beam into the designated slot. Turn the unit over, attach the trailer to the locomotive. Slide the beam to the adapter then to the locomotive, align the opening, put the connection pin through and secure the connection with washer and cotter pin.
- Page 14 9. TRAILER HANDRAIL ASSEMBLY Parts required: #9 Slide the handle into the designated slot, press firmly until it locks. Note, the handle should point to the back.
- Page 15 DASHBOARD Horn Forward/ MP3 player Backward Pedal Charging port Power on/off MP3 PLAYER Music Music Music Music Music LCD display USB slot SD card slot AUX port Mode Next/Volume Play/Pause Previous/ down Volume up...
-
Page 16: Security Warning
FUSE This car is equipped with an auto-reset fuse. If the car stops suddenly while driving, it is caused by the instantaneous current exceeding, enabling the fuse to trip. This will result in the car disabling for about 8 seconds, and this fuse can be reset. - Page 17 10. To maintain product life and safety, avoid damaging the charger, battery, or electrical circuit. The car must use the default configuration of the dedicated charger and power supply. 11. When inactive, disconnect the car’s power by unplugging the (red) bat- tery wire, ensuring all switches are in the “STOP”...
-
Page 18: Charging Procedures
WARNING 1. The car should not be driven on dangerous terrain or environments. This includes the road, bodies of water, or obstacles. 2. Install batteries with correct polarity to avoid short circuits. 3. Charging is to be done by adults. 4. - Page 19 WARNING 1. The assembly of the car must be done by an adult. When unassembled, it contains potentially hazardous parts that are sharp or small. Please keep out of children’s reach. 2. Choking hazards of small parts. 3. Not for children under 36 months. Recommended for 37-95 months. 4.
-
Page 20: Maintenance And Service
MAINTENANCE AND SERVICE 1. Before using, adults are responsible for reviewing the product and es- sential parts are in a functional condition. Check whether screws are loose or other potential hazards. Any damaged or defective parts must be repaired or resolved before using. 2. -
Page 21: Troubleshooting
TROUBLESHOOTING...
Need help?
Do you have a question about the VOLTZ TOYS DG-81919 and is the answer not in the manual?
Questions and answers