Table of Contents
Advertisement
Quick Links
Download this manual
See also:
User Manual
Advertisement
Table of Contents

Related Manuals for Airlinkplus APSUSB201W

Summary of Contents for Airlinkplus APSUSB201W
-
Page 1: Quick Installation Guide
Model # APSUSB201W Quick Installation Guide Ver. 1A... -
Page 2: Setup Preparation
Section 1 Caution: Before beginning the installation, make sure that the printer driver is installed locally on each computer that will print through the print server. Otherwise, the print server will not be configured successfully. Please refer to your printer’s manual for instructions on how to install the printer driver. Before setting up the print server, please take note of your TCP/IP setting. -
Page 3: Connecting The Print Server
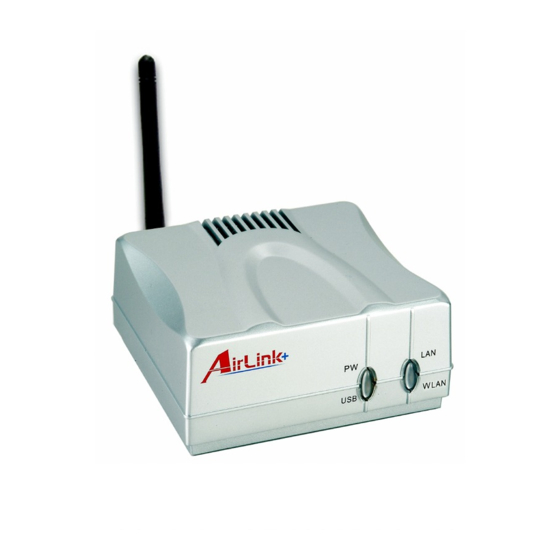
Section 2 Connecting the Print Server Warning: Only a USB printer may be connected to the USB port of the print server. Connecting any other USB device to the print server may damage the print server. Note: It is strongly recommended that you configure the print server through a wired connection first before configuring it for wireless printing. -
Page 4: Installing Software
Section 3 Step 1 Insert the provided CD and wait for the setup menu to appear. Step 2 Click on Install Utility. Note: If the setup menu does not appear automatically after you have inserted the CD, go to Start, Run, type D:\PS Utility\setup.exe (where D is the letter of your CD drive) and click OK. - Page 5 Step 4 Click Next. Step 5 Click Yes. Step 6 Click Finish.
- Page 6 Section 4 Note: If your TCP/IP setting from Section 1 has an IP Address of 192.168.1.x (where x is a number between 2 - 253) AND your Default Gateway is 192.168.1.1, you may skip this section and proceed to Section 5, Verifying Network Connection. If either criteria does not match, please follow the instructions below to configure the network setting of the print server.
- Page 7 Step 4 Refer back to the TCP/IP setting from Section 1. Note the first three sets of numbers from the IP Address you wrote down and enter them into the respective fields. For example: If your computer’s IP Address is 192.168.0.100, enter the same three numbers: 192.168.0 in the corresponding fields.
-
Page 8: Verifying Network Connection
Section 5 Verifying Network Connection Step 1 Click on Start, Run. Step 2 For Windows 95/98/ME type command and click OK. For Windows 2000/XP, type cmd and click OK. Step 3 At the command prompt, type ping and the IP Address of the print server and press Enter. For example, if you have changed the IP Address of the print server to 192.168.0.254, type ping 192.168.0.254 If you kept the factory default IP address, type ping 192.168.1.254... -
Page 9: Running Ps Wizard
Section 6 Running PS Wizard Warning: Make sure you have installed the printer driver locally on every computer in your network before running the PS Wizard. Otherwise, the PS Wizard will not run properly. Be sure to run the PS Wizard on all the computers in your network. - Page 10 Step 3 Click Next. Section 4 Step 4 Select the printer that is connected to the print server and click Next.
- Page 11 Step 5 Double-click on the Print Server Name, select the Printer Port Name, and click Next. Step 6 Click Reboot (for Windows 95/98/ME) or Finish (for Windows 2000/XP). Step 7 Run the PS Wizard on all the computers in your network that will use the print server. You have successfully configured the print server for printing.
-
Page 12: Configuring Wireless Printing
Section 7 Configuring Wireless Printing The following section describes how to setup the print server for wireless printing. It is strongly recommended that you test the print server with a wired connection first before moving on to configure wireless printing. Note: You should use a wired connection to configure the following wireless settings before unplugging the network cable from the print server. - Page 13 Step 4 If you are printing through a wireless router, make sure the Connection Mode is set to Infrastructure. Step 5 Type in the SSID (network name) of your wireless router in the SSID field, or use the drop-down menu directly below the SSID field to choose your wireless router. Note: you can also click on the Site Survey button to view all the available wireless network.
- Page 14 Step 7 Click on Management and go to Wireless. Verify that the Connection Mode is Infrastructure and the Link is Yes. Also verify that the SSID matches the SSID of your wireless router. Note: If the Link does not say Yes, click on the Refresh button until it displays Yes. Also, if you have enabled encryption on your router, you will also need to set the identical encryption settings on the print server.
- Page 15 If you want to print directly to the print server (bypassing the wireless router), follow the steps below. You should use a wired connection to configure the following wireless settings before unplugging the network cable from the print server. Note: Your wireless computer may lose Internet connection if you set it to print directly to the print server.
-
Page 16: Technical Support
Step 6 Manually change the TCP/IP setting of your wireless client to use a static IP address and assign the appropriate IP Address, Subnet Mask, and Default Gateway according to your network. If you do not know how to do this, it is recommended that you do not print directly to the print server, but print through the wireless router instead.
Need help?
Do you have a question about the APSUSB201W and is the answer not in the manual?
Questions and answers