Table of Contents
Advertisement
Quick Links
Advertisement
Table of Contents

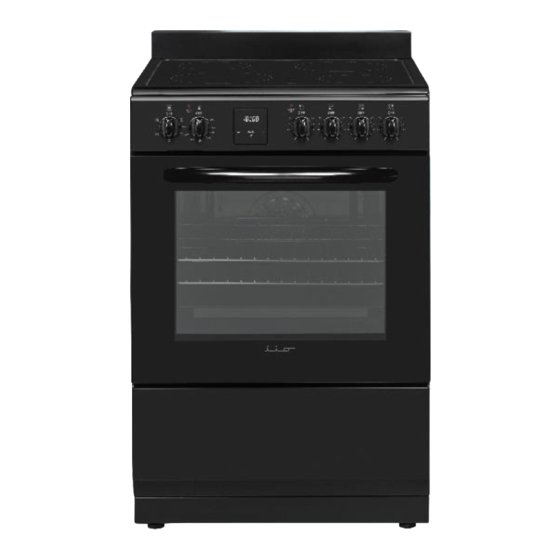
Summary of Contents for iio ER1
- Page 1 (iER-244W/B/SS) Use & Care Instructions...
-
Page 2: Table Of Contents
• Video review must be at least 30 seconds in duration, clearly show the product in use in a natural setting and include insightful product-specific audio commentary. • The photo or video must be of sufficient quality, in the opinion of the iio™ management, that it can be used on our website and in other promotional materials. -
Page 3: Important Safety Notes
IMPORTANT SAFETY NOTES Always read and follow all safety messages. READ ALL INSTRUCTIONS BEFORE USE. Alert Symbol – will display WARNING or CAUTION beside the instruction. Messages with the Alert Symbol will inform you of the potential hazard, provide guidance for reducing the hazard, and inform of the possible outcome if the instruction is not followed. - Page 4 WARNING Children and Use ➢ This appliance is not intended to be used by children under the age of 18. ➢ Children shall not play with the appliance. Do not allow any child to get into, climb the appliance or play with the appliance doors. ➢...
- Page 5 CAUTION: IMPORTANT INFORMATION REGARDING THE USE OF YOUR STOVE ➢ If the appliance has been disassembled, replace all appliance parts and panels before operation. ➢ When heating fat or grease, watch it closely. Grease may catch fire if it becomes too hot. Do not use water or flour on grease fires.
- Page 6 ➢ When you are flaming foods under a ventilating hood, turn on the fan. Do Not Clean or Operate a Broken Cooktop. If cooktop should break, cleaning solutions and spillovers may penetrate the broken cooktop and create a risk of electric shock. Contact a qualified technician immediately. ➢...
-
Page 7: Installation
Prop. 65 Warning for California Residents WARNING: This product may contain chemicals known to the State of California to cause cancer, birth defects, or other reproductive harm. Dispose of properly in accordance with federal and/or local regulations. In case of punctured tubing follow all handling instructions carefully. INSTALLATION WARNING ➢... - Page 8 ➢ Do not remove model/serial number plate. ➢ Cold temperatures can damage the electronic control. When using this appliance for the first time, or when the appliance has not been used for an extended period of time, be sure the appliance has been in temperatures above 32ºF (0ºC) for at least 3 hours before turning on the power to the appliance.
- Page 9 • After removing the packaging material from the appliance and its accessories, ensure that the appliance is not damaged. If you suspect any damage, do not use it, and contact an authorised service person or qualified technician immediately. • Make sure that there are no flammable or combustible materials in the close vicinity, such as curtains, oil, cloth etc.
- Page 10 Prepare The Electrical Connection: • Effective January 1, 1996 the National Electric Code requires that new construction (not existing) utilize a 4-conductor connection to an electric range. When installing an electric range in new construction follow Steps 3 and 5 for 4-wire connection. •...
- Page 11 3-Wire Power Cord Installation WARNING: The neutral or ground wire of the power cord must be connected to the neutral terminal located in the center of the connector block. The power leads must be connected to the outside (brass colored) terminals. •...
- Page 12 WARNING: The neutral wire of the supply circuit is connected to the neutral terminal located in the center of the connector block. The power leads must be connected to the outside (brass colored) terminals. The 4th grounding lead must be connected to the frame of the range with the grounding plate and grounding screw.
- Page 13 Adjusting The Feet • Your product stands on four adjustable feet. For safe operation, it is important that your appliance is correctly balanced. Make sure the appliance is level prior to cooking. To increase the height of the appliance, turn the feet anti-clockwise. To decrease the height of the appliance, turn the feet clockwise.
-
Page 14: Operation
Dimensions and Clearances • Check the dimensions of the appliance and the installation path to ensure there is sufficient room to move the appliance through doors or narrow openings. • The installation location chosen for the appliance should allow space behind the unit for connections and airflow as well as space in front to open the doors. - Page 15 3. If the power supply to the cooktop is disconnected while the residual heat indicator is on, the warning light will flash when the power is reconnected. The display will flash until the residual heat has decreased or until one of the cooking zones is activated. IMPORTANT: When ceramic heaters are operated at higher heat settings, the heating element may be seen switching on and off.
- Page 16 12. If you notice a crack on the cooktop, it must be switched off immediately and replaced by authorized service personnel. Oven Controls 13. Oven program control knob - Turn the knob to the corresponding symbol of the desired cooking function.
- Page 17 Use of the Digital Touch Timer...
- Page 18 Time adjustment 1. The time must be set before you start using the oven. Following a connection to power, the symbol “A” and “00:00” or “12:00” will flash on the display. 2. Press the “MODE” for 2 sec to deactivate keylock and the dot in the middle of the screen will start to flash.
- Page 19 3. Press “MODE” until you see “end” symbol on the display screen. “A” and the current time of day will flash. 4. Use the “+” and “-” buttons to set the desired finishing time. 5. The current time will reappear on the screen, the symbols “A” and manual cooking will remain illuminated.
-
Page 20: Accessories
ACCESSORIES The EasyFix Wire Rack Clean the accessories thoroughly with warm water, detergent, and a soft, clean cloth on first use. • Insert the accessory to the correct position inside the oven. • Allow at least a 1 cm space between the fan cover and accessories. •... - Page 21 The Deep Tray The deep tray is best used for cooking stews. Put the tray into any rack and push it to the end to make sure it is placed correctly. The Backsplash The backsplash is attached to the cooktop with two screws. The Wire Grid The wire grid is best used for grilling or for processing food in oven-friendly containers.
-
Page 22: Cleaning
CLEANING WARNING ➢ Unplug the appliance from the power source before cleaning. ➢ Do not use large amounts of water or liquid when cleaning the appliance as this may affect electrical components and insulating properties of the appliance. ➢ Switch off the appliance and allow it to cool before cleaning is to be carried out. - Page 23 General Cleaning Instructions • Check whether the cleaning materials are appropriate and recommended by the manufacturer before use on your appliance. • Use cream cleaners or liquid cleaners which do not contain particles. Do not use caustic (corrosive) creams, abrasive cleaning powders, rough wire wool or hard tools as they may damage the cooker surfaces.
- Page 24 Cleaning the Enamelled Parts • Clean the enamelled parts of your appliance on a regular basis. • Wipe the enamelled parts with a soft cloth soaked in soapy water. Then, wipe them over again with a wet cloth and dry them. •...
- Page 25 • To replace the inner glass: 1. Push the glass towards and under the location bracket (y), in the direction of B. 2. Place the glass under the location bracket (x) in the direction of C. • If the oven door is a triple glass oven door, the third glass layer can be removed the same way as the second glass layer.
- Page 26 Open the locking catch (a) (with the aid of a screwdriver) up to the end position. Close the door until it almost reaches the fully closed position and remove the door by pulling it towards you. Removal of the Wire Shelf •...
-
Page 27: Maintenance
MAINTENANCE WARNING: The maintenance of this appliance should be carried out by an authorized service person or qualified technician only. WARNING: Switch off the appliance and allow it to cool before working on your appliance. Changing the Oven Lamp • Remove the glass lens, then remove the bulb. •... -
Page 28: Troubleshooting
For other troubleshooting inquiries or for an iio™ authorized repair center please contact us at: 1-833-446-4461 or email us a service@iiokitchen.com. CAUTION: IMPORTANT INSTRUCTIONS FOR SERVICE AND MAINTENANCE... - Page 29 ➢ Do not repair or replace any part of the appliance unless specifically recommended in the manuals. All other servicing should be done only by a qualified technician. This reduces the risk of personal injury and damage to the appliance. ➢...
-
Page 30: Warranty
WARRANTY iio™ warrants this appliance will be free from defects in materials or workmanship for a period of one YEAR from the date of original purchase. THERE ARE NO OTHER WARRANTIES, EXPRESSED OR IMPLIED, INCLUDING BUT NOT LIMITED TO, WARRANTIES OR MERCHANT ABILITY OR FITNESS FOR A PARTICULAR PURPOSE. Proof of purchase/original invoice may be required to claim warranty. -
Page 31: Your Appliance Information
YOUR APPLIANCE INFORMATION To make it easier to request maintenance or warranty service, please record the following information and keep this manual near your appliance. Make: Model: Serial Number: Invoice Number: Date Purchased: Store Name:... - Page 32 We do the utmost to ensure that the provided information is complete and accurate, however, images and specifications are subject to change without notice. Visit www.iiokitchen.com to download the latest version of the user manual. Contact us at: 1-833-446-4461 or info@iiokitchen.com or visit www.iiokitchen.com for more information. ER1 (iER-244) Use and Care Instructions Manual 20230626V1...
Need help?
Do you have a question about the ER1 and is the answer not in the manual?
Questions and answers