
Related Manuals for Medline AEROMIST COMPACT HCS70004ADLT


Summary of Contents for Medline AEROMIST COMPACT HCS70004ADLT
- Page 1 HCS70004ADLT AEROMIST COMPACT ® NEBULIZER COMPRESSOR KIT Instruction Manual By Cindy Yang at 9:41 am, Dec 02, 2021...
- Page 2 By Cindy Yang at 9:41 am, Dec 02, 2021...
-
Page 3: Table Of Contents
TABLE OF CONTENTS IEC Symbols......................4 Important Warnings..................4 Introduction......................5 Specifications....................6 Description......................7 Operation Instructions...................8 Cleaning......................9 Maintenance.....................9 Trouble Shooting Guide................. 1 0 Warranty......................1 1 By Cindy Yang at 9:41 am, Dec 02, 2021... -
Page 4: Iec Symbols
IEC SYMBOLS Caution, Attention or Consult accompanying documents....Type BF Equipment..................Alternating Current..................Double Insulation..................Indoor Use Only.................... IMPORTANT WARNINGS Caution: Federal Law (USA) restricts this device for sale or use on the order of a physician. 2. Follow the instructions of your physician to operate this unit. 3. -
Page 5: Introduction
Warning: To Reduce the risk of burns, electrocution, fire or injury Electrical Shock Hazard - do not remove the cabinet or open the cover. 2. Disconnect the power cord from the electrical outlet before cleaning or servicing. 3. Do not place this equipment near hot, sparking or burning objects 4. -
Page 6: Specifications
SPECIFICATIONS Item HCS70004ADLT Current 120V/60HZ 180 VA Max Power consumption Nebulize Cup #30503 Operation air pressure 9 - 16 Psi (62 - 110 kPa) Max air pressure 35 - 50 Psi (241 - 345 kPa) Operation Air Flow 5.0 - 8.0 Lpm Nebulizer rate ≥... -
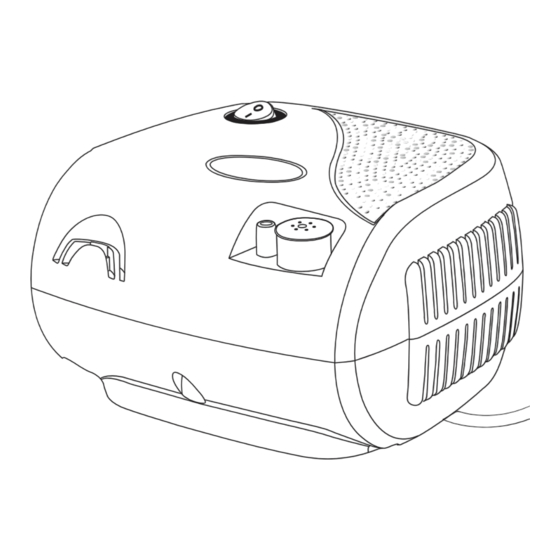
Page 7: Description
DESCRIPTION Power Switch Air Outlet Connector Power Cord Compressor Mouthpiece Filter Cap + reservoir tubing Foam Filters Jet Nebulizer Baffle Tubing Jet Nebulizer Chamber Air Inlet Connector Adult Mask By Cindy Yang at 9:41 am, Dec 02, 2021... -
Page 8: Operation Instructions
OPERATION INSTRUCTIONS Place compressor on a stable, sturdy and flat surface such that the unit can be easily reached when you’re seated. 2. Make sure the compressor is off by pressing the power switch to the “OFF” (O) position. 3. Plug power cord into a wall outlet. 4. -
Page 9: Cleaning
CLEANING Turn the power off and unplug the compressor power cord from the wall outlet. 2. Remove the tubing from the air inlet. 3. TO CLEAN: Disassemble mouthpiece, jet nebulizer cap, chamber and baffle, and wash these items in hot water with dish-washing detergent. Rinse these items thoroughly to remove the detergent and let air dry. -
Page 10: Trouble Shooting Guide
TROUBLE SHOOTING GUIDE If a problem occurs during operation, please check and correct the following points: SYMPTOM POSSIBLE SUGGESTED CAUSE SOLUTIONS When switching it Incorrectly plugged. Check if the unit is on, it does not work. properly connected. The mist does not 1. -
Page 11: Warranty
Check with your dealer for more details. This warranty is limited to the original purchaser of the compressor. Any defective part or assembly will be repaired or replaced, at the sole discretion and determination of Medline Industries, LP, if the unit has been properly operated during the warranty period.
Need help?
Do you have a question about the AEROMIST COMPACT HCS70004ADLT and is the answer not in the manual?
Questions and answers
how do I attach the included hard mask to the nebulizer?
To attach the hard mask to the Medline COMPACT HCS70004ADLT nebulizer:
1. Add the prescribed solution into the jet nebulizer cap.
2. Assemble the jet nebulizer components.
3. Instead of attaching the mouthpiece, connect the bottom of the hard mask to the top of the jet nebulizer cap.
This answer is automatically generated