Table of Contents
Advertisement
Name of Product
Electrical Safety Comprehensive Test System
Models covered in this manual:
AN9640B V3(F): Six- in-One (GB+IR+ACW +LC+PA+ST+DCW);
Meaning of abbreviations
ACW
:
AC Withstand Voltage Test
IR
:
Insulation Resistance Test
GB
:
Ground Resistance Test
LC
:
Touch Current/Leakage Current Test
PA
:
Power Test
ST
:
Low-voltage Start-up Test
DCW
:
DC Withstand Voltage Test
:
1
Advertisement
Table of Contents

Summary of Contents for Ainuo AN9640B
- Page 1 Name of Product Electrical Safety Comprehensive Test System Models covered in this manual: AN9640B V3(F): Six- in-One (GB+IR+ACW +LC+PA+ST+DCW); Meaning of abbreviations AC Withstand Voltage Test Insulation Resistance Test Ground Resistance Test Touch Current/Leakage Current Test Power Test Low-voltage Start-up Test...
- Page 2 AN9640BV3(F)&AN9651BV3(F) &AN9651CV3(F) Comprehensive Safety Performance Analyzer & Comprehensive test system for safety performance User Manual(V1.0)...
- Page 3 Applicable standards and regulations This series of products are manufactured according to the following criteria: GB/T 32192-2015 Withstanding voltage tester SJ/T11385-2008 General specification of insulation resistance tester GB/T 32191-2015 Leakage current tester GB/T 28030-2011 Earth continuity tester This series meets the following verification regulations: JJG843-2007 Verification regulation of leakage current tester JJG795-2016...
-
Page 4: Table Of Contents
Table of Content Table of Content......................4 Chapter 1 Safety Rules....................1 1.1 General..........................1 1.2 Warning Signs........................1 1.3 Testing Station........................2 1.4 Operating Regulation......................2 1.5 Operating Rules........................3 1.5.1 Forbidden.......................3 1.5.2 Precautions during testing................... 3 Chapter2 Overview...................... 4 2.1 Introduction......................... 4 2.1.1AN9640BV3 (F) Comprehensive safety performance analyzer...... - Page 5 4.3.3 FAIL Mode......................28 4.3.4 Starting voltage...................... 28 4.3.5 Display Brightness....................29 4.3.6 Theme........................29 4.3.7 Language.........................29 4.3.8 Communication...................... 29 4.3.9 Display of Result....................29 4.3.10 Date........................30 4.4 Group Selection......................... 30 4.5 Parameters Settings......................30 4.5.1 GB settings......................31 4.5.2 IR Settings.......................32 4.5.3 ACW Settings......................33 4.5.4LC Settings......................
- Page 6 7.3 Attachments........................52 Annex A Test Principle....................54 A.1 Block Diagram....................... 54 A.2 Test Principle......................... 54 Annex B Safety Knowledge..................55 B.1 Importance of safety test....................55 B.2 GB........................... 55 B.3 IR.............................56 B.4 ACW/DCW........................57 B.4.1 Advantages/disadvantages of ACW/DCW............57 B.4.2 Features and classification of ACW..............57 B.4.3 Features of DCW....................58 B.4.4 Difference between arc detection and ACW/DCW.........58 B.5 Definition of Discharge, Arc, Flashover and Breakdown..........59...
-
Page 7: Chapter 1 Safety Rules
Chapter 1 Safety Rules Chapter 1 Safety Rules Guide: General Warning Signs Testing Station Operating Regulation Operating Rules 1.1 General Before operating this analyzer, read this manual carefully, and operate according to this manual. Keep this manual in place convenient for operator to access. ... -
Page 8: Testing Station
Chapter 1 Safety Rules 1.3 Testing Station 1 Position The station must be positioned away from persons other than the operators. Keep the station “High-voltage Testing Station” isolated with other facilities, indicating . Indicate “Danger! Testing ..., Non-operators keep away!” during testing. -
Page 9: Operating Rules
Chapter 1 Safety Rules Operating Rules of this tester is . Observe the The maximum output 5kVAC following during to avoid injury or death provisions test Forbidden 1.5.1 Frequent ON/OFF of the instrument is forbidden. Switch on/off the instrument at interval of 30 seconds or move. -
Page 10: Table Of Content
AN9640BV3(F)series Safety Analyzer is a comprehensive instrument for testing of electrical strength (ACW/DCW), GB, IR, LC, PA, and other functions, an important tester of electrical manufacturers and inspection department. This series of testers are developed by Ainuo with industry-leading technology, automation and performance:... -
Page 11: An9651Bv3(F) Comprehensive Safety Performance Analyzer
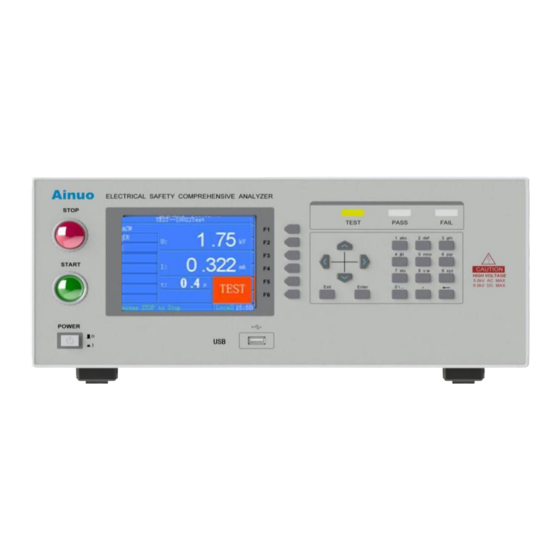
Chapter 2 Overview 2.1.2 AN9651BV3(F) Comprehensive safety performance analyzer AN9651BV3(F) is composed of AN9640BV3 and intelligent variable frequency power supply. 2.1.3 AN9651CV3(F) Comprehensive test system for safety performance AN9651CV3 is composed of AN9640BV3, intelligent variable frequency power supply and system controller. The configuration of the system controller is as follows: System controller (industrial computer and peripherals) IPC: Intel CPU 2.8GHz;... - Page 12 Chapter 2 Overview : STOP: stop current test and return to the parent directory. : START: start current group test. (3) LCD screen: show settings and measurement information, as shown in Figure 2-3-2, including 6 districts. Figure 2-3-2 LCDs Tile: display title of current screen. Main: dispaly settings and test information.
-
Page 13: Rear Panel
Chapter 2 Overview Exit 1. Cancel current input under edit mode. 2. Exit current screen under non-edit mode. Enter 1. Conform current input under edit mode. 2. Move the cursor to the next line under non-edit mode. Figure/Letter Input letter or figure at the cursor position. (6) Status LED: TESTING (yellow), FAIL(red), PASS(green). - Page 14 Chapter 2 Overview N: N terminal of the power input line; DUT POWER: input of DUT power, to connect mains power or inverter power; ②PLC: Support PLC control to start, stop, change the test group and other operations. For definitions of ports, refer to Section 5.3; ③ALARM: to connect alarm LED (three colors).
-
Page 15: An9651Bv3/An9651Cv3 Installation And Connection
Chapter 2 Overview 2.5 AN9651BV3/AN9651CV3 installation and connection 2.5.1 AN9651BV3Assembly wiring The comprehensive test system needs to install the corresponding test fixtures and accessories, and the input power supply can be used normally. Please refer to the steps shown in Figure 2-1 for the installation and connection. - Page 16 Chapter 2 Overview shown in Figure 2-1; Figure 2-5-2 Fixed display (2) According to the actual wiring diagram of the system, connect each instrument according to the specified wire, including the power supply line, communication line and test fixture of each single meter, as shown in Figure 2-5-3, confirm that the power supply is single-phase 220V±10%, 50Hz±5%。...
-
Page 17: Accessory
Chapter 2 Overview Figure 2-5-4 ESRS driver The installation location of some modules of the software in Figure 2-5-4 above is recommended to be installed in a hard disk partition with a large remaining space, because the data generated by the test will be automatically saved in this directory, occupying a large hard disk space, 2-5-4 are some necessary drivers required for the software to run, generally installed in the default directory. - Page 18 Chapter 2 Overview Figure2-6-3 ALARM light 2.6.5 RS232 cable For serial communication. Insert one end of the cable into the interface on the rear panel, and the other end into the serial port of the computer for communication. Figure 2-6-5 RS232 cable...
-
Page 19: Chapter 3 Unpack And Installation
Packing List in the manual. If the items are not consistent with those in the Packing List, please contact Ainuo service center or the dealer. If the package is damaged, check the instrument for any deformation or scratch, or damage to the panel etc. -
Page 20: Check Before Power-On
(3) Start the analyzer for the first time, if there is no display, check and make sure the power line is connected well; during start to test, if the start fails, there is no response after pressing the key, or there is no action sound of relay etc, please contact Ainuo or designated dealer for technical support. - Page 21 Chapter 3 Unpack and Installation Figure 3-2-2 login interface This system supports multiple models of instrumentation equipment. Please select the instrumentation equipment model when logging in. Click the "Options" button to switch between showing or hiding language selection and mode selection options.
- Page 22 Chapter 3 Unpack and Installation By default, he has all permissions, and the permissions can be modified, and the password can be modified. This user belongs to the production staff and can save the data to the database during the test.
-
Page 23: Esrssystem Software Operation Flow
Chapter 3 Unpack and Installation 3.4.2 ESRSSystem software operation flow The operation process of the ESRS system test software is as follows: In control mode: The first step is to enter the "Hardware Configuration" module and configure the tester device parameters you want to control. This step is generally only required once, unless you change the hardware configuration of the device, you need to re-enter the module settings. - Page 24 Chapter 3 Unpack and Installation Figure 3-2-4 System management interface System management is divided into 5 modules: user information management, login log management, test program management, device information viewing, hardware configuration file management, etc. User information includes user name, user password, expiration date, production line personnel, operation authority and remarks of each module of the ESRS system.
-
Page 25: Hardware Configuration
Chapter 3 Unpack and Installation The hardware configuration file information records the system hardware configuration file name, remarks, etc.; the hardware configuration file management mainly implements operations such as deleting the configuration file. 3.4.4 Hardware Configuration Select the device management option in the main interface of the ESRS system software, and the device management interface shown in Figure 3-2-5 will be displayed. - Page 26 Chapter 3 Unpack and Installation Figure 3-2-6 Program editing window At this time, the user will be asked whether they want to create a new test process or open an existing test process. If you choose to create a new test process, a dialog box will appear, as shown in Figure 3-2-6.
-
Page 27: Product Testing
Chapter 3 Unpack and Installation Figure 3-2-8 Open the interface After creating or modifying a test process, save the test process file and publish it. Note that if you modify a test program, it is best to rename it after modification, otherwise it may affect the generation of the report. -
Page 28: Report Generation
Chapter 3 Unpack and Installation Figure 3-2-9 Control mode 3.4.7 Report generation In the main interface of the system software, select report generation as shown in Figure 3-2-10, select the date and filter method, and then click the "Find" button. All test serial numbers that meet the query conditions will be displayed in the display area. -
Page 29: Chapter 4 Settings And Test
Chapter 4 Settings and Test Chapter 4 Settings and Test Guide: Wiring connection Power on Settings System Settings Group Selection Settings Parameters Start to test Extended Function Calibration Shutdown Precautions before starting the comprehensive measurement system The comprehensive test system includes AN9651BV3 and AN9651CV3. - Page 30 5.0kV AC MAX 6.0kV DC MAX MAX 10A MAX 16A Ainuo TESTING FIXTURE-16A Figure 4-1-1 (1) 9640BV3 connection test box and ground test clamp schematic 1) Connect the four wires on the test box as shown, and lock the terminals.
-
Page 31: Connect Input Power Of The Instrument
Chapter 4 Settings and Test comprehensive measurement system, according to the markings on the wire, one-to-one correspondence, connect and fasten the terminals (A1, A2, A4, A6); 2) After passing the two wires on the grounding test pliers through the wire hole at the rear of the comprehensive measurement system, according to the markings on the wire, one-to-one correspondence, connect and fasten the terminals (A3, A5);... -
Page 32: Power On
REFER SERVICING TO QUALIFIED PERSONNEL 5.0kV AC MAX 6.0kV DC MAX MAX 10A MAX 16A Ainuo TESTING FIXTURE-16A Figure 4-1-4 DUT wire connection Note: Connect DUT with the test box and the GB clamp. 4.2 Power On After finish wiring connections, turn on the power switch on the front panel to start the instrument. -
Page 33: System Settings
Chapter 4 Settings and Test F menu Function & Description Start Test Enter into test standby page Group Selection Enter into Group selection module to select and call the group Parameters Settings Enter into Parameters setting module to set the current selected group System Settings Enter into System setting module to set system parameters Extended Function... -
Page 34: Fail Mode
Chapter 4 Settings and Test password screen will pop up, to prevent unauthorized change to the settings of the instument. Figure 4-3-2 Password screen 2) Password range: 0000~9999. the factory default password: OFF. 4.3.3 FAIL Mode Including two types: Stop and Continue: Type Description Stop... -
Page 35: Display Brightness
Chapter 4 Settings and Test t3: test period. t4: Ramp Down. t5: Fast-dropping, time is 0.2s maximum, mainly used to discharge. If the test is judged as fail before stage t4, there is no Ramp Down stage. U2 is test voltage. U1 is output starting voltage (U2*XX% ). 4.3.5 Display Brightness Backlight Brightness of LCD screen, including 8 steps. -
Page 36: Date
Chapter 4 Settings and Test Figure 4-3-5 List the test results after completing the test 4.3.10 Date To set the date/time of the instrument. 4.4 Group Selection Provide 100 built-in groups to edit and recall the settings. Press to move the cursor and select the group to ediy. Press the F menu button Re-name and Load to edit and recall the settings. -
Page 37: Settings
Chapter 4 Settings and Test Figure 4-5-1 Group Settings Remarks: if password function is set to ON, it will prompt the password screen first. Enter the correct password before enter into the settings screen. To revise the current test items, move the cursor to the test item at left first. Press the corresponding key ACW/DCW, GB, IR, Wait, Delete to revise or delete current test items. -
Page 38: Ir Settings
Chapter 4 Settings and Test Resistance/voltage Set according to current. Output Ground resistance/voltage alarm lower limit lower limit voltage shall not exceed Test time (0.5~999.9) s/continuous test Test time of current step Output frequency 50Hz/60Hz Ground current output frequency Compensation test ON/OFF Include compensation value or not Test mode... -
Page 39: Acw Settings
Chapter 4 Settings and Test 4.5.3 ACW Settings Figure 4-5-4 ACW Settings ACW Parameters: Item Range Description Output Voltage (100~5000)V ACW Output voltage Current Upper Limit (0~100.00) mA Breakdown current alarm upper limit Current Lower Limit (0~9.999) mA Breakdown current alarm lower limit Test Time (0.5~999.9)s/continuous Test time of current step Ramp Time... -
Page 40: 4Lc Settings
Chapter 4 Settings and Test 4.5.4 DCW Settings Figure 4-5-5 DCW Settings DCW Parameters: Item Range Description Output voltage (100~6000) V DCW Output voltage Current upper limit (0~10000) uA Breakdown current alarm upper limit Current lower limit (0~999.9)uA Breakdown current alarm lower limit Test time (0.5~999.9)s/continuous Test time of current step Ramp time... -
Page 41: Pa Settings
Chapter 4 Settings and Test Output Voltage (80.0~300.0)V Output voltage for LC Current Upper Limit Rms 0.0μA~12.00mA Touch current upper limit Current Lower Limit As above Touch current lower limit Test Time (0.5~999.9)s, 0= continuous test Test time of current step Test Frequency 50Hz/60Hz Output Frequency... -
Page 42: St Settings
Chapter 4 Settings and Test 4.5.7ST Settings Figure 4-5-8 ST Parameters for ST: Item Range Description Test Voltage (0~300)V Test voltage for ST Current Upper Limit (0.00~25.00 Current alarm upper limit Current Lower Limit (0.00~25.00 Current alarm lower limit Test Time (0.00~999.9)s Test time of current step Test Frequency... -
Page 43: Start To Test
Chapter 4 Settings and Test Figure 4-5-10Parameters setting screen after delete the test step 4.6 Start to test Figure 4-6-1 Test waiting screen It will return to the Selection of Function screen after completing all the settings. Press F Menu START Test to enter into Test wiating module. - Page 44 Chapter 4 Settings and Test Figure 4-6-2 Testing process Now, TEST lamp turn to yellow on the front panel, and ALARM light port gives TESTING signal. 2) Test Pass, as shown in Figure 4-6-3. Figure 4-6-3 All test items pass If all test items pass, PASS led turn to green on the front panel, and ALARM light port gives PASS signal.
-
Page 45: Compensation
Chapter 4 Settings and Test Figure 4-6-5 Test abnormal If test failed or abnormal, alarm LED turn to red on the front panel. The buzzer gives three sounds, and ALARM light port gives FAIL signal. 1) Abnormal protection will occur in the following cases: a. -
Page 46: Extended Function
Chapter 4 Settings and Test Single step In Parameters Settings screen, move the cursor to the compensation compensation Enalbe/Disenable position. Set compensation test to ON, and then press START button. The analyzer will get the compensation value automatically and display the result on the screen. Group In Waiting Test screen, press F menu Compensation key to finish wire compensation... -
Page 47: Plc
The pin definition of PLC is described in section 5.3. 4.8 Calibration User can’t perform calibration of the instrument without the professional instruments, please contact Ainuo for the calibration. 4.9 Shutdown Shut down the analyzer as the following steps: Press STOP to stop testing and return to “Function Selection” screen. -
Page 48: Chapter 5 Interface
Chapter 5 Interface Chapter 5 Interface Guide: ALARM REMOTE PLC BAR CODE INPUT COM U DISK EXT-COM SIGNAL INPUT/SIGNAL OUTPUT ALARM Active signal output, using 5P aero socket (male), as shown in Figure 5-1-1. Figure 5-1-1 ALARM socket (male) Definition of pins: 1 - 4 ON: TEST... -
Page 49: Remote
Chapter 5 Interface 5.2 REMOTE Active signal input interface, 3P aero socket (male), as shown in Figure 5-2-1. Figure 5-2-1 REMOTE (male) Definition of pins: 1 - 2 ON: STOP 1 - 3 ON: START 1: Common (Low end, GND) The optional attachment is the remote control box. -
Page 50: Bar Code Input
PLC). Never connect other voltage or current supply. Other power supply will cause damage or malfunction of control circuits in the analyzer. 5.4 BAR CODE INPUT Use DB9 socket (male), matching Ainuo barcode scanner, asshown in Figure 5-4-1. Figure 5-4-1 COM (male) Pins of RS232 port (same for A and B) -
Page 51: Com
Chapter 5 Interface 5.5 COM This analyzer uses RS232 port (Optional RS485). The PC is connected with this port for control of this analyzer. A 9-pin D-sub connector (male) is used with signal definition as shown in Figure 5-5-1(a) and (b); (a) Definition of RS232 port (b) Definition of RS485 port Figure 5-5-1 Definition of COM port... -
Page 52: Signal Input/Signal Output
Chapter 5 Interface 3: TXD, send data 5: GND, ground 5.8 SIGNAL INPUT/SIGNAL OUTPUT Use a 6-Pin European terminal, external adjustment device to select the group, up to 7 adjustable groups. The user can input PM0, PM1 and PM2 three digit codes to choose any one of the 8 groups. -
Page 53: Chapter 6 Maintenance
6.1.1 Regular Maintenance This analyzer can output voltage of 5kVAC. Calibration by users is dangerous. For any necessary calibration, please contact Ainuo service center. ◆ For long time storage of analyzer, power on every month lasting for at least 30 Min. -
Page 54: Storage And Transport
Chapter 6 Maintenance LCD no display after Start. Check and make sure the power line is connected relaibly. Abnormal protection during Check ACW/DCW /IR lines for short circuit and correct. ACW/DCW/IR. Abnormal protection during GB. Check GB line for open circuit and correct. Analyzer crashed. -
Page 55: Chapter 7 Specifications
Chapter 7 Specifications Chapter 7 Specifications Guide: Specification Performance Port Attachment 7.1 Specification Table 7.1 Specification AN9640BV3 AN9651BV3 AN9651CV3 Installation position Indoor, altitude less than 2000 m Operating Temp. 0~40℃ environment Humidity 40℃, (20~90)%RH Storage Temp. (-10~50)℃... - Page 56 Chapter 7 Specifications Duration Range: 0, (0.5 ~999.9) s. Resolution: 0.1s. Accuracy: ± (0.1%× setting +2word) Arc Detection 1 ~9 (9: most sensitive); 0: arc detection disenable Current compensation 0.000~100.00mA, total current + compensation current <100mA, Auto/Manual Rated output 6kVDC / 10mA DC voltage output Range: (100 ~ 6000) VDC.
- Page 57 Chapter 7 Specifications Rated output Max. test current: 32A, Max.resistance: 600mΩ. Open voltage: less than 12V Output current Range: (2.0~32.0) A ac. Resolution: 0.1A. Accuracy: ± (1%× setting +2 words) Current ripple ≤0.4%× setting/Min. Range: (3.0~10.0) Vac. Resolution: 0.1V. Accuracy: ± (1%× setting +2 words), Output Voltage open circuit 50Hz/60Hz.
-
Page 58: Attachments
Chapter 7 Specifications 0.0μA~999.9μA: DC, 15Hz≤f≤100kHz: ± (1.5%× reading +10 words) 100kHz<f≤1000kHz, 10.0μA~999.9μA: ±5%× reading Touch/leakagecurrent 1000μA~7999μA: DC, 15Hz≤f≤100kHz: ± (1.5%× reading +10 words) measurement (rms) 100kHz<f≤1000kHz, 10μA~7999μA: ±5%× reading 8.00mA~12.00mA: DC: ± (1.5%× reading +10 words) 15Hz≤f<1000kHz, 0.01mA~12.00mA: ±5%× reading LC Compensation Range: 0.000~1.000mA, Auto measurement, On or Off. - Page 59 Chapter 7 Specifications Name of attachment Spec. Standard or not Camp, red 60A, 1.5m, red √ Camp, black 60A, 1.5m, black × Test box 10A+16A socket, 1.5m cable √ High-voltage test line Test clamp+1.5m cable × PROBE 1.5m/3m/5m/10m cable optional ×...
-
Page 60: Annex A Test Principle
Annex A Test Principle Annex A Test Principle Guide: Block Diagram Test Principle A.1 Block Diagram Figure A-1-1 Block Diagram A.2 Test Principle This AN9640BF(V3) series analyzer adopts DSP microprocessor for control, completing A/D convertion, output control, data process and management of display, key and serial communication etc. -
Page 61: Annex B Safety Knowledge
Annex B Safety Knowledge Annex B Safety Knowledge Guide: Importance of safety test GB IR ACW/DCW Arc test Charge current test LC PA and ST Importance of safety test With the advancement of society, human needs constantly increase, paying more attention to safety, including electrical safety, traffic safety, food safety and environmental safety etc. - Page 62 Annex B Safety Knowledge ground on-resistance of the apparatus can pass the test in such harsh environment, this appliance should be safe under normal conditions. Although the ground resistance can be measured using general resistance meters, the current output from the resistance meter is usually very small and do not meet safety specifications.
-
Page 63: Acw/Dcw
Annex B Safety Knowledge (2) Pinhole in the insulator; (3) Distance between parts is not enough; (4) Insulation is crushed and broken: The above cases can only be detected by ACW/DCW. B.4 ACW/DCW The ACW/DCW is adopted to test the ability to withstand of low-voltage electrical equipment, insulation materials and the insulation structure. -
Page 64: Features Of Dcw
Annex B Safety Knowledge In general, safety regulations will prefer ACW than DCW, for most products use AC power supply. The ACW can simultaneously test the positive and negative polarity of the product, consistent with the actual operating environment. Because the discrete capacity cannot be fully charged during ACW, but there will not be instant impact current, and it is unnecessary to keep the voltage rising slowly. -
Page 65: Definition Of Discharge, Arc, Flashover And Breakdown
Annex B Safety Knowledge The arc is actually a gas discharge phenomenon, the spark generated as the current flowing through some insulating medium (e.g., air) with wave as shown in B-4-1. The part circled in red in Figure B-4-1 (c) is several arc current waves. Factors affecting the arc include voltage, distance, current, material contamination level and so on. -
Page 66: Arc
Annex B Safety Knowledge B.5.2 Arc Self-maintained gas conduction, the majority of carriers are electrons generated by the primary electron emission (GB/T 2900.1-2008). B.5.3 EDM Small short arc luminance. (GB/T 2900.1-2008) B.5.4 Discharge Start from the electron avalanche, the second process for complementary, continuous motion of carriers through the original insulating medium. -
Page 67: Charge Current Test
Annex B Safety Knowledge conductor is far away from other conductors, producing strong diverging electric field, so local discharge will occur that the point. Usually accompanied by light-emitting and noise. (GB/T 2900.5-2002) B.6 Charge current test a) Definition The charge current means the Max. peak current obtained during voltage output process of the analyzer. -
Page 68: Type Of Lc
Annex B Safety Knowledge leakage and Line leakage are common test terms. In fact, it can be divided into three types of tests: Earth Leakage Current, Enclosure Leakage Current and Applied Part Leakage. The main difference is that the measurement locations of the test rod (clamp) are different. Earth Leakage Current means the leakage current flowing back to the earth through the earth line. - Page 69 Annex B Safety Knowledge Figure B-7-1 First step of Static LC Figure B-7-2 Second step of Static LC Where: If the duration is set to n Sec., the duration for the first step and the second step is n/2 Sec.; In the first step, measure for n/2 Sec., and the current measurement is I1;...
-
Page 70: Simulated Leakage Body Network
Annex B Safety Knowledge Figure B-7-3 First step of Dynamic LC Figure B-7-4 Second step of Dynamic LC Where: If the duration is set to n Sec., the duration for the first step and the second step is n/2 Sec.; In the first step, measure for n/2 Sec., and the current measurement is I1;... -
Page 71: Pa And St
Annex B Safety Knowledge Where: The network is from GB/T12113-2003 Figure 4; Non- inductance resistance accuracy: 0.1%, capacitance accuracy: 1%; Leakage current I = U2/500R, U2 is rms; Frequency response range: DC ~ 10kHz ~ 1MHz. B.8 PA and ST B.8.1 PA 1 Purpose If the DUT has a rated input power, under normal operating temperature, the deviation... - Page 72 Annex B Safety Knowledge will be a risk. For example, if the motor cannot start normally which leads to stall will cause too large input current, causing a fire etc. To avoid accidents, and ensure safety of the environment and the instrument, ST is required. 2 ST conditions Under normal operating voltage, the motor should be able to start.
-
Page 73: Annex C Protocol
Annex C Protocol Annex C Protocol Guide: 1) Handshake protocol Ports Protocol Caution! For communication between the analyzer and PC, be sure to guarantee: 1. The RS232/485 address setting is consistent with those of PC! 2. The RS232/485 baud rate setting is consistent with those of PC! 3. -
Page 74: Protocol
Annex C Protocol C.3 Protocol 3.1 Protocol format The protocol adopts ascii code in transmission. The command strings are not case insensitive. The end bits of strings received by the instrument are 0x0A (\n) or 0x0D0x0A (\r \n), and the end bits of strings returned by the instrument are 0x0A (\n). transmit:... -
Page 75: Error Return List
Annex C Protocol Null End the settings and save the file DELI-LAST Null Delete the last step DELI-ALL Null Remove all steps SET-ACW Detailed follow-up Add a step at the end,ACW SET-DCW Detailed follow-up Add a step at the end,DCW SET-IR Detailed follow-up Add a step at the end,IR... -
Page 76: Detailed Agreement
Annex C Protocol Settings: Set a file flow as follows: 1) In the main interface, send ENTER-SET to enter the parameter setting page 2) FN name Starts a file 3) Add item by item, up to 8 steps 4) FS end of the set, save the file 3.5Detailed agreement Query all test data Return: Command word + space + parameter + end character... - Page 77 Annex C Protocol Return DCW, 1.50kV, 0.0uA, OK ,; 1) FN name: create a file. “name” is the file name, up to 30 characters. This file is saved directly in the file location of the current call. 2) Add test items (total 8): SET-ACW, SET-DCW, SET-IR, SET-GB, SET-TCT, SET-PW, SET-ST, SET-WAIT.
- Page 78 Annex C Protocol 11)Compensation value, A Compensation value, B Example:SET-ACW 1500,3.50,0,1.0, Or:SET-ACW 1500,3.50,0,1.0,1,0.1,0,0,0,0,0,0, SET-DCW 1) Output Voltage,100~6000V,2100V 2) Current Upper Limit,0~10000uA,5000uA 3) Current Lower Limi,0.0~999.9uA,0uA 4) Test Time,0.5~999.9s(0=LLLL) ,1.0s 5) Three-channel scanning option, 0 \ 1 \ 2,0 represents input to output, 1 represents input to ground, 2 represents output to ground 6)...
- Page 79 Annex C Protocol 2) Resistance Upper Limit , 0.1~600.0mΩ ( 2.0~10.6A ) /0.1~R mΩ (10.7~32.0A,R=6400/ current setting) ,100mΩ Voltage Upper Limit 0~6.40V 3) Resistance Lower Limit , 0.0~600.0mΩ ( 2.0~10.6A ) /0.0~R mΩ (10.7~32.0A,R=6400/ current setting) ,0mΩ Voltage Lower Limit 0~6.40V 4)...
- Page 80 Annex C Protocol 3) Power Lower Limit,0.0~6000.0W, 0W 4) Test Time,0.5~999.9s(0=LLLL) ,1.0s 5) Test Frequency,45.00~65.00Hz,50.00Hz Example:SET-PW 220.0,500.0,0,1.0, Or:SET-PW 220.0,500.0,0,1.0,50.00, SET-ST 1) Test Voltage,0~300V, 195V 2) Current Upper Limit,0.00~25.00A,20.00A 3) Current Lower Limi,0.00~25.00A,0A 4) Test Time,0.5~999.9s(0=LLLL) ,1.0s 5) Test Frequency,45~65Hz,50Hz Example:SET-ST 195,20.00,0,1.0, Or:SET-PW 195,20.00,0,1.0,50, WAIT SET-WAIT...
-
Page 81: Annex D Key Components
Annex D Key Components Annex D Key Components The key components of the product are shown in the following table Key Components Spec. & Model Manufacturer Mainboard AN9640BV3(F) control board Ainuo High-voltage relay LRL-101PCZ-10KV-M TOWARD Version:V1.2 Oct. 2020...
Need help?
Do you have a question about the AN9640B and is the answer not in the manual?
Questions and answers