Table of Contents
Advertisement
Quick Links
Advertisement
Table of Contents

Summary of Contents for KEFEYA Q2
- Page 1 KEFEYA Q2 USER GUIDE KEFEYA PORTABLE LAPTOP WORKSTATION Tips: 1. Make sure all connected cables are firmly plugged into before use. 2.The continuous power required by the product is 10w. Please make sure the laptop's USB-C or USB-A port can support 10W (5V/2A).
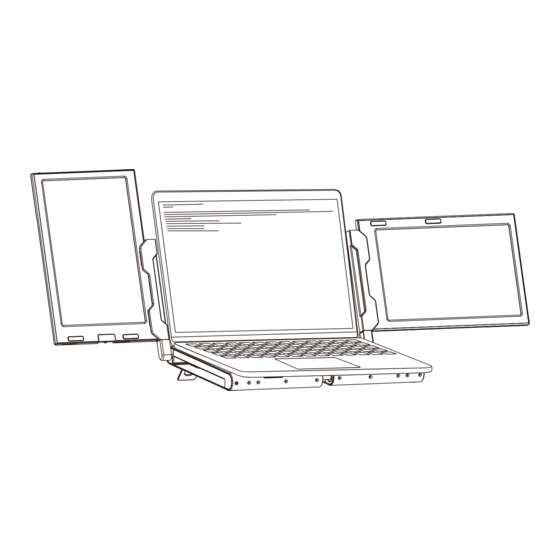
- Page 3 It can solve the problem of insufficient or small screens on the original device. The Q2 product adopts a case structure that doubles as a support stand for computers, helping with heat dissipation. The product support pole can rotate 360 degrees vertically and horizontally, allowing users to adjust to the appropriate angle based on actual needs.
-
Page 4: Table Of Contents
Contents About Your Monitor 1.Product Overview 2.Product Accessories 3.Product Specifications Installation and Storage 1.Installation 2.Dual screen set up with computer 3.Storage Connection 1.One Cable Connection 2.Connecting to an External Power Source Audio Settings 1.Change sound settings of Windows 10 / Windows 11 2.Change sound settings of MAC OS PC Display Mode 1.Windows 10 / Windows 11 Display Settings and Configuration... -
Page 5: Product Overview
Product Overview TYPE-C HDMI TYPE-C TYPE-C HDMI TYPE-C Multi-function Button Multi-function Button Red light when charging; Blue light when connected Menu/Selection/Confirmation Button Press and hold for 2 seconds to return. Press and hold for 3 seconds to shut down Toggle down "Minus” / Backlight Adjustment Button Toggle down to increase, and toggel up to decrease. -
Page 6: Installation
Installation Step 1 Supports 360° rotation in horizontal/vertical direction Erect the support bar Remove the left and right screens in order Note: To remove or store the screen, you need to erect the support pole and bracket to 90 degrees. Stretch the frame Step 2 Horizontal Screen Installation... -
Page 7: Dual Screen Set Up With Computer
Dual Screen Set up With Computer Kickstand small bracket small bracket Kickstand Detached Mode Landscape Display Portrait Display Portrait & Landscape Mode... -
Page 8: Storage
Storage 1.Restore the workbench to its initial state by shrinking the frame. 2.Put the screen back to the inner storage box. 3.Put down the support bar horizontally. Note: Be sure to restore the monitor in order to avoid damaging the device. -
Page 9: Connection
Connection One Cable Connection Laptops and mobile phones equipped with a full-featured TYPE-C port can be connected with a single cable. Connecting to an External Power Source Connect the monitor's Type-C port to an external power source. Desktop Computer Laptop Mobile Phone Switch... -
Page 10: Audio Settings
1.3 Left click "turn on sound settings" and pop-up the box as provided,Here users can set about sound; Here, users can adjust the sound settings: 1. Master volume; 2. Select output device: ( Q2 / Speaker ); 3. Device attributes. Sound... -
Page 11: Change Sound Settings Of Mac Os Pc
Audio Settings 2. Change sound settings of MAC OS PC 2.1. Choose Apple menu > System Settings 2.2. Click "Output", then select the desired device from the list of available sound output options. output devices:( Q2 / Speaker ) -
Page 12: Display Mode
Display Mode Windows 10 / Windows 11 Display Settings 1.Right-click a blank area of the desktop. Select 'Display Settings' from the pop-up dialogue box. Left-click "Display Settings" to open the settings dialogue box, as shown. 2.Under the "Rearrange your displays" section, drag and drop each display to rearrange it according to its physical layout on your desktop. -
Page 13: Macos 13 Ventura Display Settings And Configuration
Display Mode MacOS 13 Ventura Display Settings 1.1 Enter the “System Preferences” menu 1.2 Configure your monitor In this menu, you can set the resolution and mirror/expand the display you want. 1.3 Arrange Displays To rearrange displays, drag them to the desired position. To mirror displays, hold Option key while dragging them on top of each other. -
Page 14: Transportation, Storage And Safety Information
Transportation, Storage and Safety Information In order to ensure the normal use of this product and prevent accidents such as electric shock or fire, please read and understand all usage requirements and operating procedures before use. Please strictly abide by the following requirements. 1. - Page 16 Contact Us For any support you need, feel free to contact us via email at customer_service@kefeya.com (US) kefeya_service@outlook.com (EU) We are here to help and will do our best to respond within 24 hours.