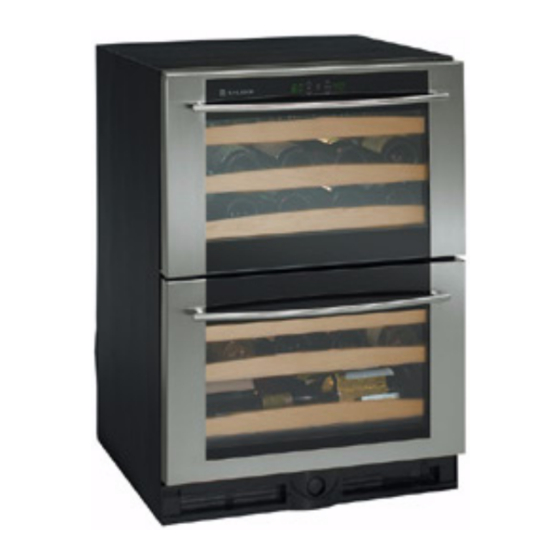
U-Line Wine Captain 2075DWRWC Installation Manual
Echelon series
Hide thumbs
Also See for Wine Captain 2075DWRWC:
- Specifications (2 pages) ,
- Service and parts manual supplement (76 pages) ,
- User manual (48 pages)
Table of Contents
Advertisement
Quick Links
Download this manual
See also:
User Manual
Advertisement
Table of Contents
Troubleshooting

Related Manuals for U-Line Wine Captain 2075DWRWC


Summary of Contents for U-Line Wine Captain 2075DWRWC
- Page 1 ™ Installation Guide 2075DWRWC — ® Drawer Model Wine Captain www.U-LineService.com Phone (414) 354-0300 • FAX (414) 354-7905 Service & Parts Tech Lines Phone (800) 779-2547 • FAX (414) 354-5696 OnlineService@U-Line.com ©2005 U-Line Corporation 02/2005...
-
Page 2: Table Of Contents
Installation Tip ....... . 11 Installation of the 2075DWRWC ....12 Anti-Tip Kit Installation . -
Page 3: Inspect And Plan
02/2005 2075DWRWC — Drawer Model Wine Captain 2 Inspect and Plan You have received a carton containing your 2075DWRWC Drawer Model Wine Captain containing a User Manual, a Product Registration Card and Anti-Tip Kit. Complete and mail the Product Registration Card or register online at www.U-LineService.com. -
Page 4: Exterior Cleaning
® 3 Prepare Site Your U-Line product has been designed for built-in installation. Your unit does not require additional air space for top, sides or rear. However, the front grille must NOT be obstructed and clearance is required for electrical connection in the rear. -
Page 5: Product Dimensions
(see Figure 19 on Page 11). 02/2005 2075DWRWC — Drawer Model Wine Captain Clearances Information The unit must be installed in a wall or under a counter- top to allow for the installation of the Anti-Tip Kit (see Page 12). -
Page 6: Other Site Requirements
2075DWRWC — Drawer Model Wine Captain The drawer unit can be installed with an appliance or fixture located in front of it, as long as there is adequate clearance for the drawer to be opened and removed when servicing (see Figure 4). -
Page 7: Adding A Final Finish Coat To Wood Trim
6. Apply a thin coat of Minwax Polycrylic, following container label for directions. Allow to dry 24 hours. 02/2005 2075DWRWC — Drawer Model Wine Captain 7. Lightly sand, tack and reapply 2 times, if desired. 8. Allow the final coat to dry for 24 hours. -
Page 8: Checking Drawer Alignment
2075DWRWC — Drawer Model Wine Captain 5 Adjust Drawers Checking Drawer Alignment The unit’s drawers are aligned at the factory before shipment. However, their alignment could have been disturbed during shipment. Aligned Front-to-Back Aligned Top-to-Bottom Figure 6 See Figure 6. Check each drawer to confirm that it is aligned: •... - Page 9 Figure 11 02/2005 2075DWRWC — Drawer Model Wine Captain Minor Adjustment: Note: The mounting holes on the slide are slightly Loosen larger than the screws’ Mounting Screws diameter.
- Page 10 2075DWRWC — Drawer Model Wine Captain Top-to-Bottom (and Left-to-Right) Adjustment Not Aligned Top-to-Bottom Not Aligned Left-to-Right Top View of Unit Front View of Unit Figure 14 See Figure 14. The drawer will need a Top-to-Bottom Adjustment if, when viewed from the front, the drawer is not level horizontally.
-
Page 11: Electrical Specifications
• Never use an extension cord to connect power to the unit. Go on to 7 Level the Unit. 02/2005 2075DWRWC — Drawer Model Wine Captain 7 Level the Unit Leveling Information Note: It is recommended that the unit is level. -
Page 12: Installation Of The 2075Dwrwc
2075DWRWC — Drawer Model Wine Captain 8 Install the Unit Installation of the 2075DWRWC 1. Plug in the power cord. 2. Gently push the unit into position. Be careful not to entangle the electrical cord. 3. Re-check the leveling, from front to back and side to side. -
Page 13: Installation Troubleshooting
8". If it is not, re-check leveling from front to back of the unit and readjust if necessary. 02/2005 2075DWRWC — Drawer Model Wine Captain 9 Start-Up for the First Time Initial Start-Up Once installation and leveling is complete, the unit is ready for initial start-up and operation. -
Page 14: Start-Up Troubleshooting
2075DWRWC — Drawer Model Wine Captain To display actual temperature of each drawer, press the “ ” and “ ” touch sensors simultaneously for three seconds. The display indicates the actual temperature. After approximately 10 seconds, the set point temperature displays. -
Page 15: Service Information
For more than four decades, U-Line has distinguished itself as the leader in built-in undercounter ice making, refrigeration and wine storage appliances. U-Line Corporation, located in Milwaukee, WI, is a family operated manufacturer of built-in undercounter icemakers, Combo ®...